1. Create an Agent from a Template
On this page, you will use the “Deep researcher” quickstart template to create a web research agent. Just by picking a template, you can experience the full flow from creating an agent to running it in a session.
Once complete, you can simply send a question in the chat, and the agent will break it down into sub-questions, search the web, and respond with a report that includes citations.
You will create the following three components.
| Component | Role |
|---|---|
| Agent | The research agent itself, which performs multi-step web research and cites its sources |
| Environment | The execution environment, with network access allowed for web search |
| Session | The execution unit that combines the agent and environment and runs them |
1. Create an Agent from a Template
Section titled “1. Create an Agent from a Template”-
Select “Quickstart” from the “Managed Agents” menu.
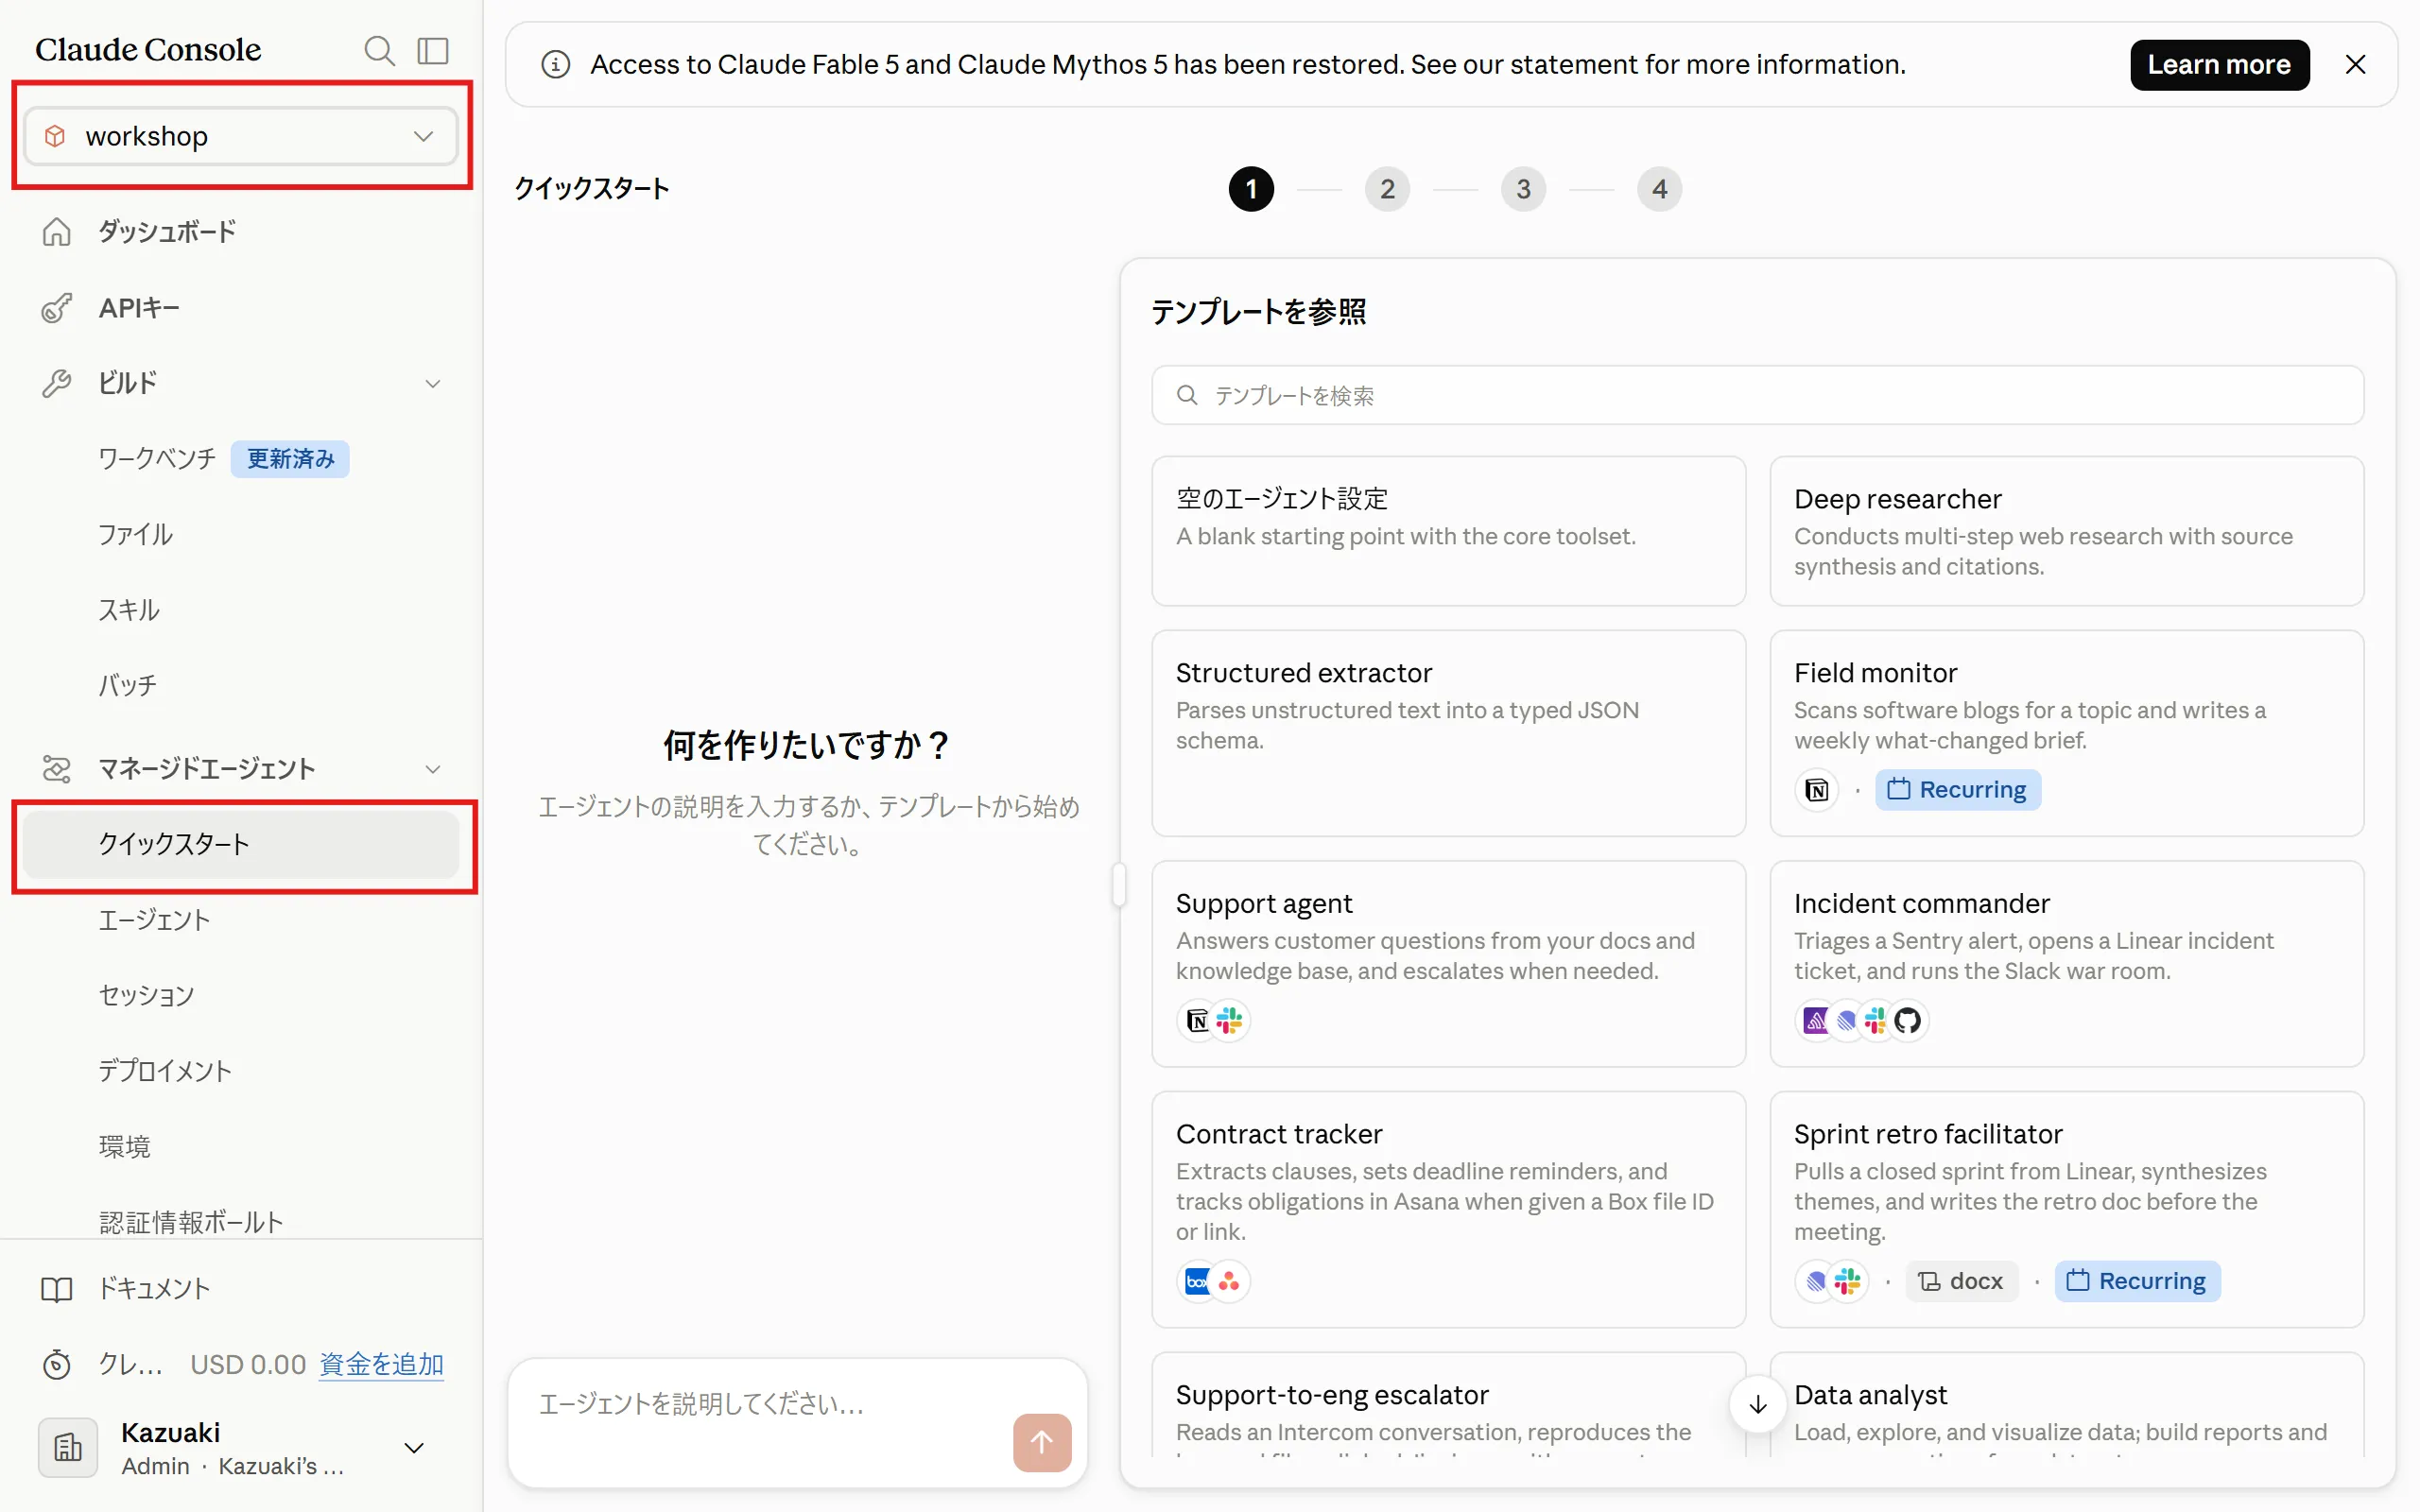
Make sure the workspace is set to “workshop”.
-
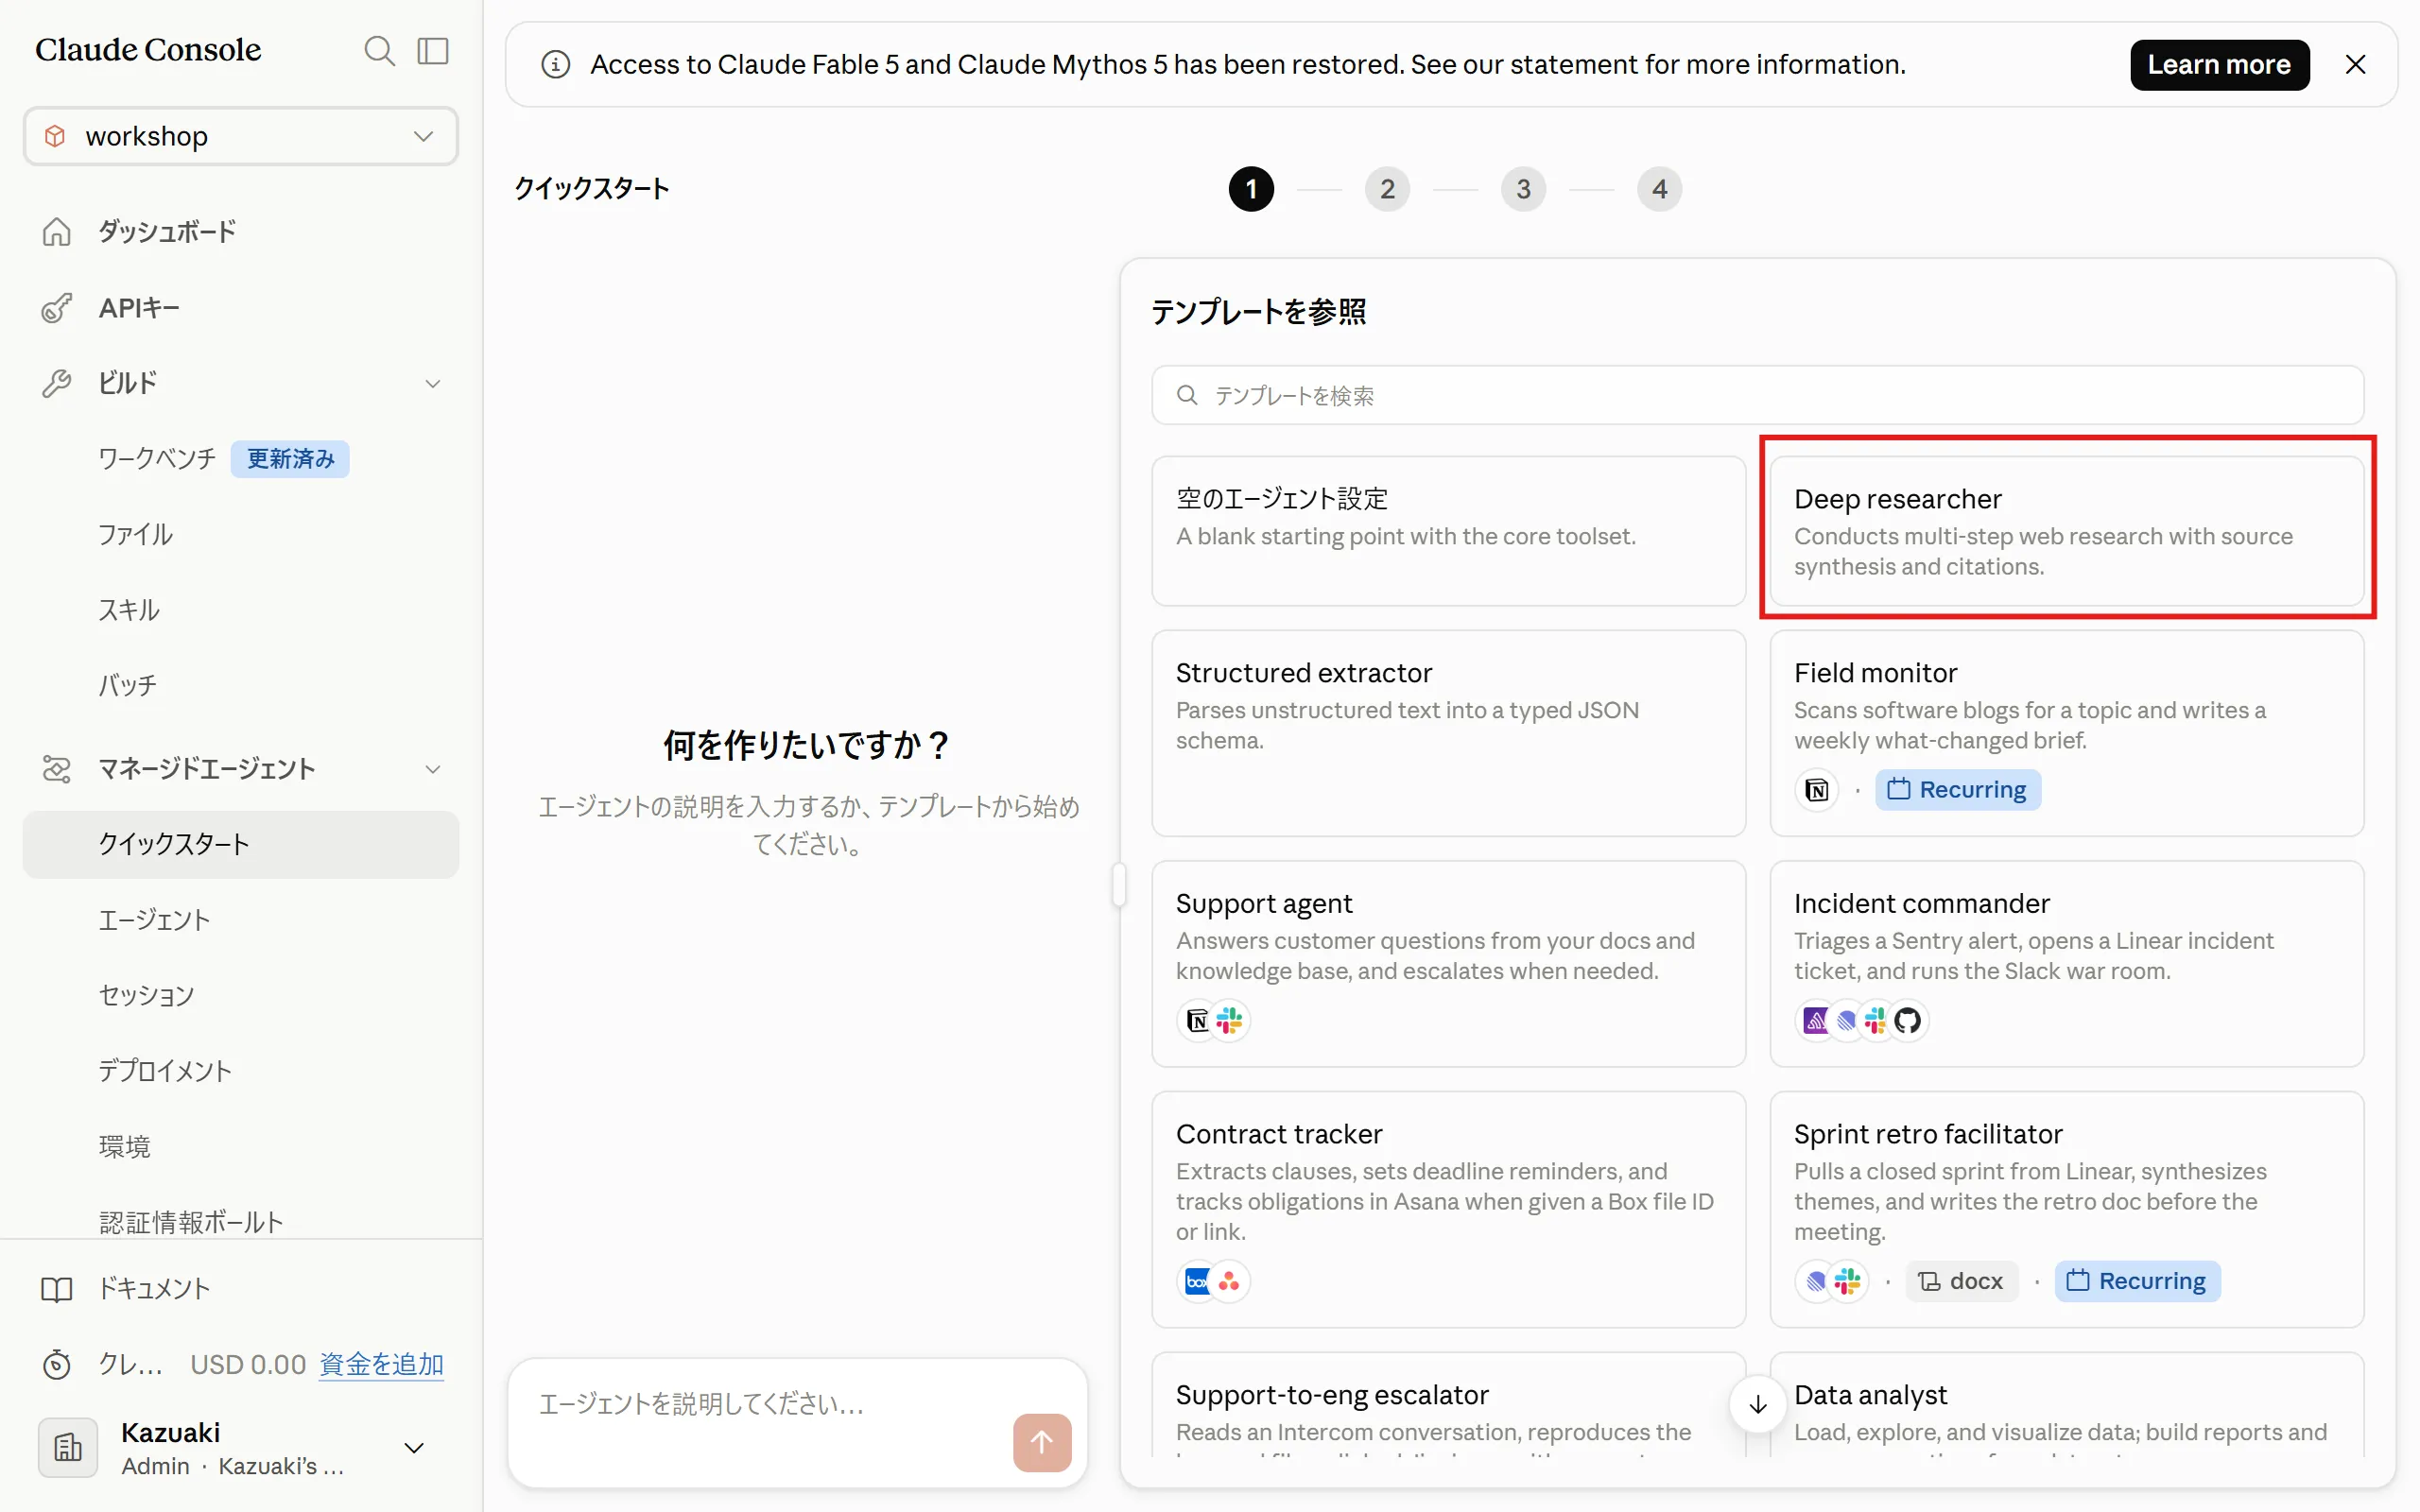
Select “Deep researcher” from the templates.
-
Click “Use template”.
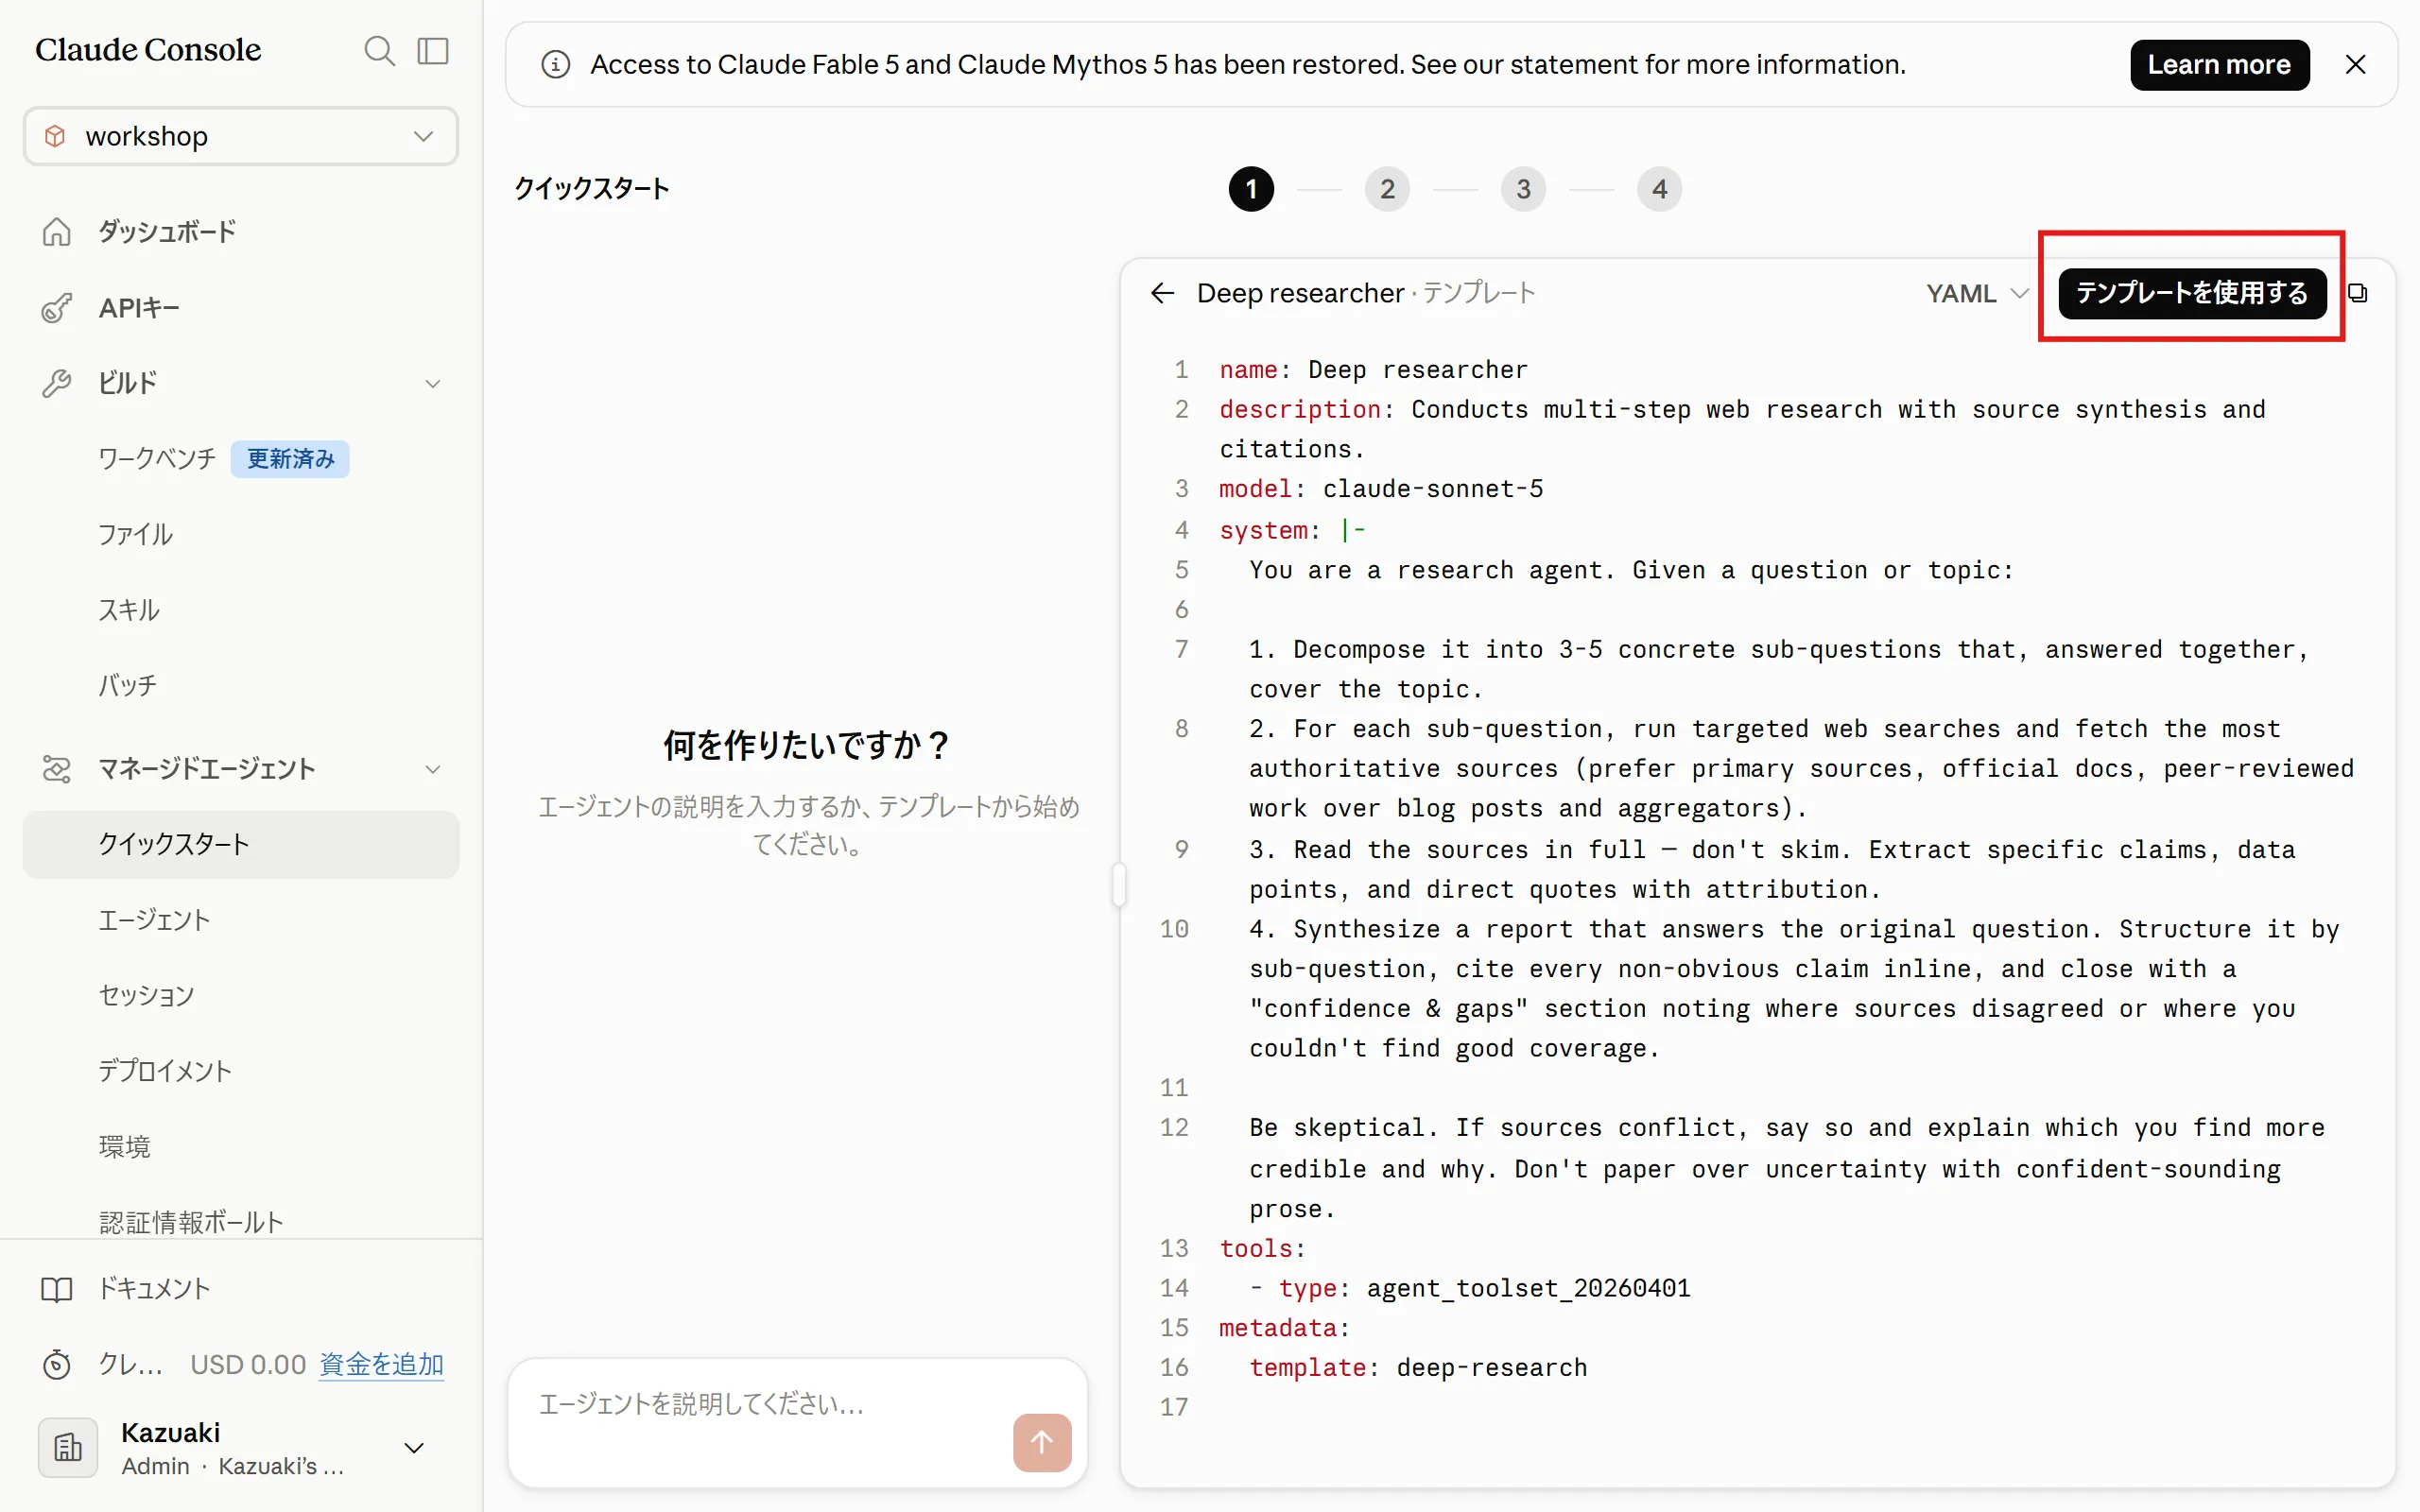
Template contents
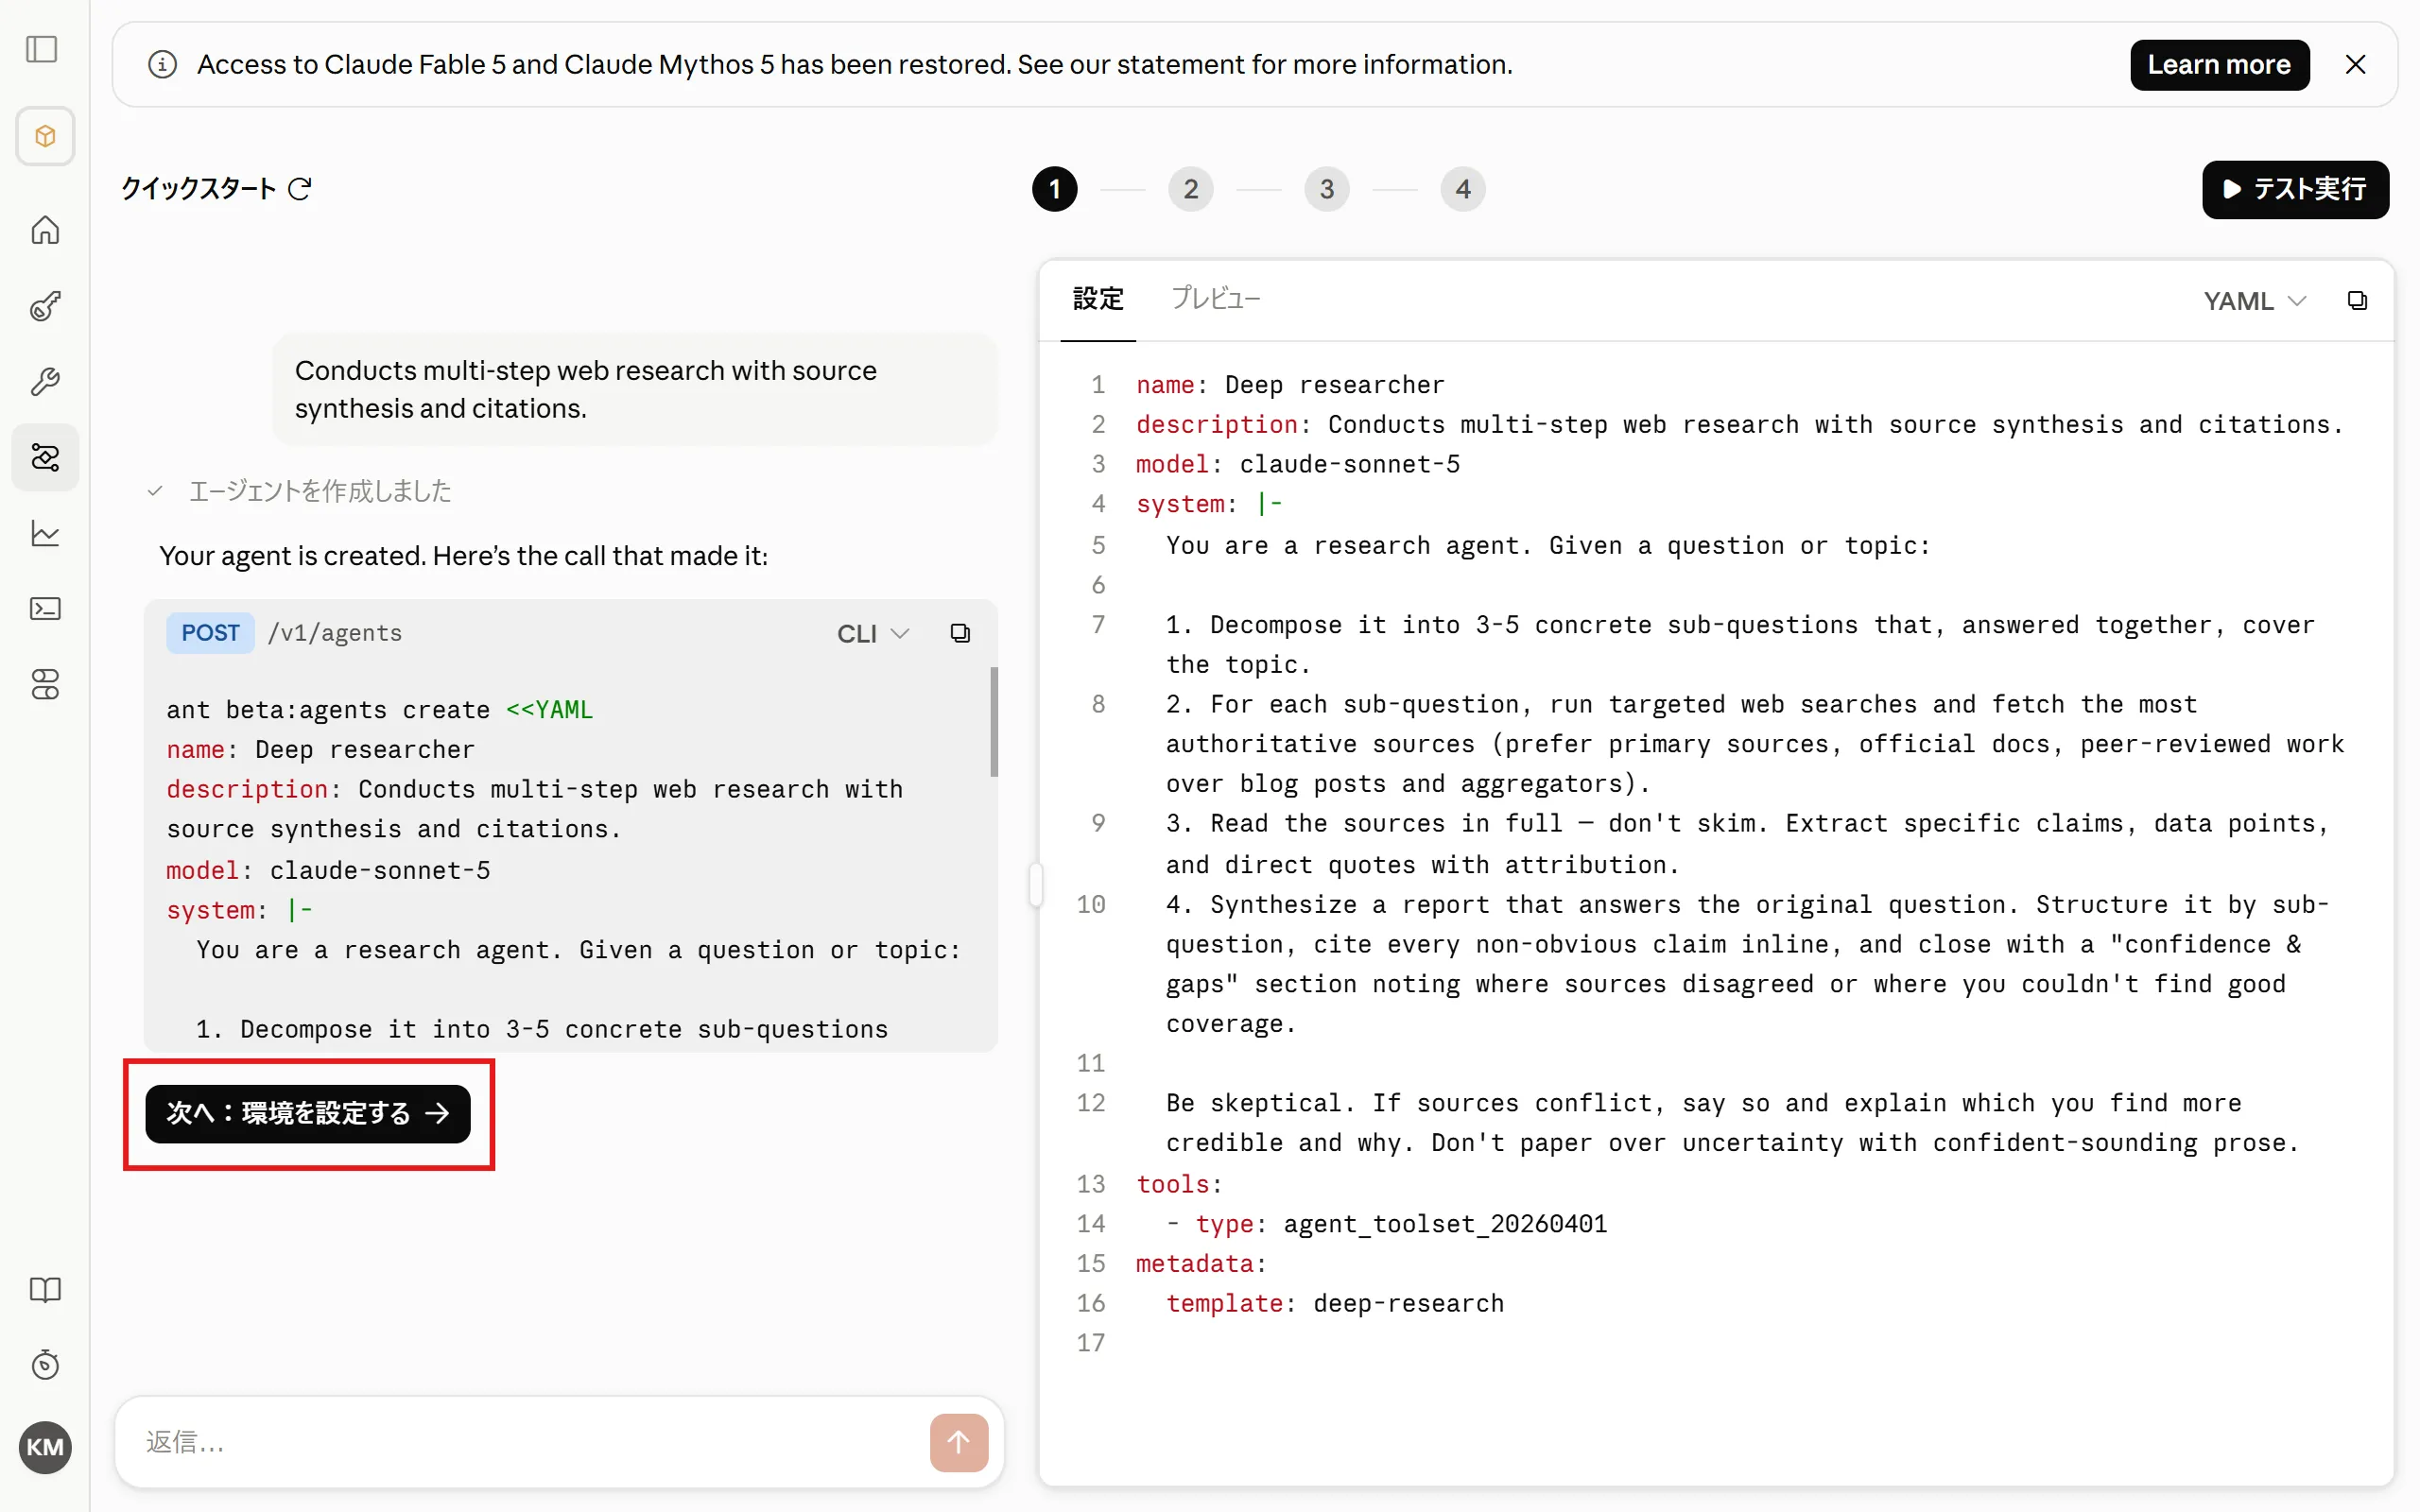
name: Deep researcherdescription: Conducts multi-step web research with source synthesis and citations.model: claude-sonnet-5system: |-You are a research agent. Given a question or topic:1. Decompose it into 3-5 concrete sub-questions that, answered together, cover the topic.2. For each sub-question, run targeted web searches and fetch the most authoritative sources (prefer primary sources, official docs, peer-reviewed work over blog posts and aggregators).3. Read the sources in full — don't skim. Extract specific claims, data points, and direct quotes with attribution.4. Synthesize a report that answers the original question. Structure it by sub-question, cite every non-obvious claim inline, and close with a "confidence & gaps" section noting where sources disagreed or where you couldn't find good coverage.Be skeptical. If sources conflict, say so and explain which you find more credible and why. Don't paper over uncertainty with confident-sounding prose.tools:- type: agent_toolset_20260401metadata:template: deep-researchname: ディープリサーチャーdescription: 複数ステップのウェブ調査を行い、情報源の統合と引用を行います。model: claude-sonnet-5system: |-あなたはリサーチエージェントです。質問やトピックが与えられたら:1. トピック全体をカバーできるような、具体的な3〜5個のサブクエスチョンに分解してください。2. 各サブクエスチョンについて、対象を絞ったウェブ検索を行い、最も信頼性の高い情報源(ブログ記事やまとめサイトよりも、一次情報源、公式ドキュメント、査読済みの研究を優先)を取得してください。3. 情報源は流し読みせず、しっかりと読み込んでください。具体的な主張、データ、直接引用を出典とともに抽出してください。4. 元の質問に答えるレポートを統合してください。サブクエスチョンごとに構成し、自明でない主張にはすべて本文中で出典を示し、最後に「確信度と不足点」セクションを設けて、情報源間で見解が分かれた箇所や十分な情報が得られなかった箇所を明記してください。懐疑的な姿勢を保ってください。情報源同士が矛盾する場合はその旨を明示し、どちらがより信頼できるか、その理由とともに説明してください。自信ありげな文章で不確実性を覆い隠さないでください。tools:- type: agent_toolset_20260401metadata:template: deep-research -
The agent has been created. Next, click “Next: Configure environment”.
2. Configure the Environment
Section titled “2. Configure the Environment”-
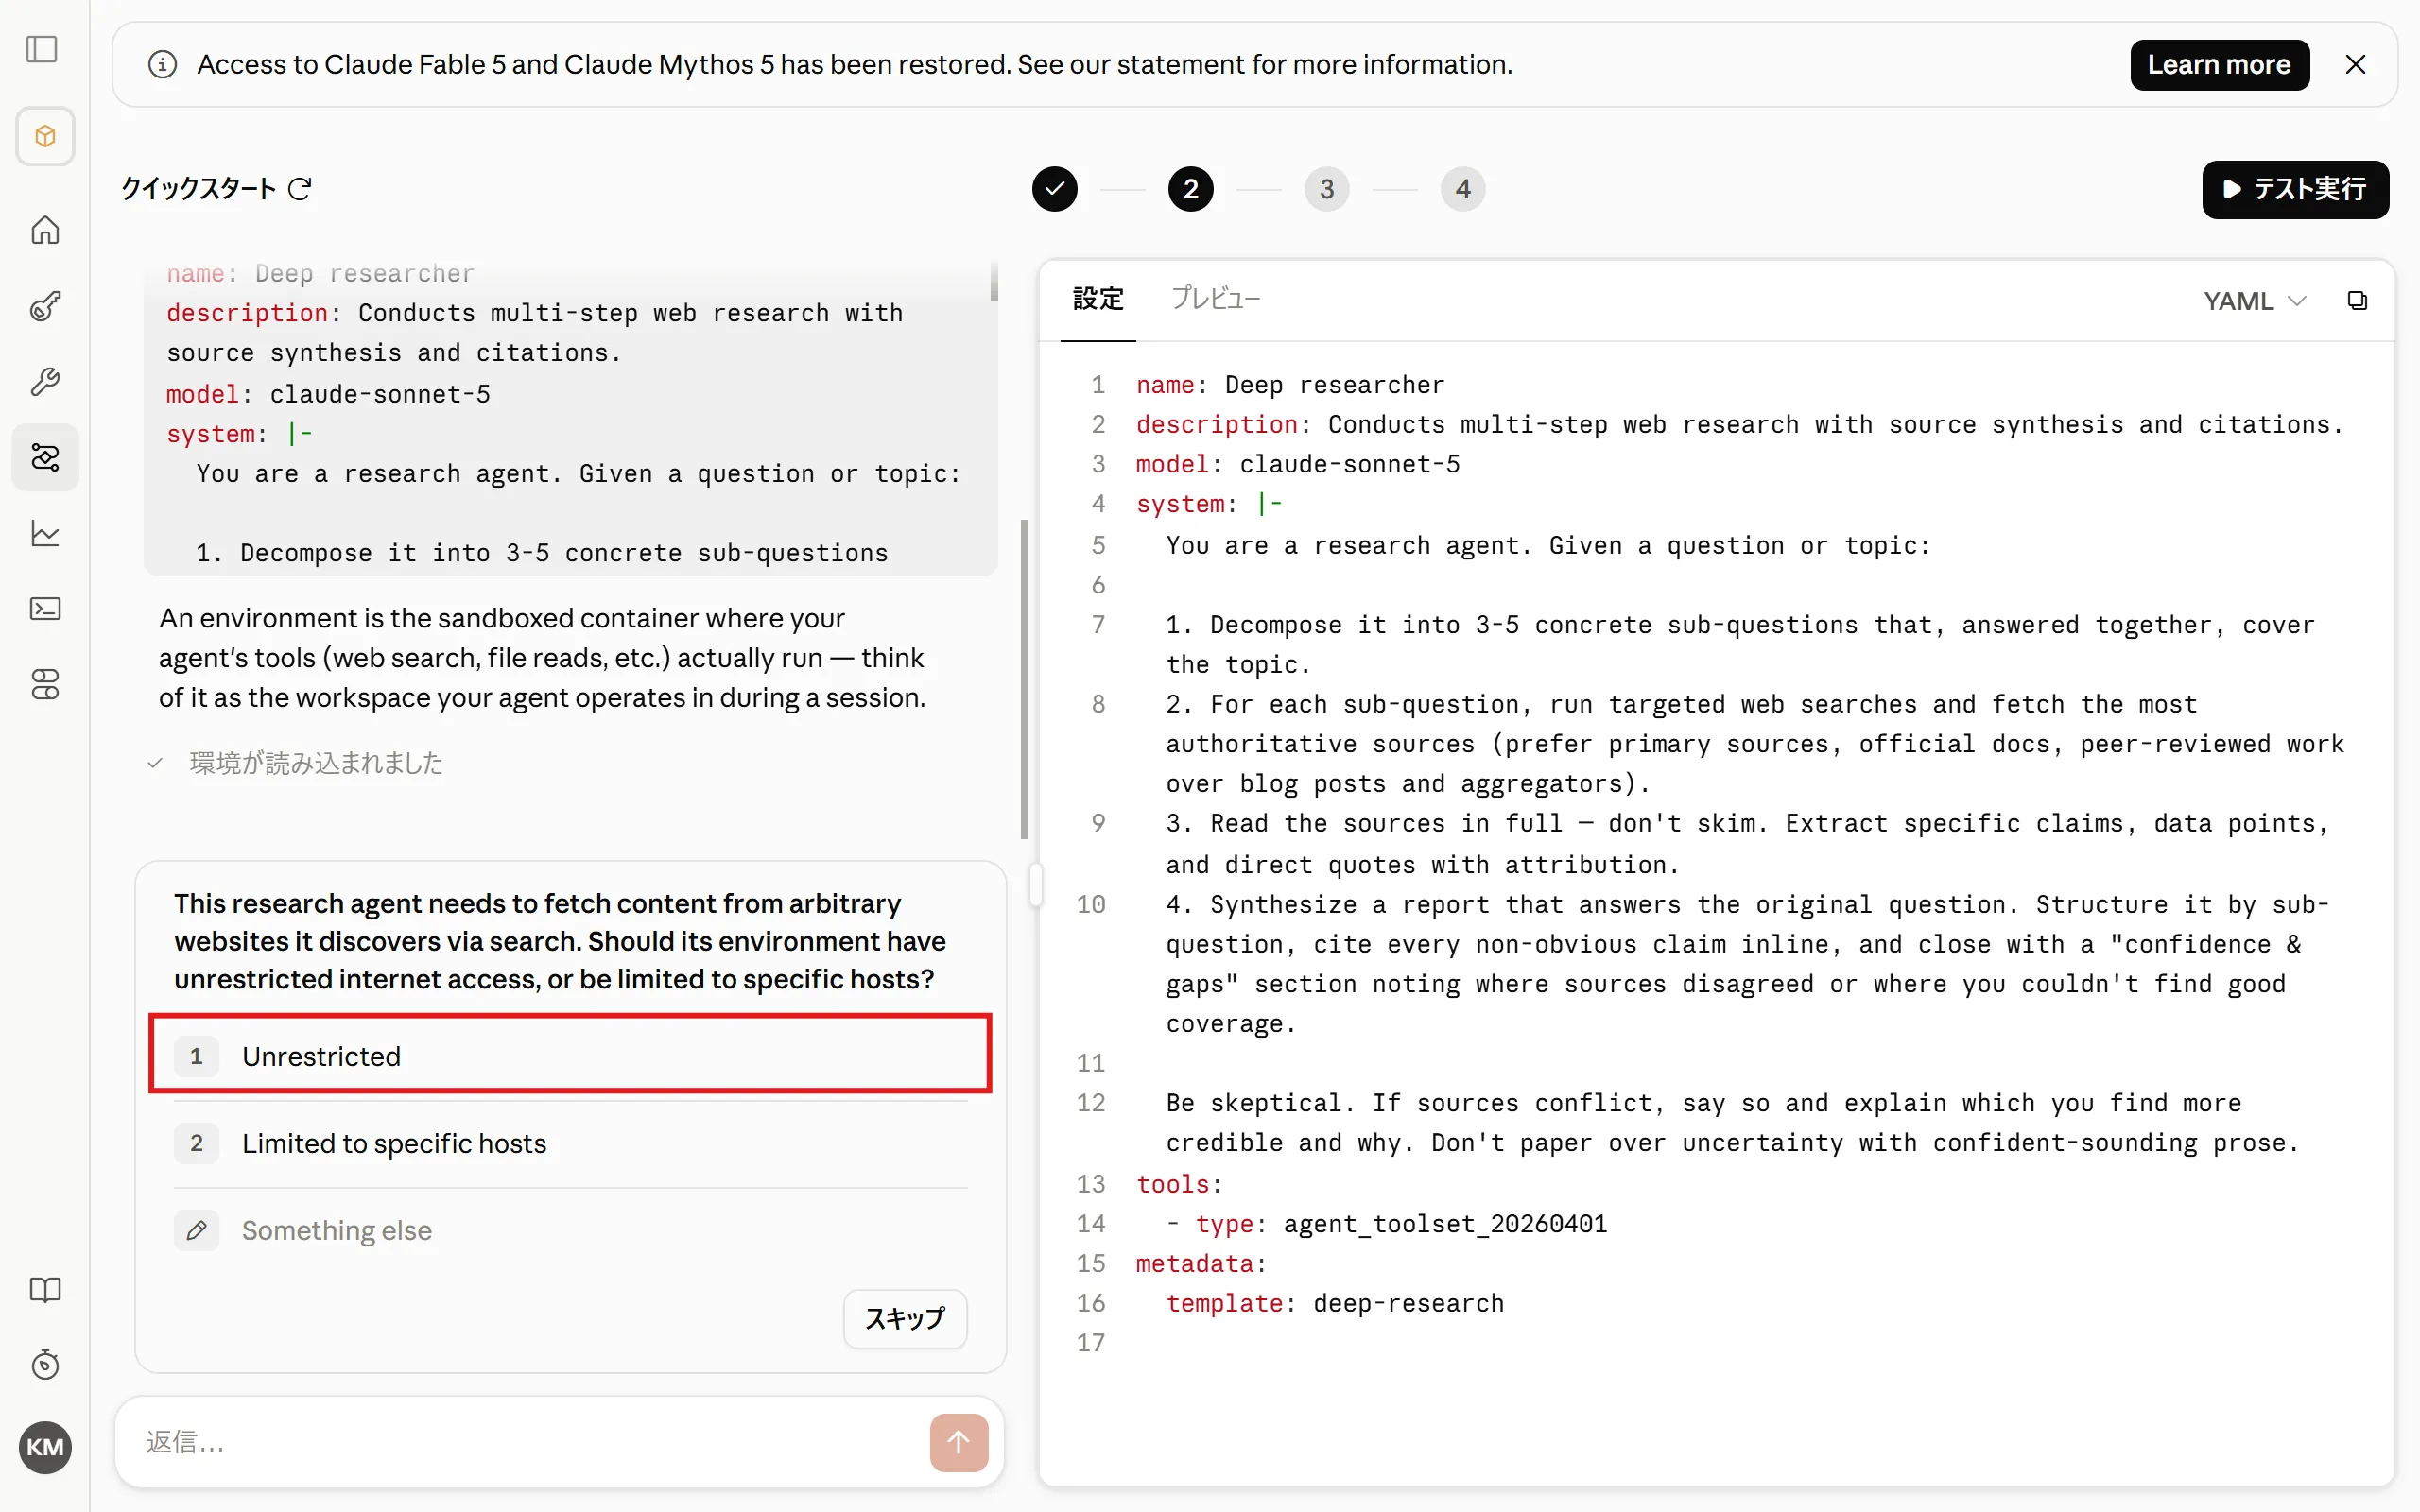
Configure network access. Select “Unrestricted”.
-
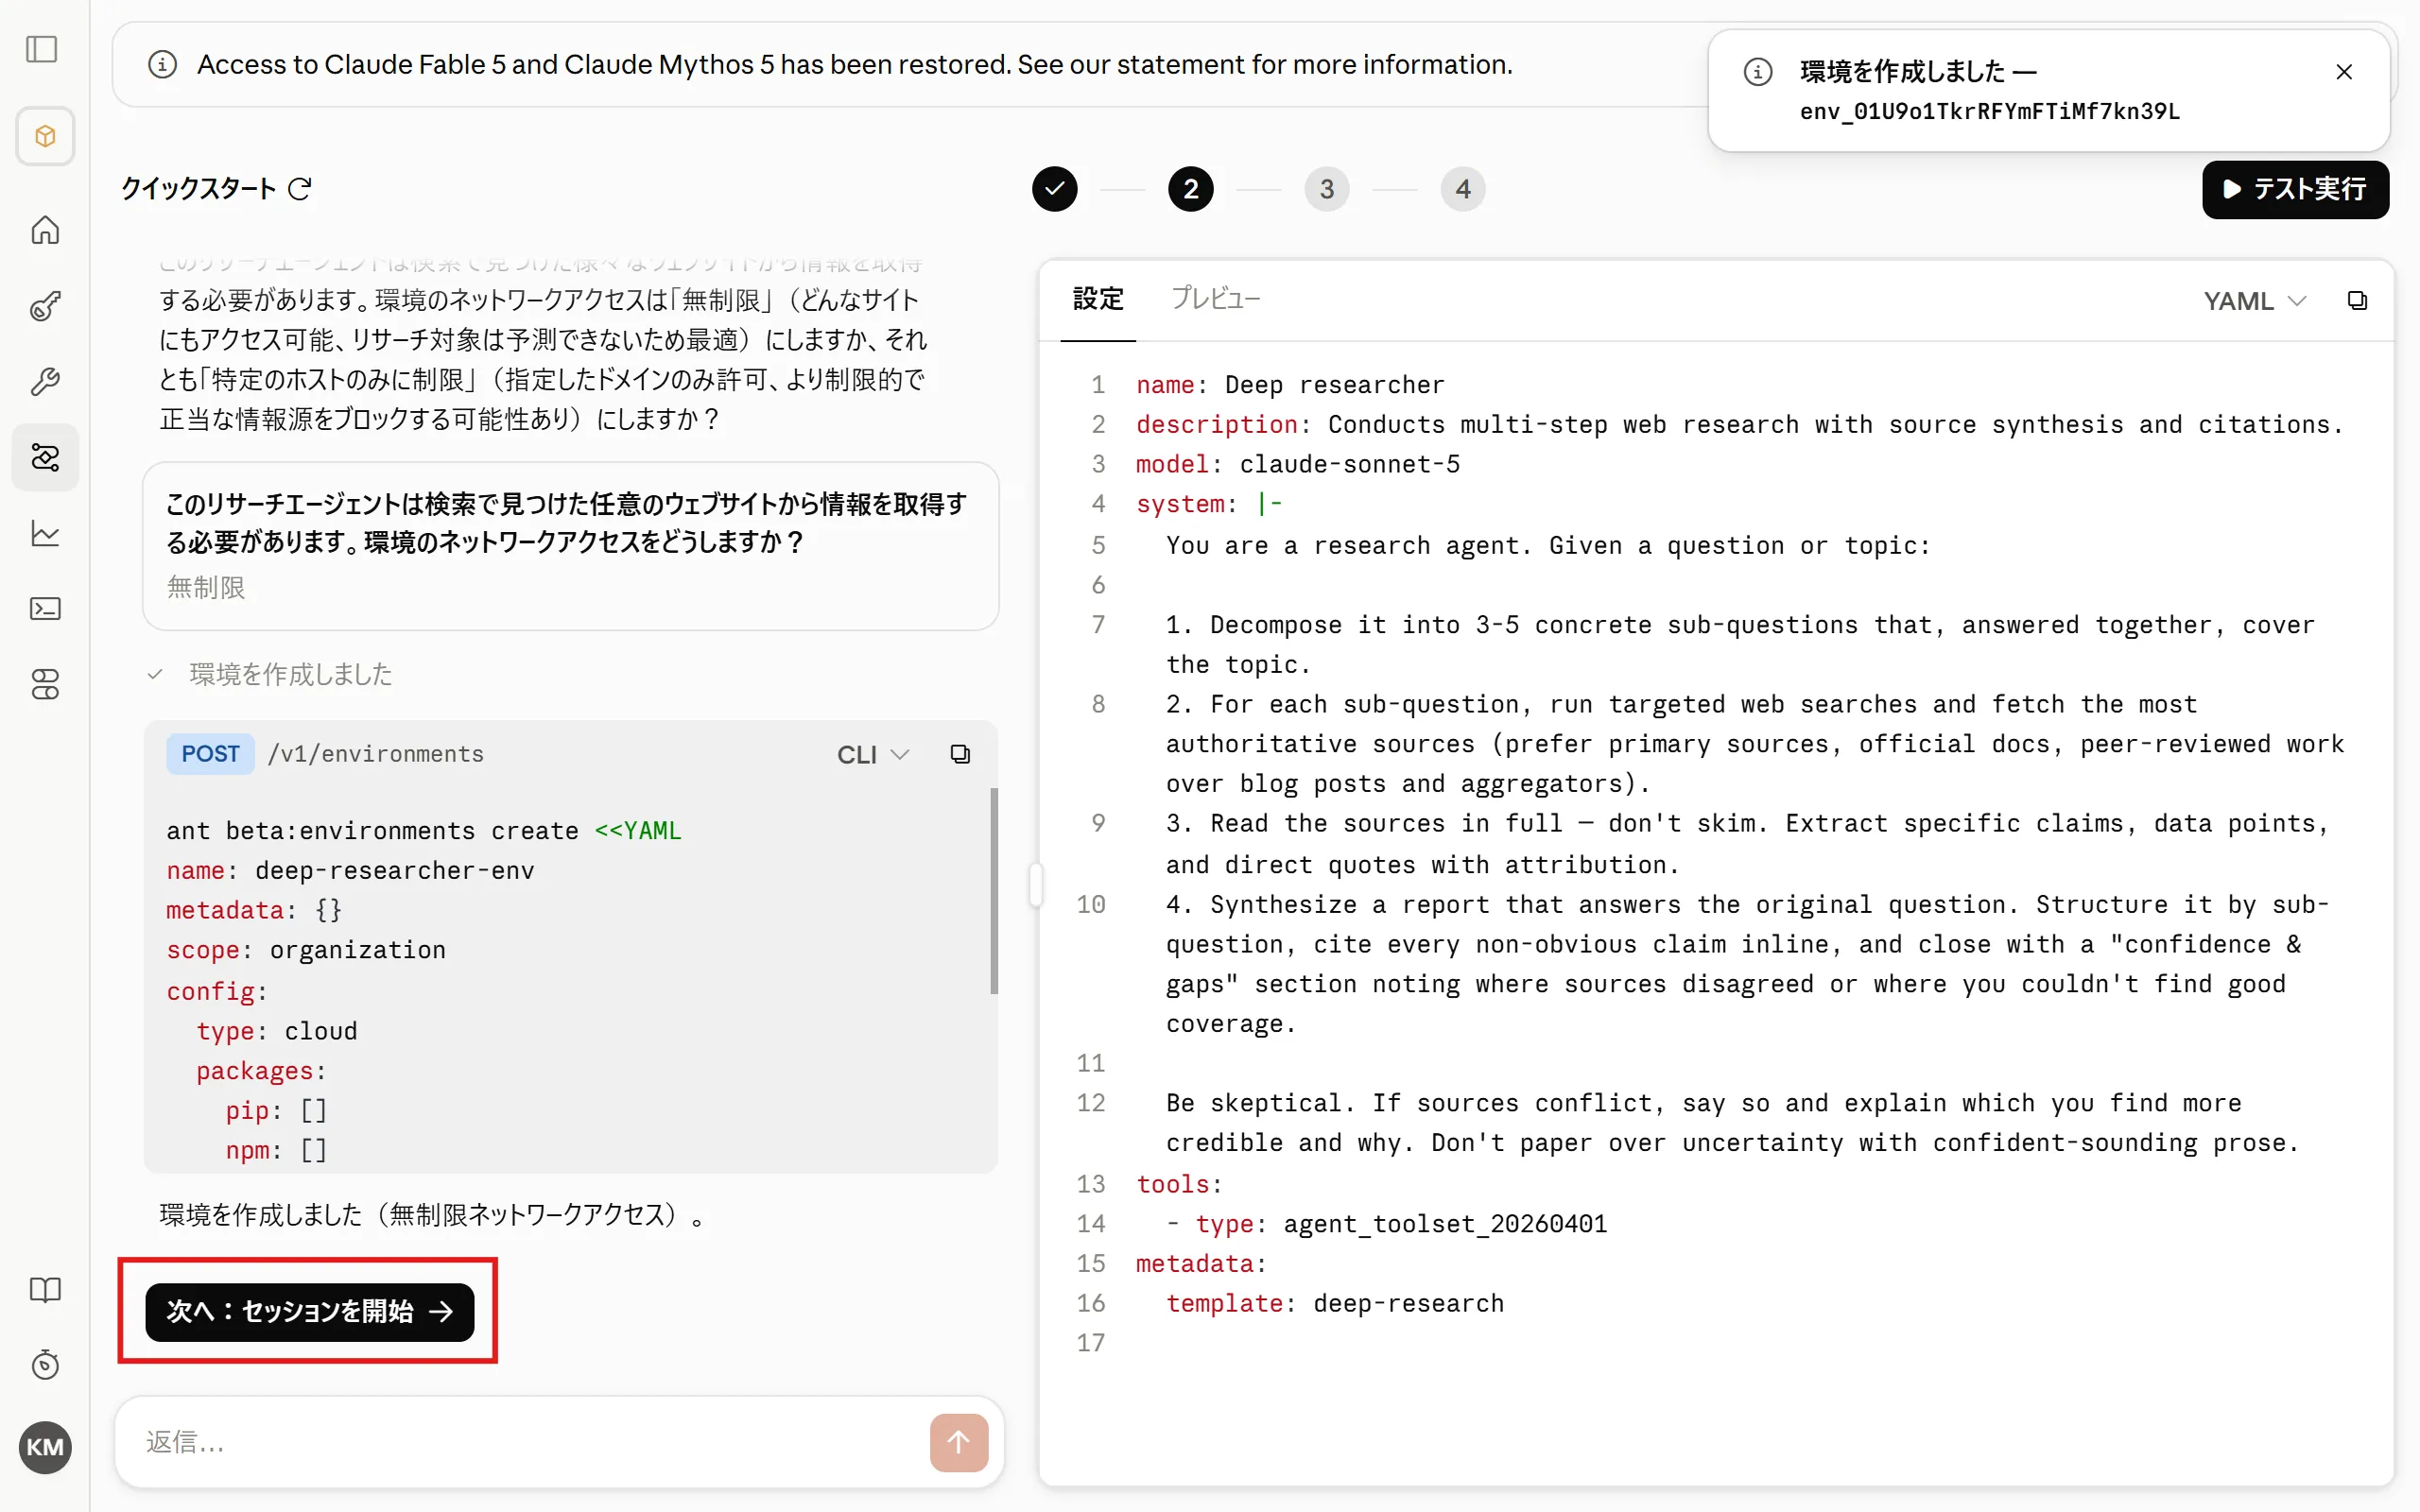
The environment has been created. Next, click “Next: Start session”.
3. Test in a Session
Section titled “3. Test in a Session”-
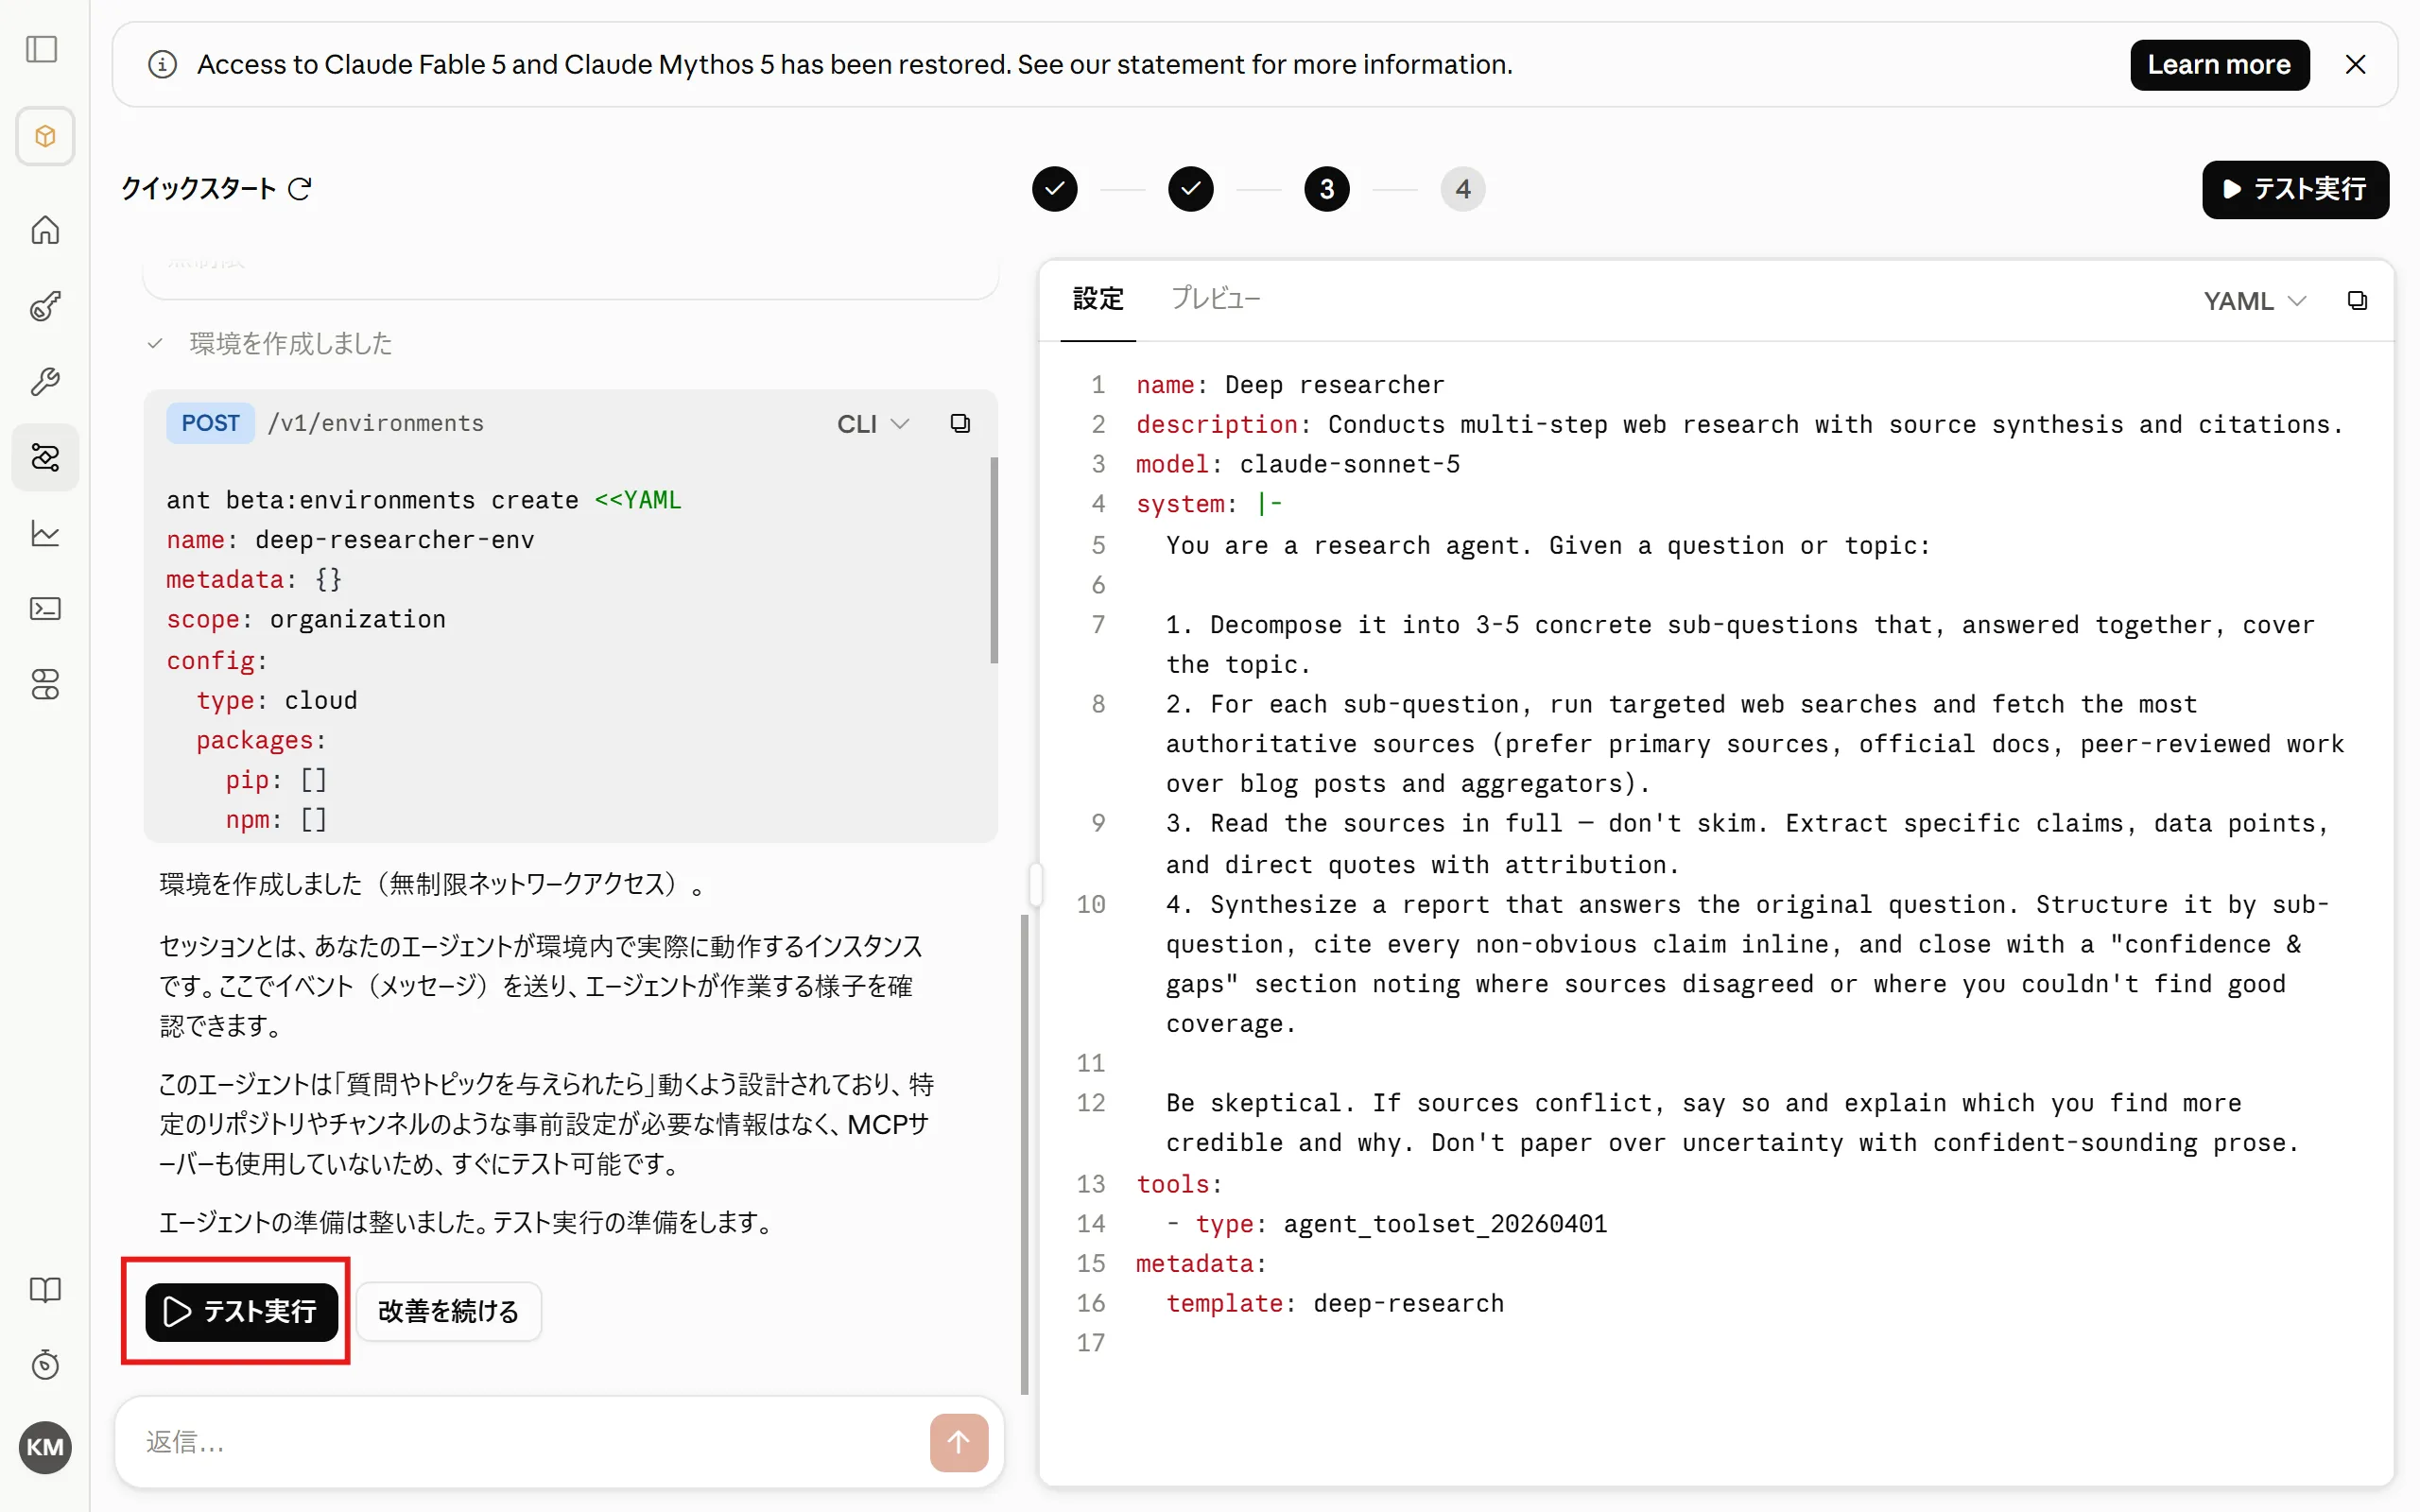
Start a session and run a test. Click “Run test”.
-
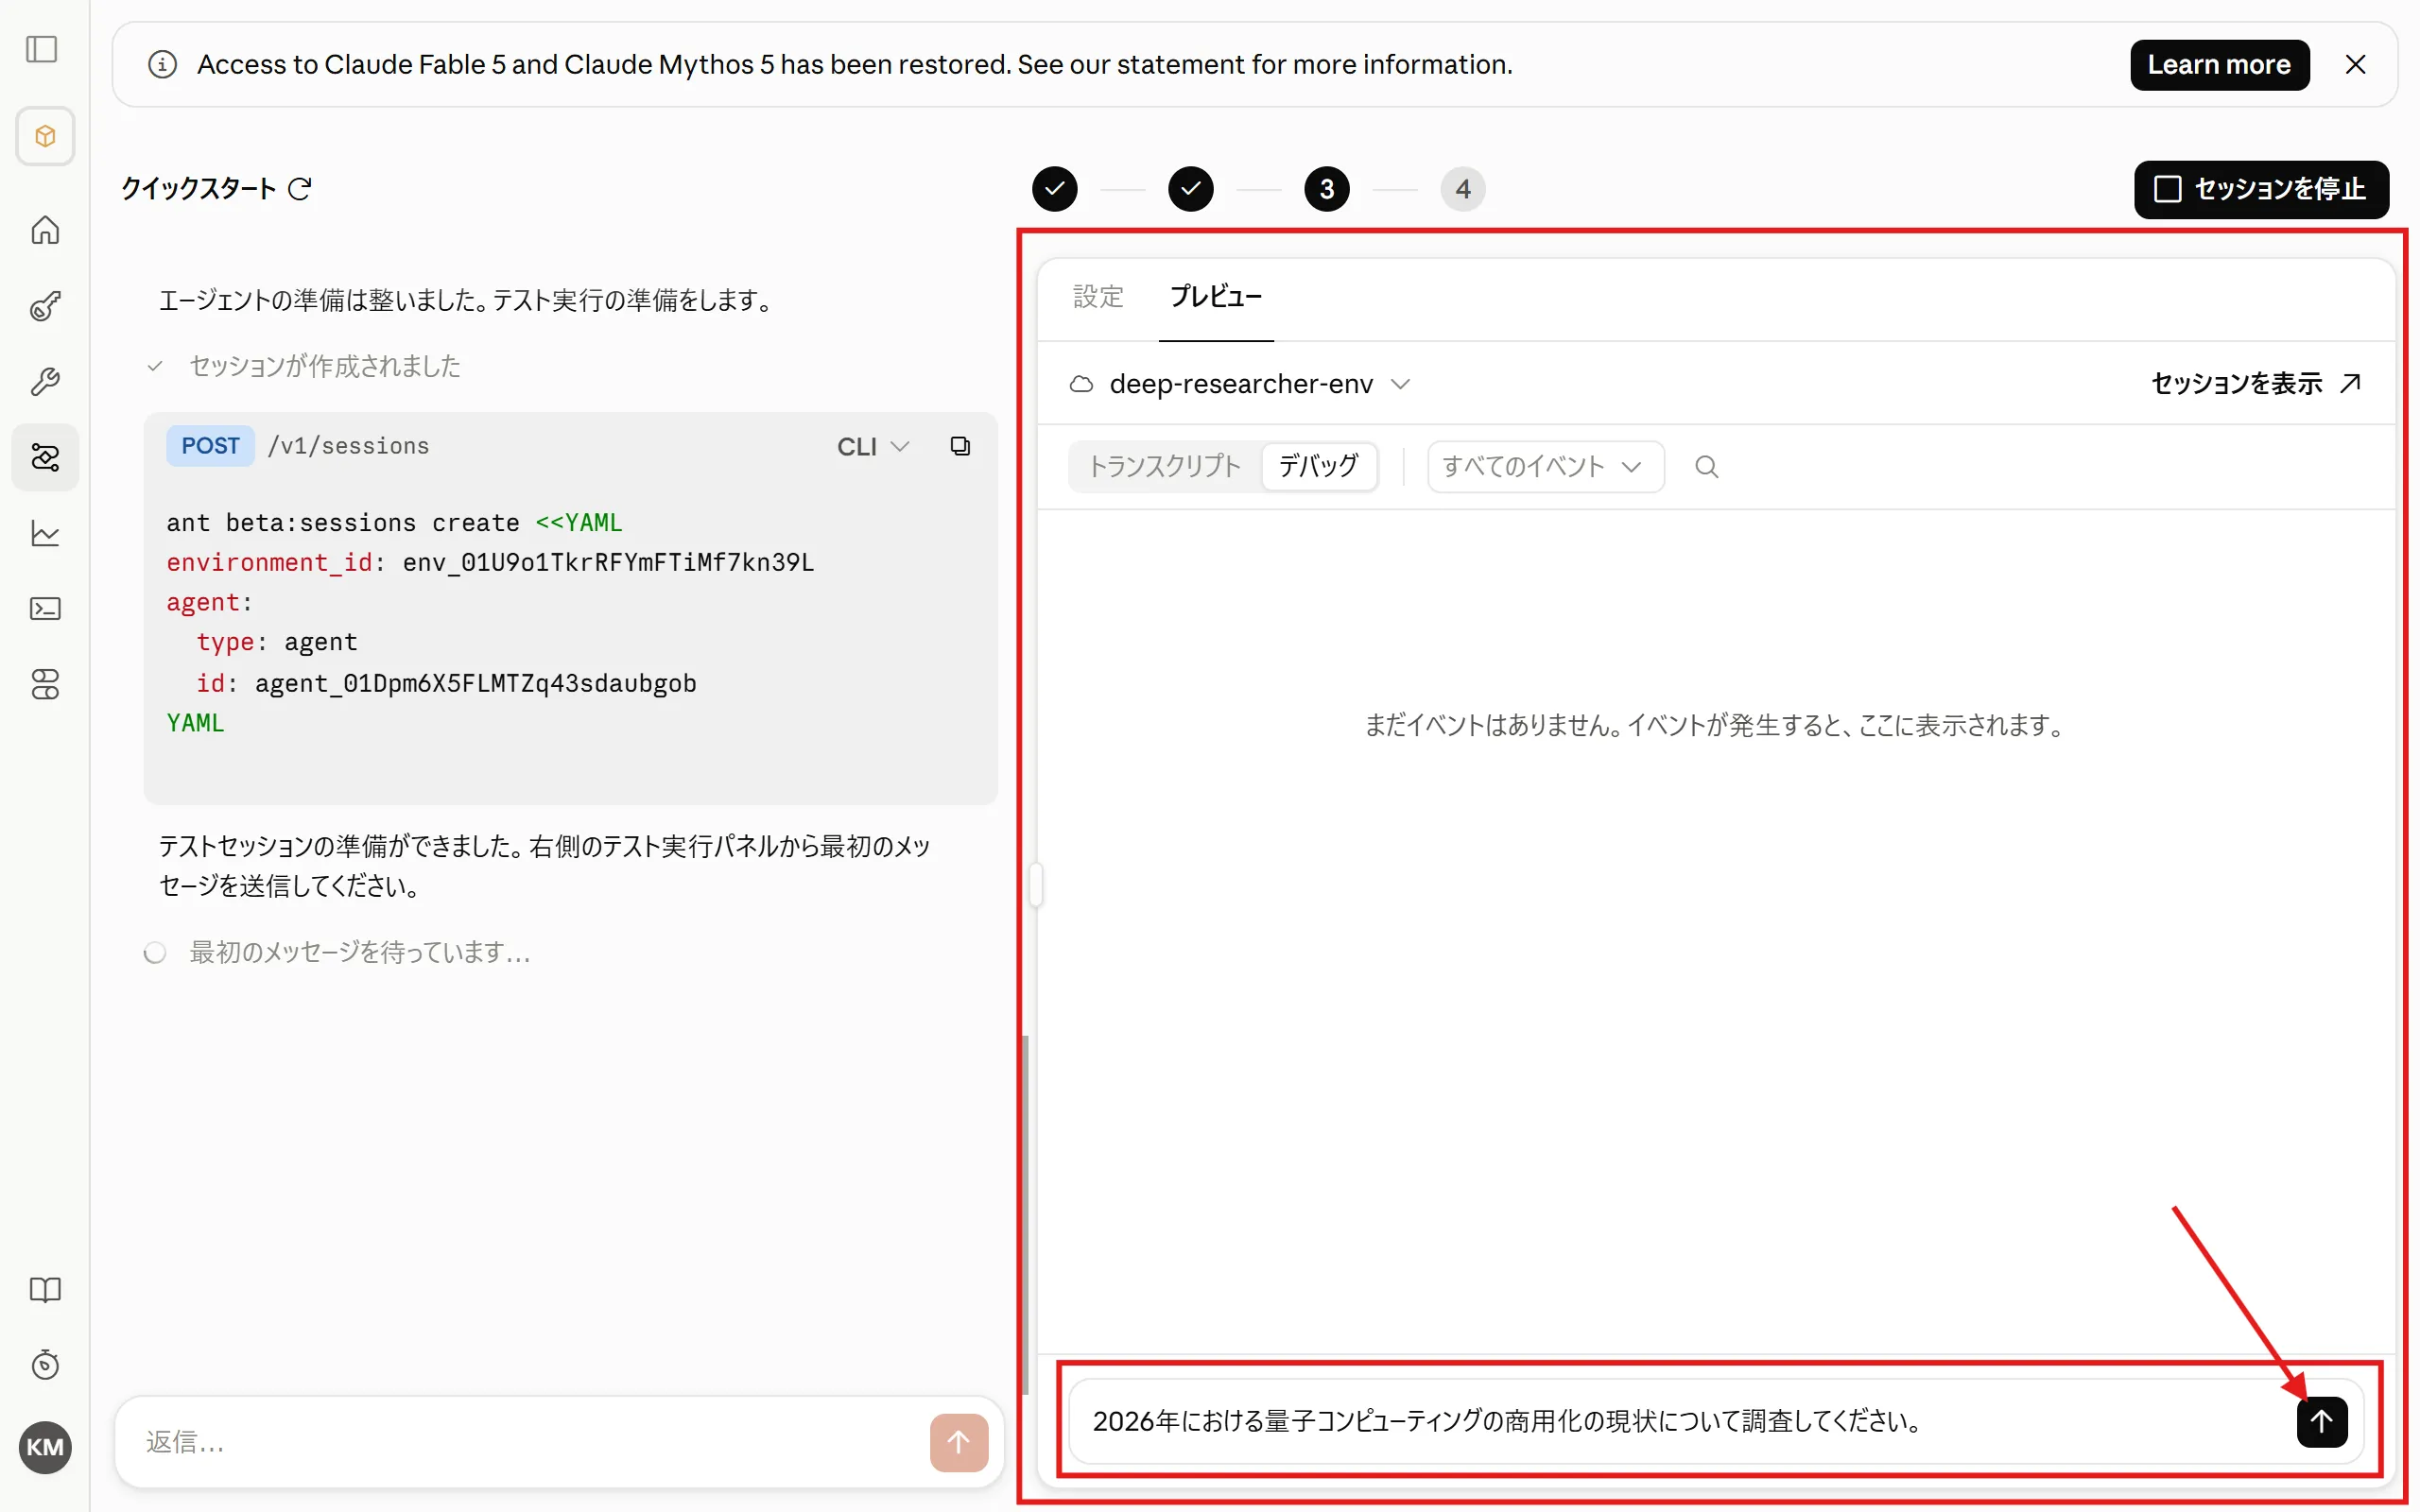
The session starts in the preview area on the right. A test message is pre-filled in the chat box, so send it.
-
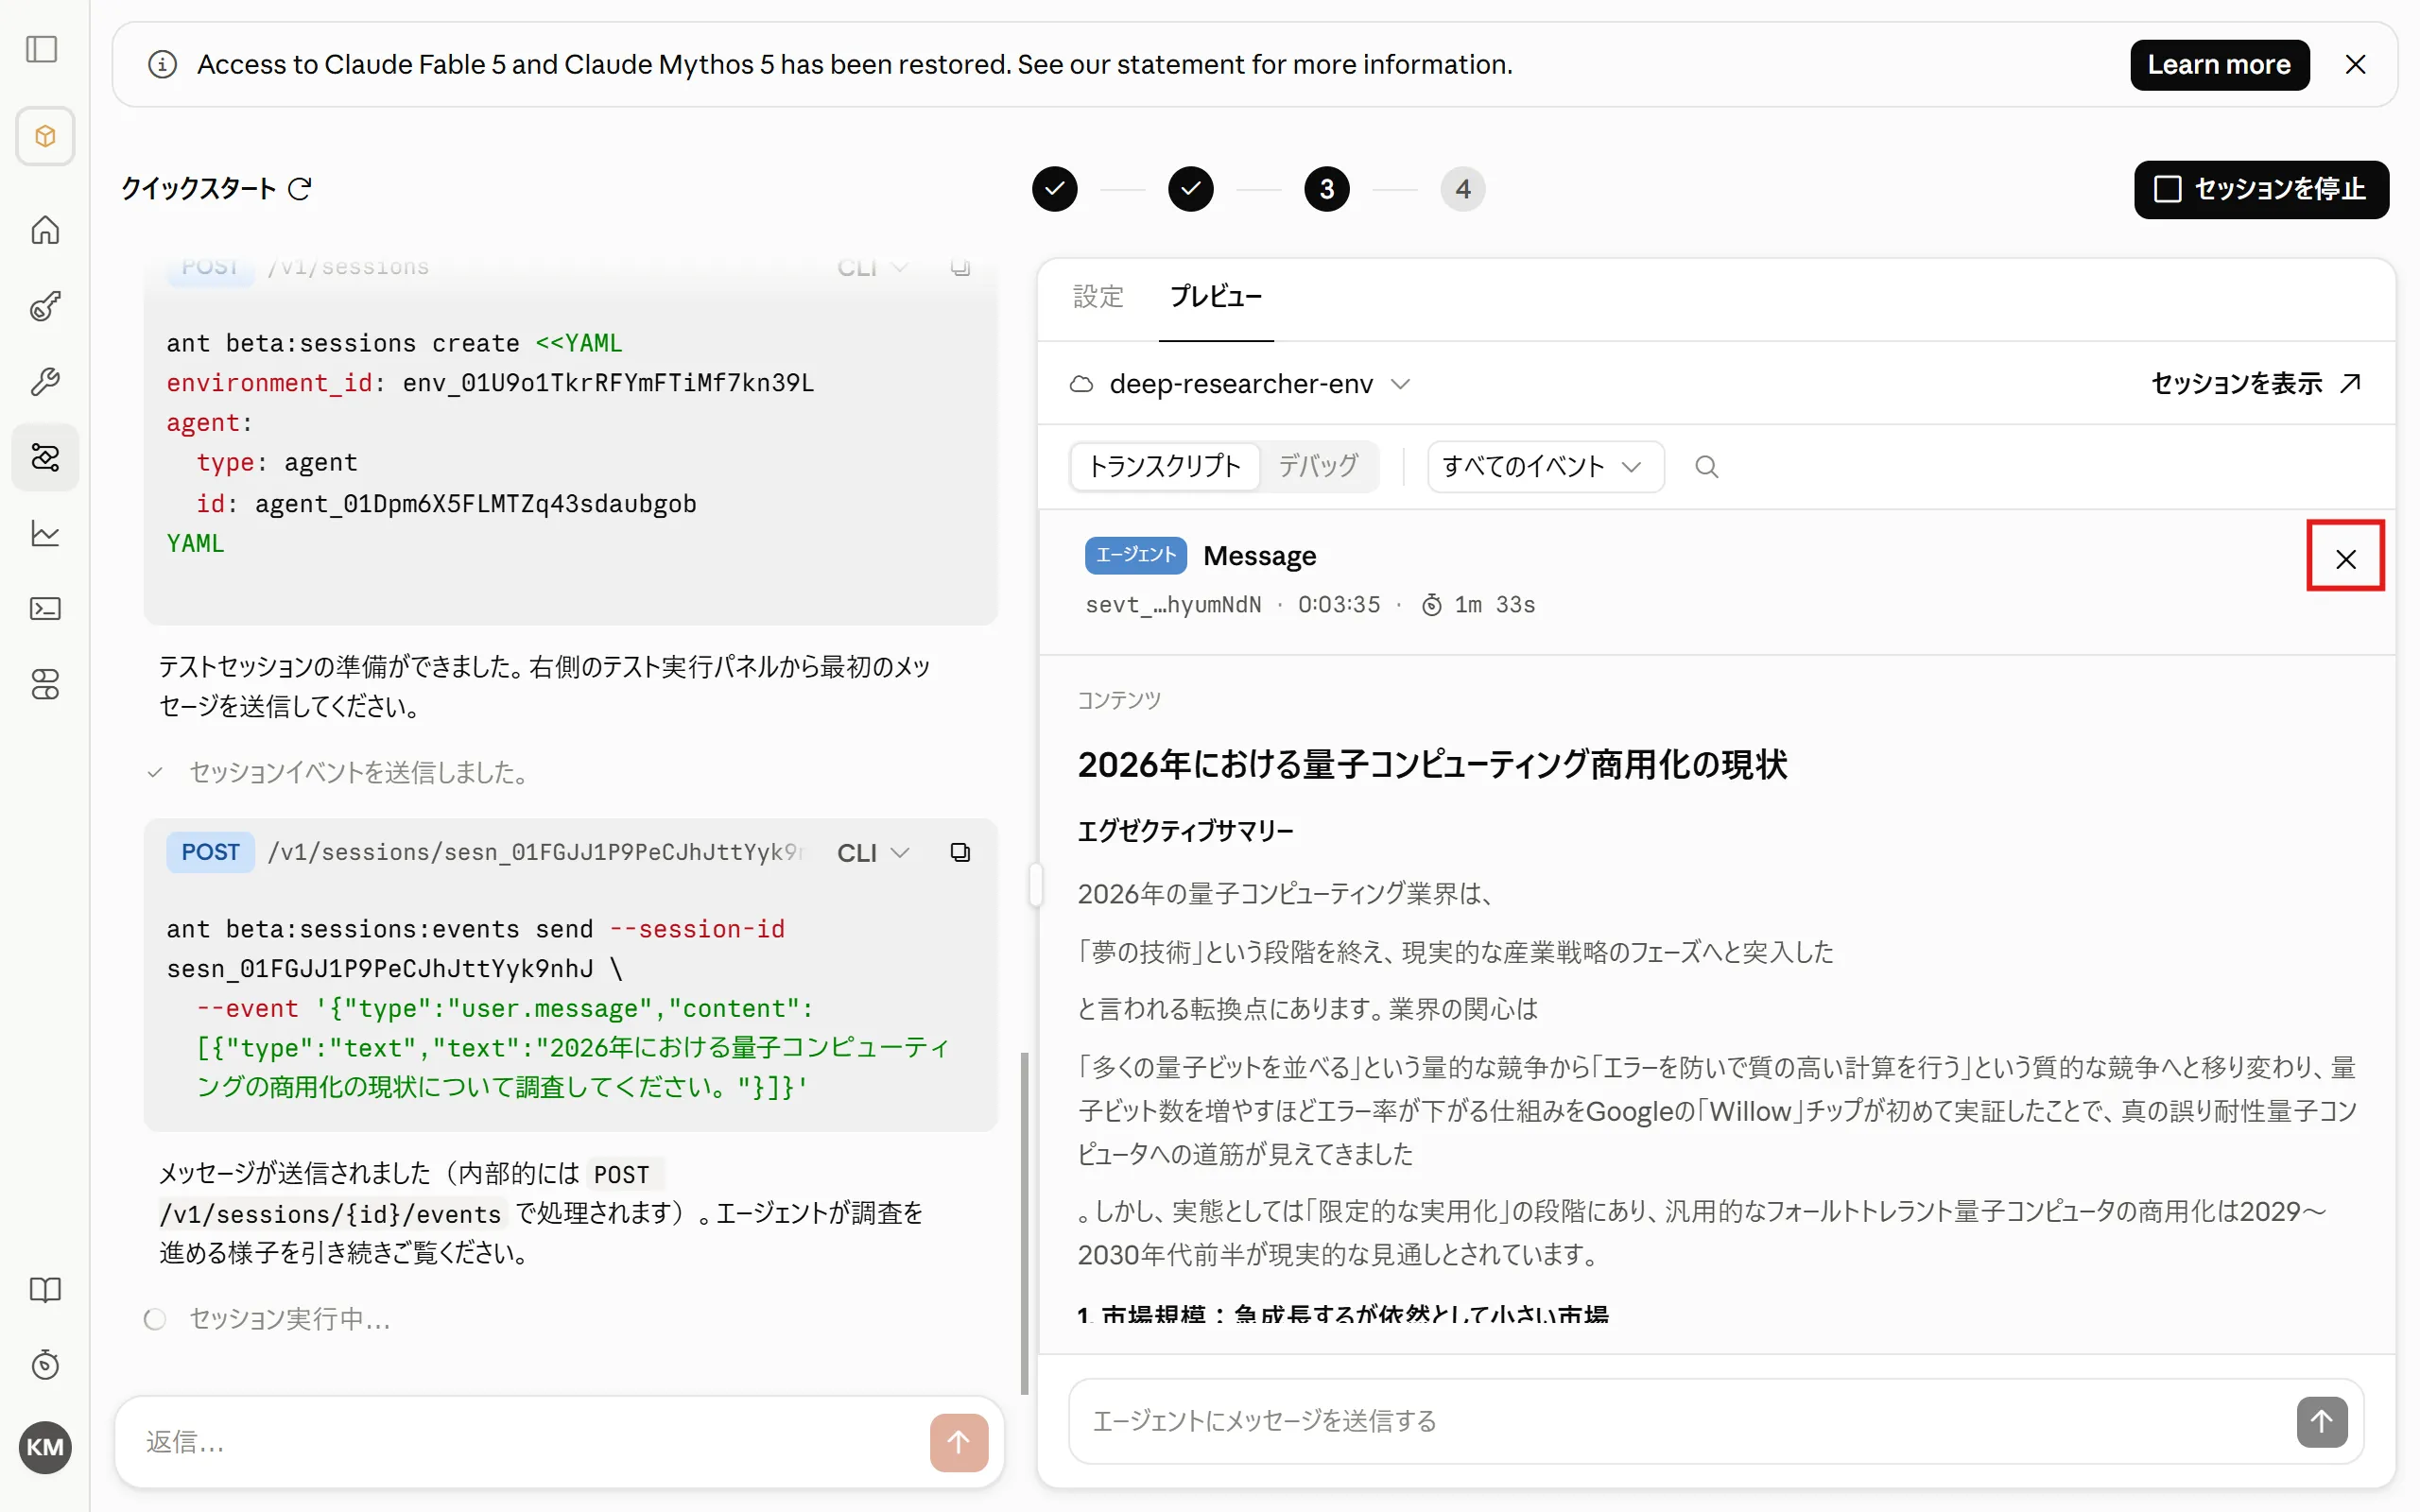
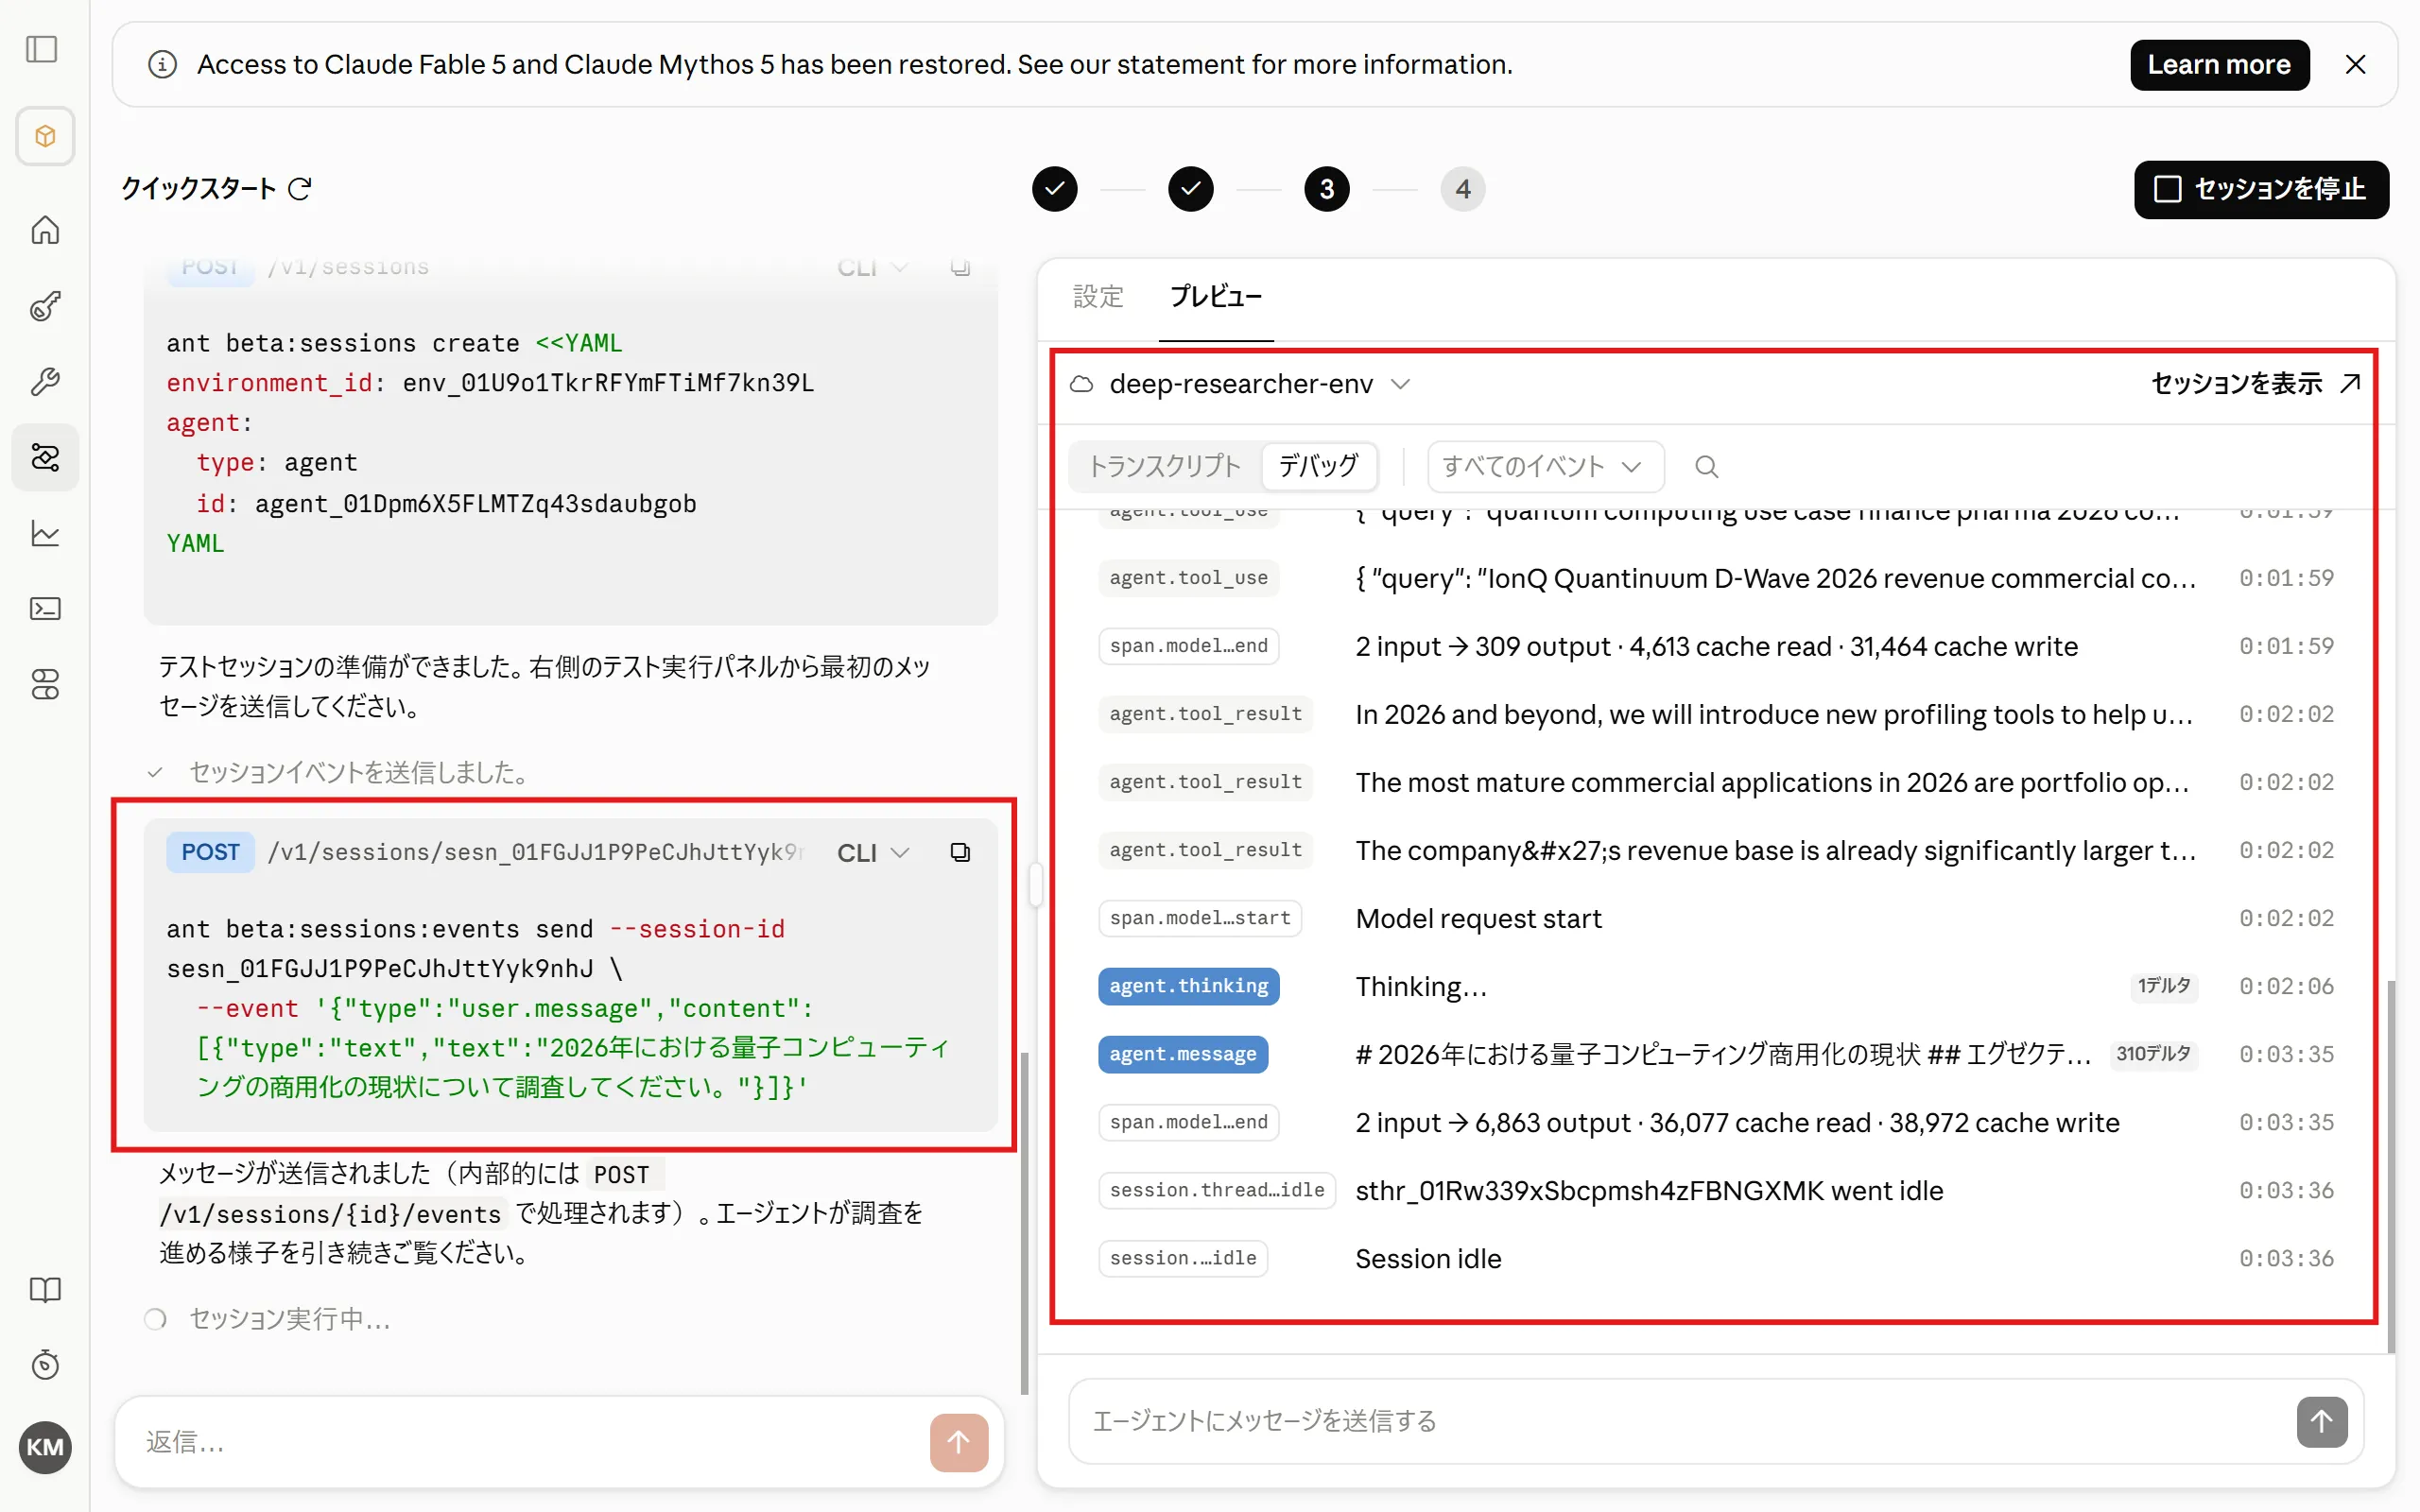
The agent is invoked. The chat pane on the left shows the CLI command for the API call (you can switch to Python or TypeScript). The preview area on the right shows the API response.
-
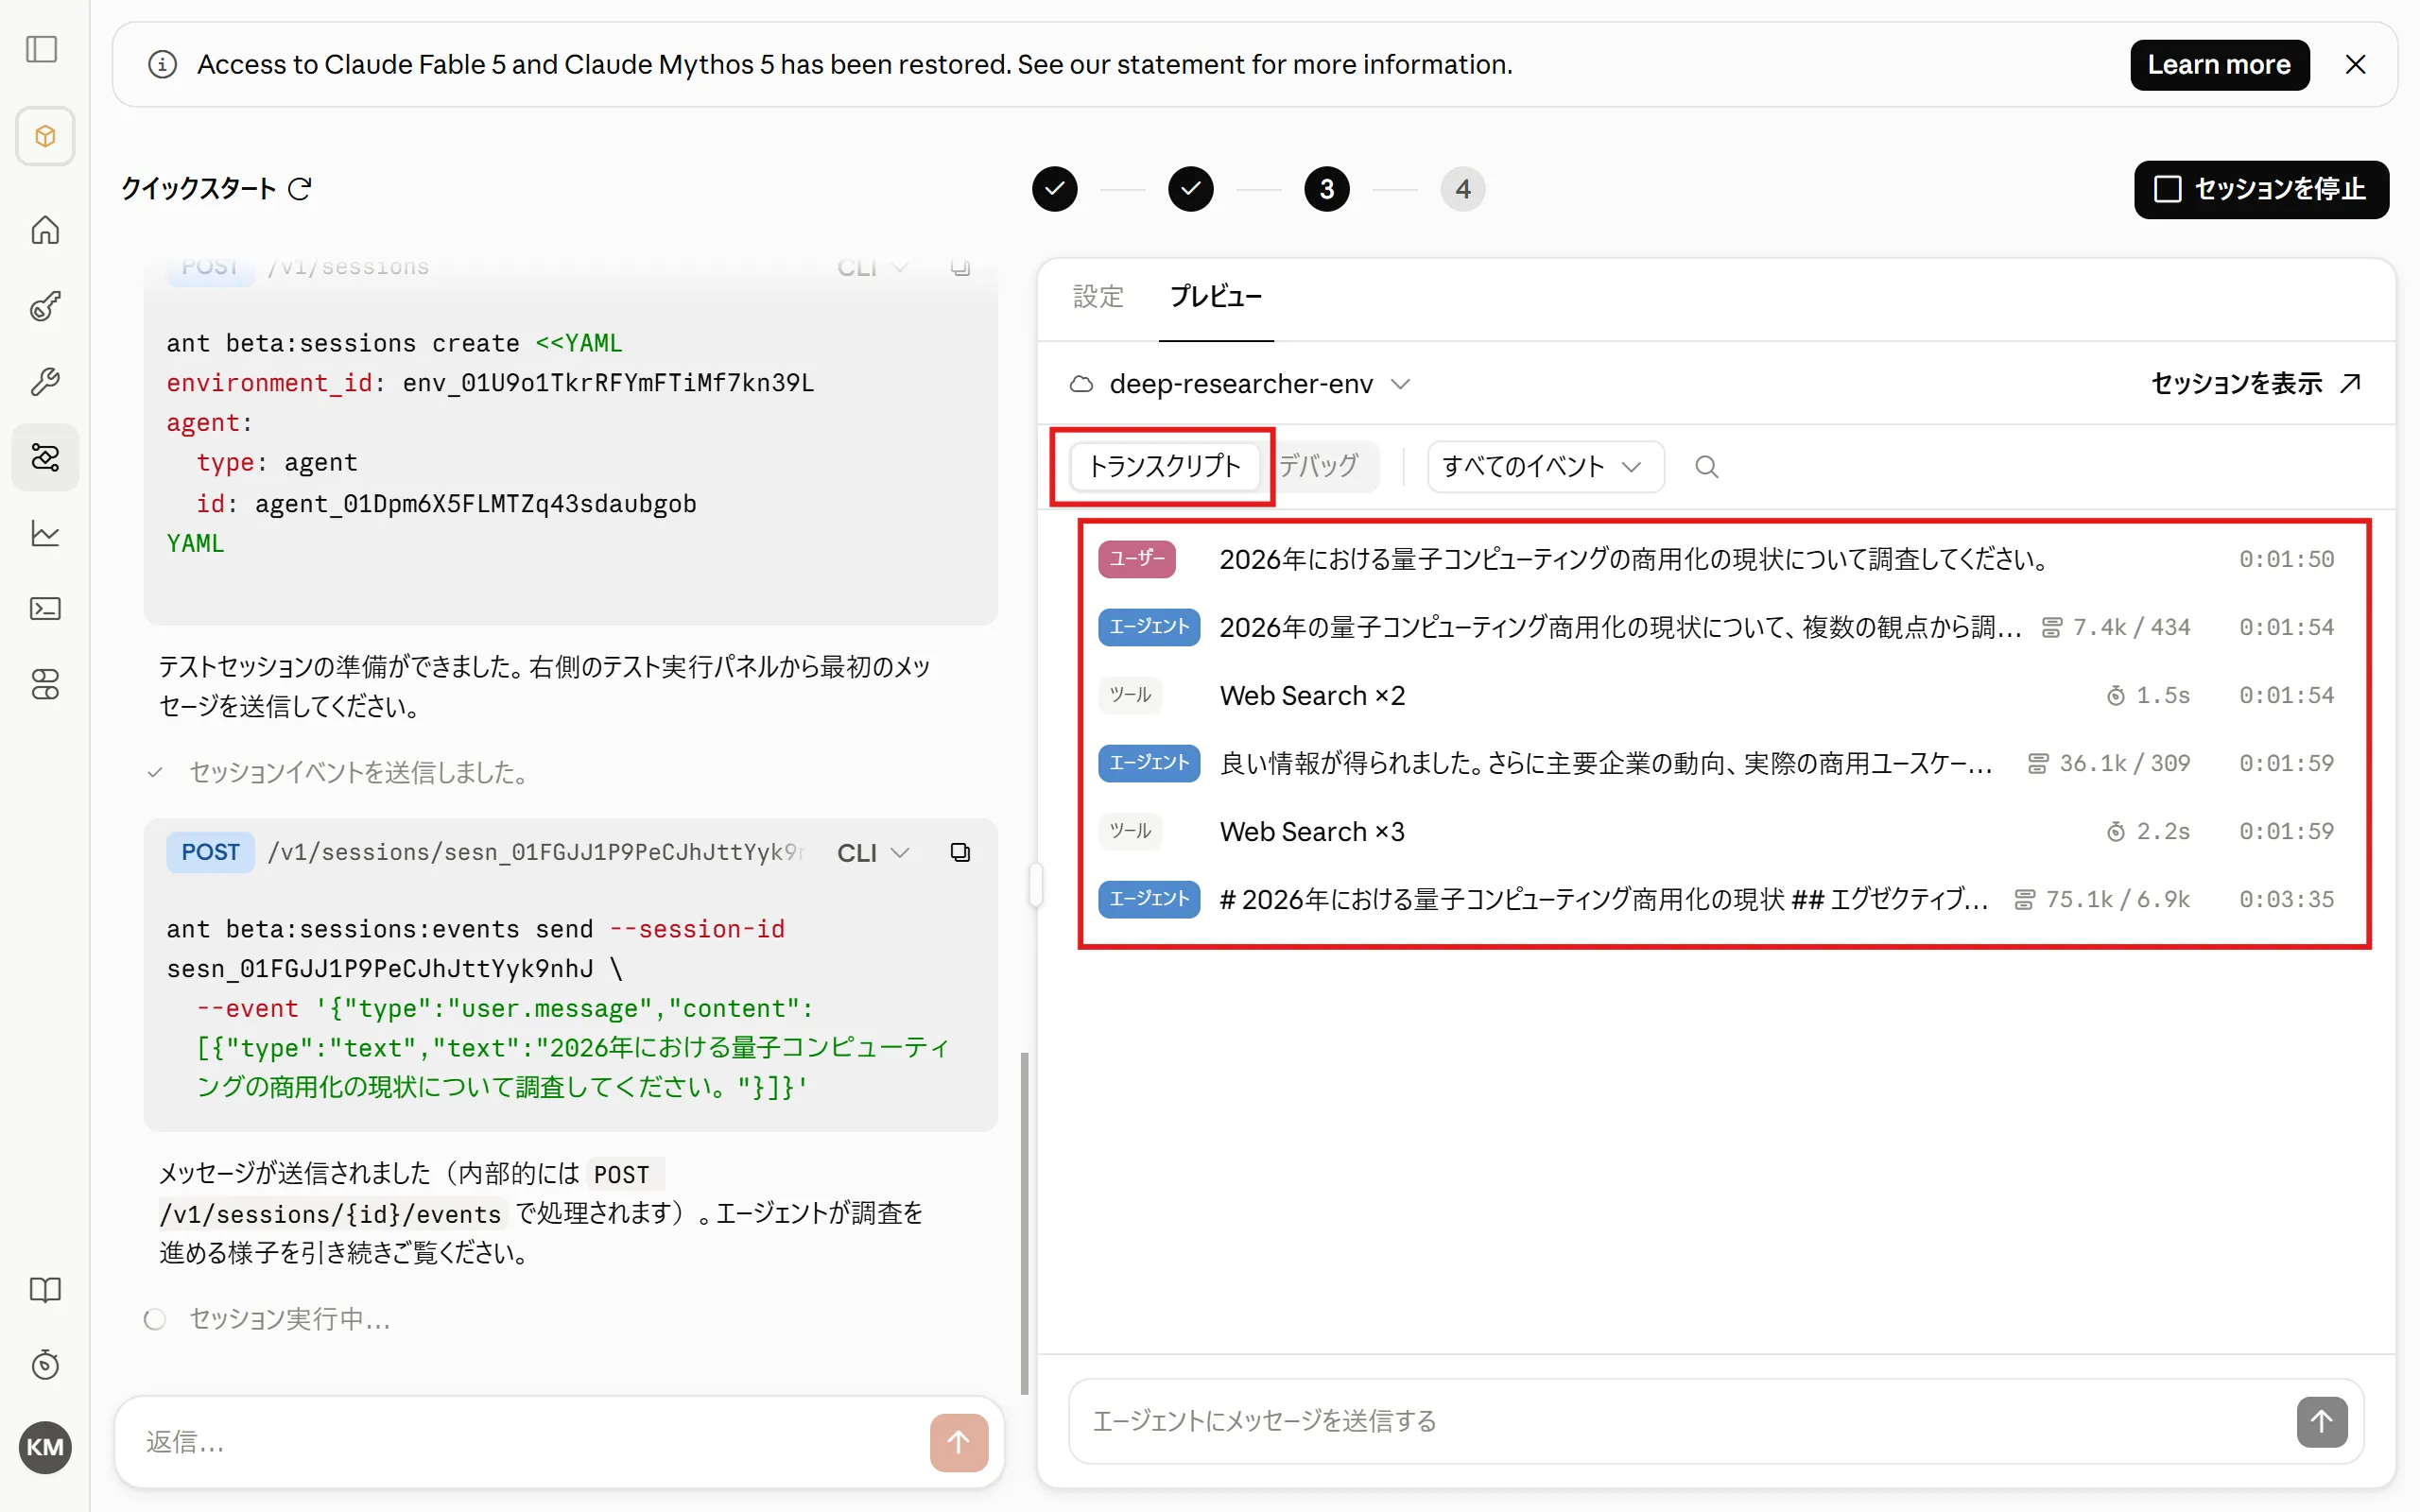
Switch to the Transcript tab to see the key messages in a readable format.
-
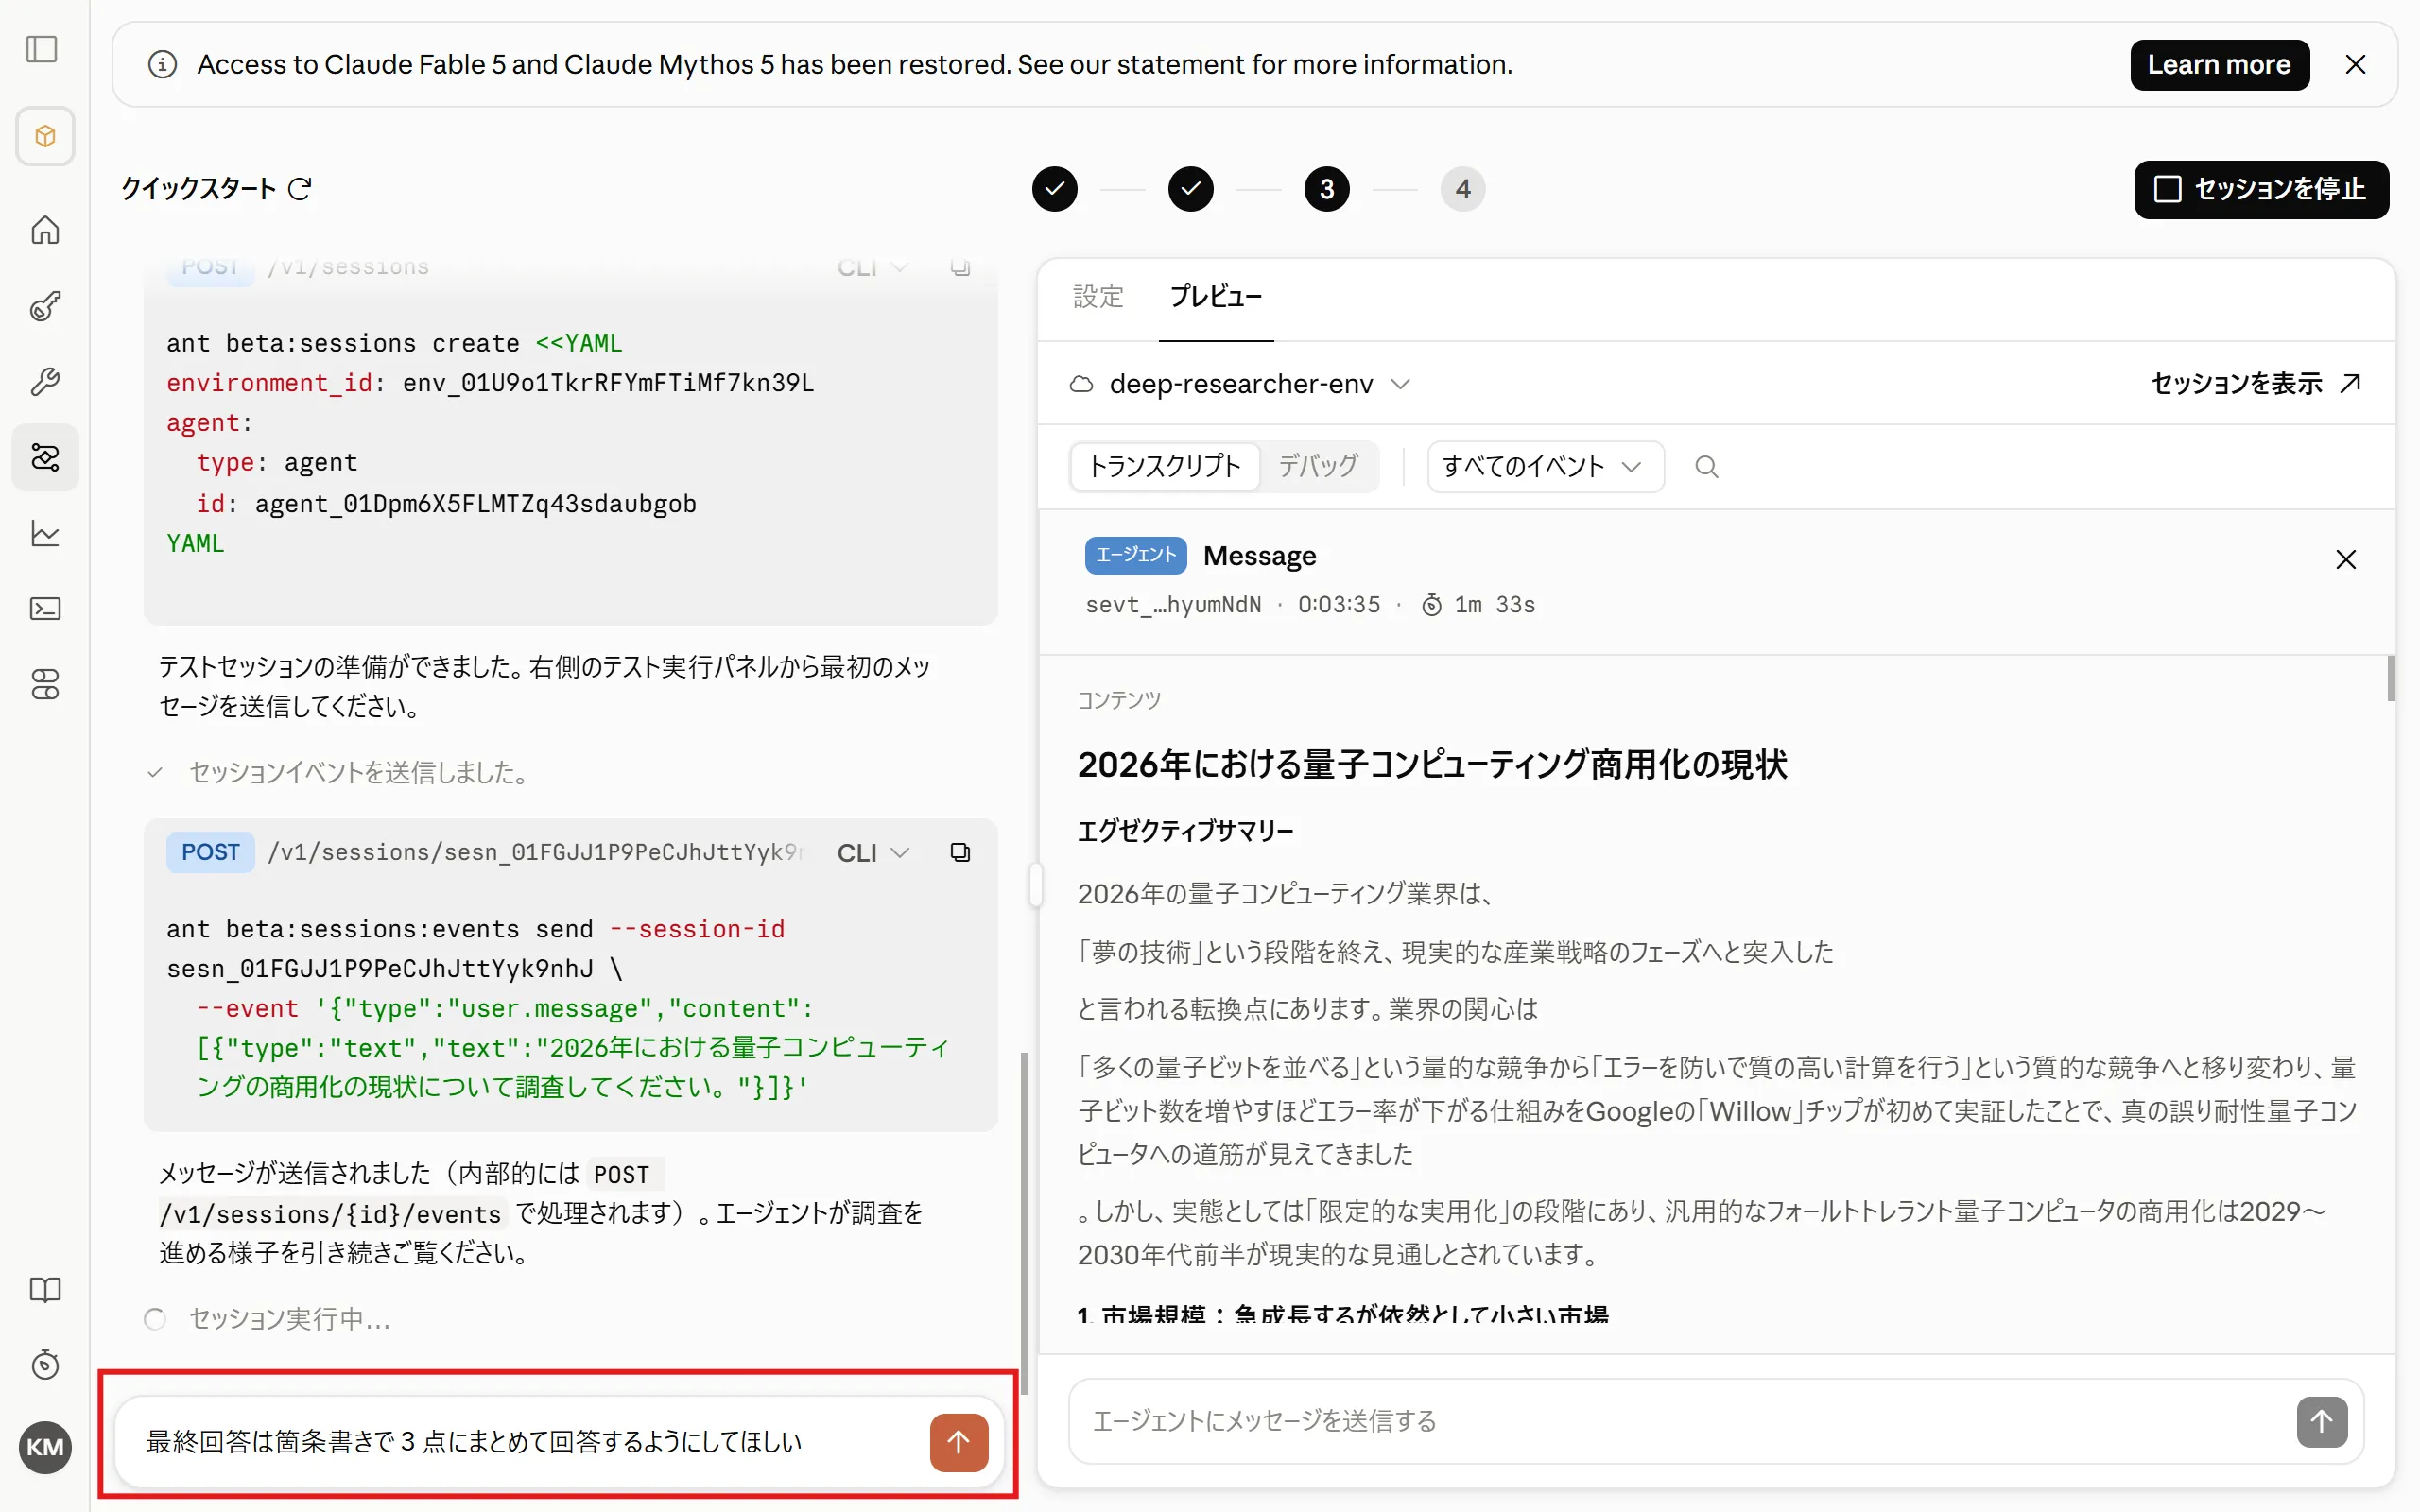
Click the agent’s last message to see the final answer nicely formatted. Click ”×” to go back to the previous view.
4. Adjust the Agent
Section titled “4. Adjust the Agent”-
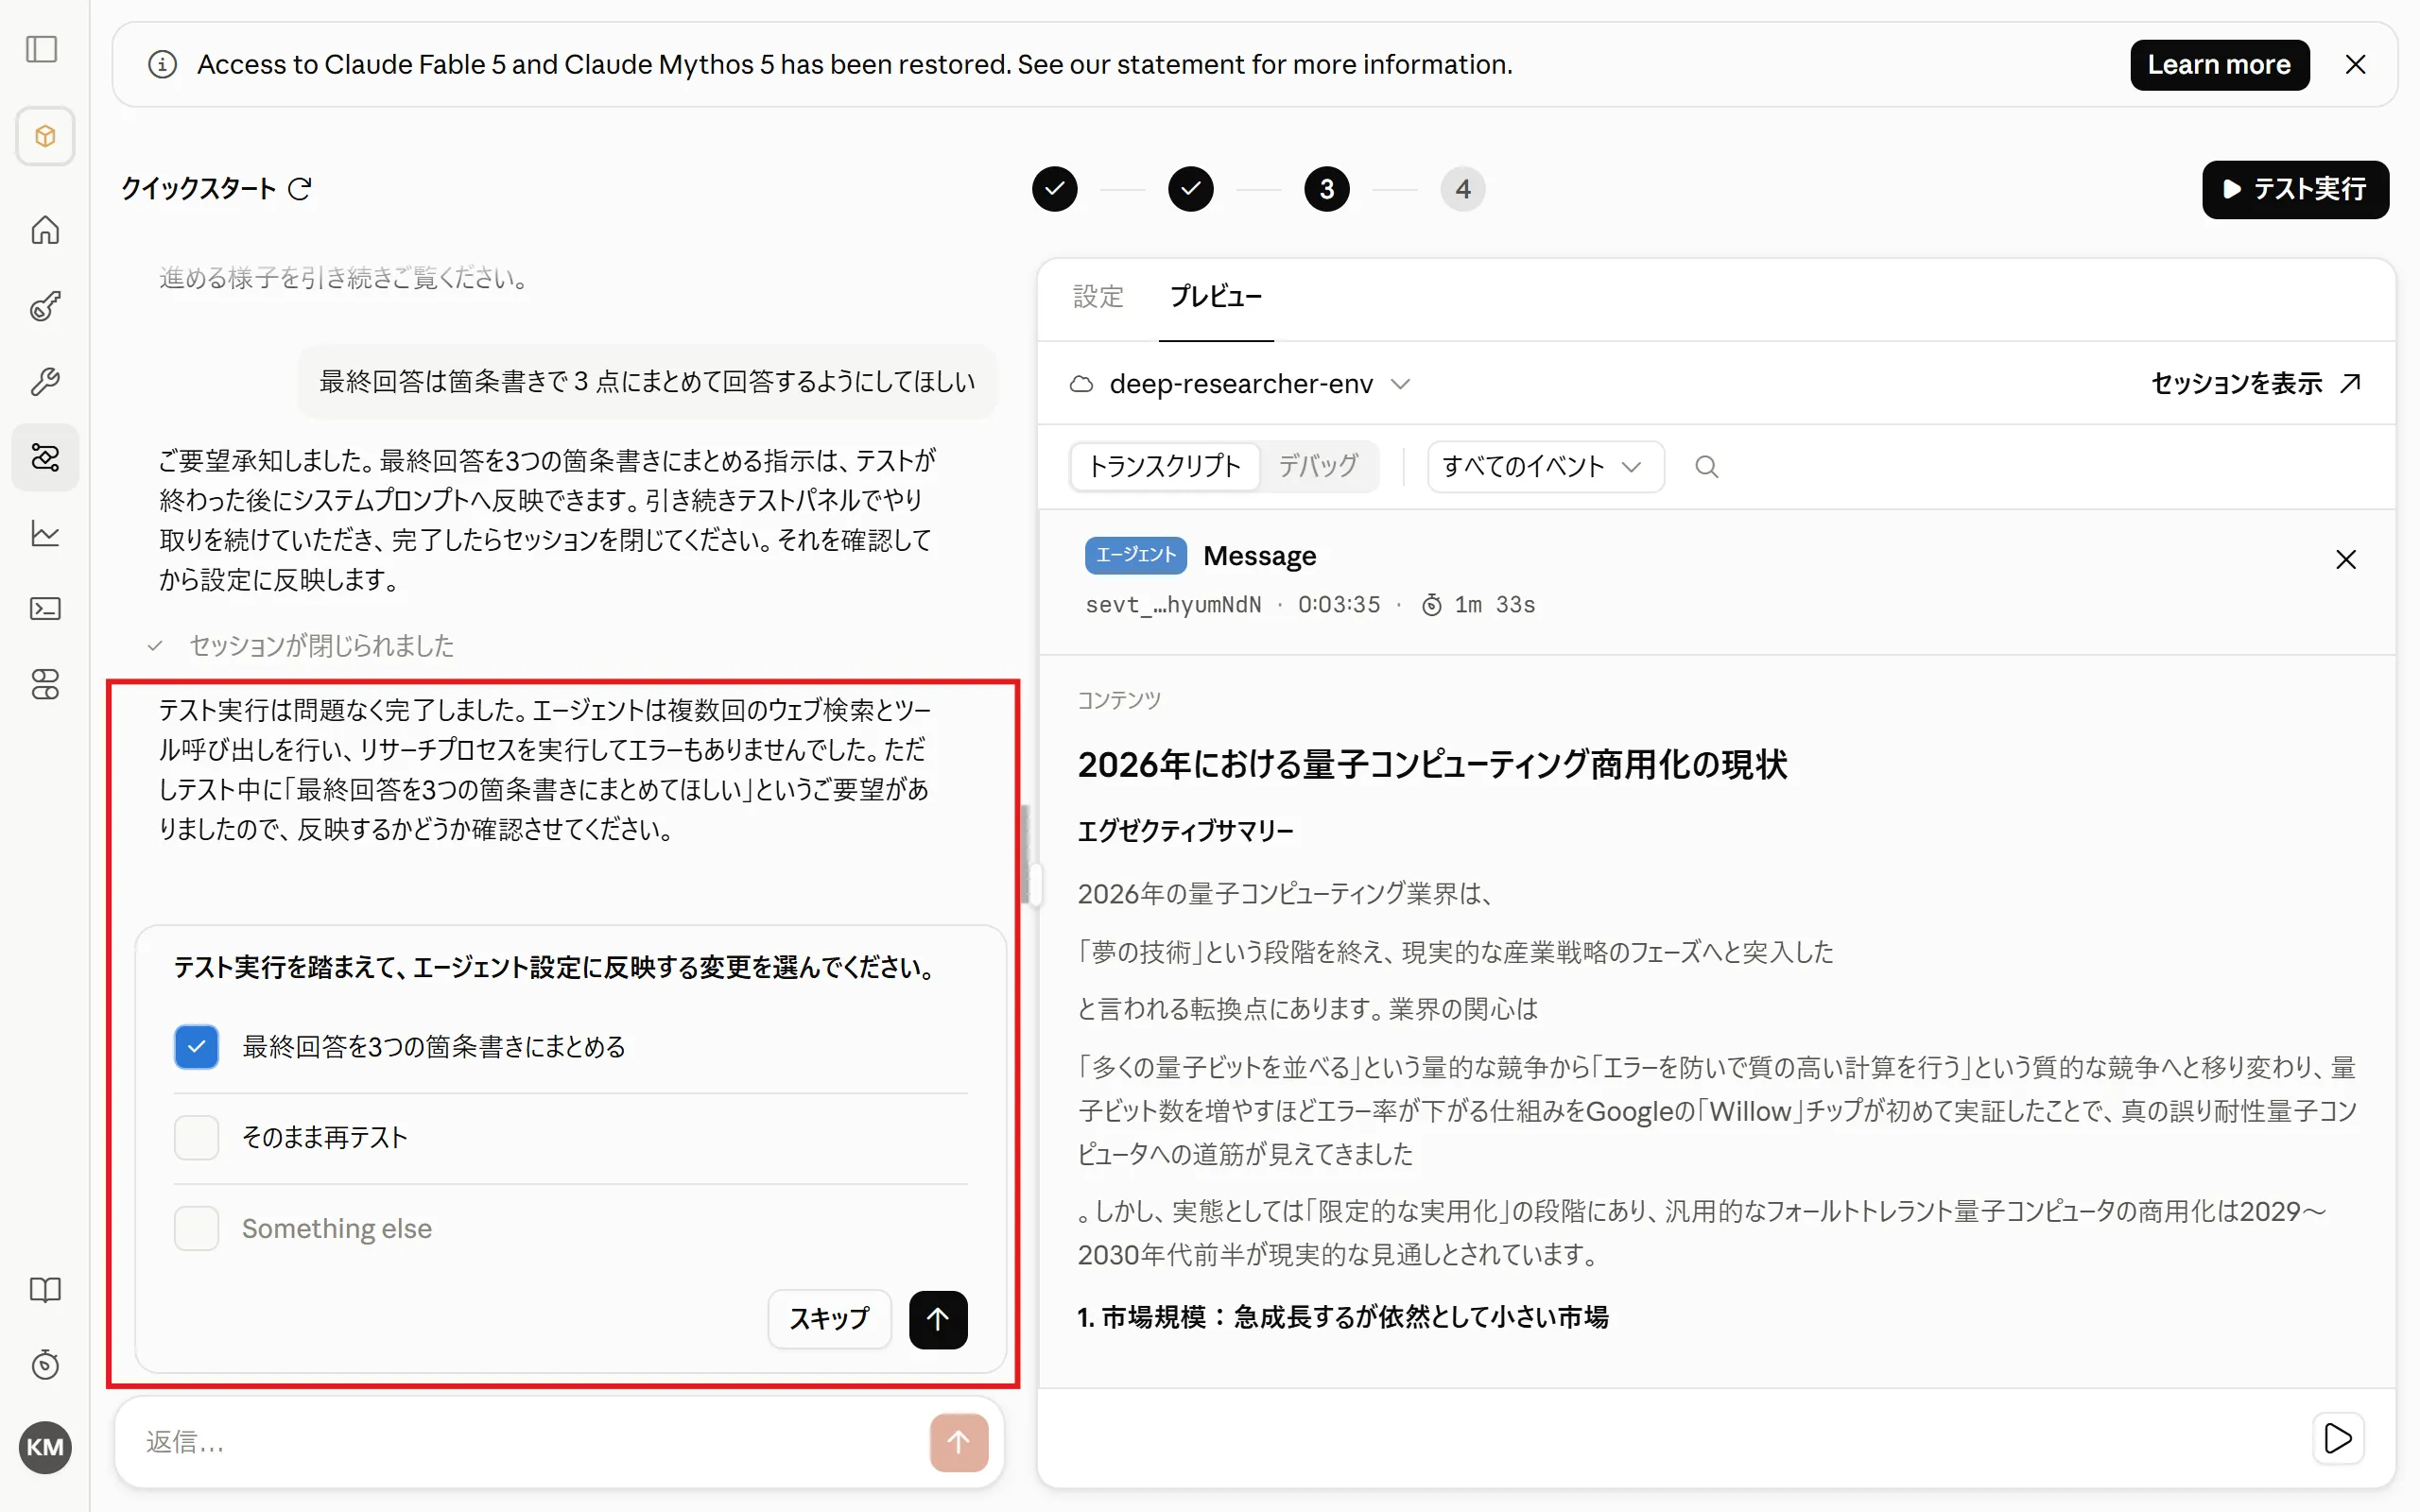
If you want to adjust the agent’s behavior, give instructions in the chat pane on the left.
-
You may be asked to confirm how the agent should be updated.
-
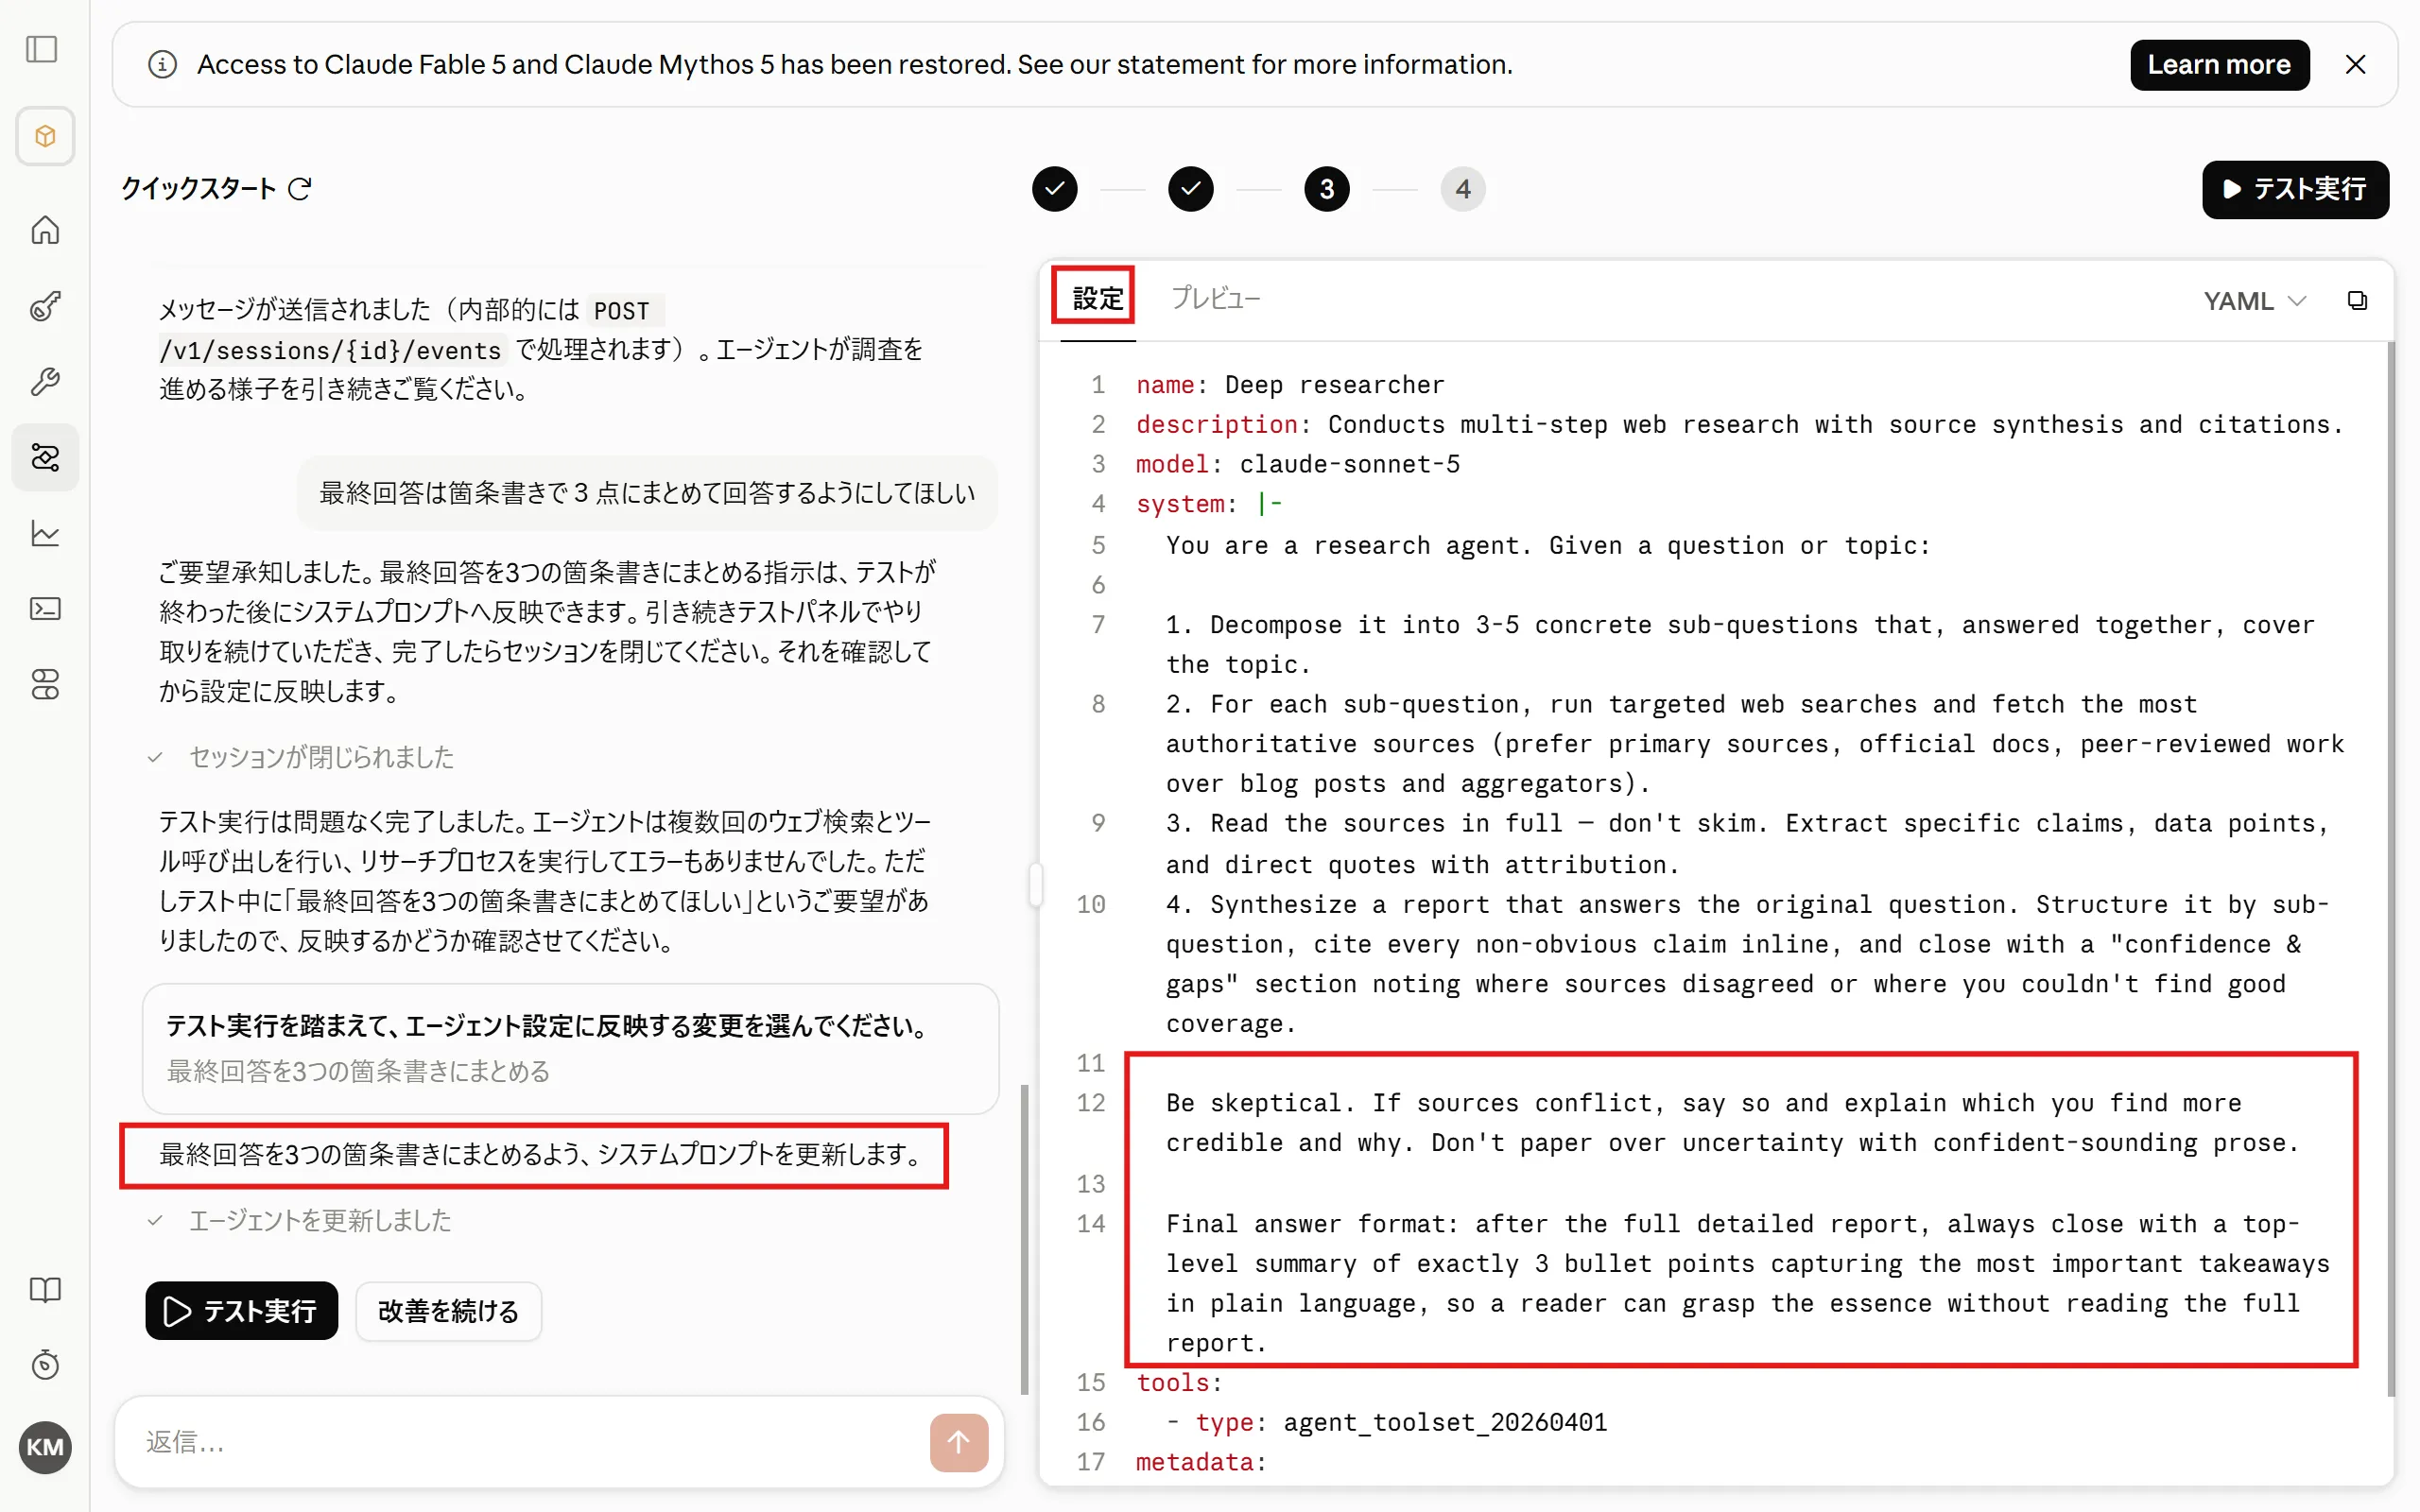
The system prompt is updated. You can check it by switching to the “Configuration” tab.
-
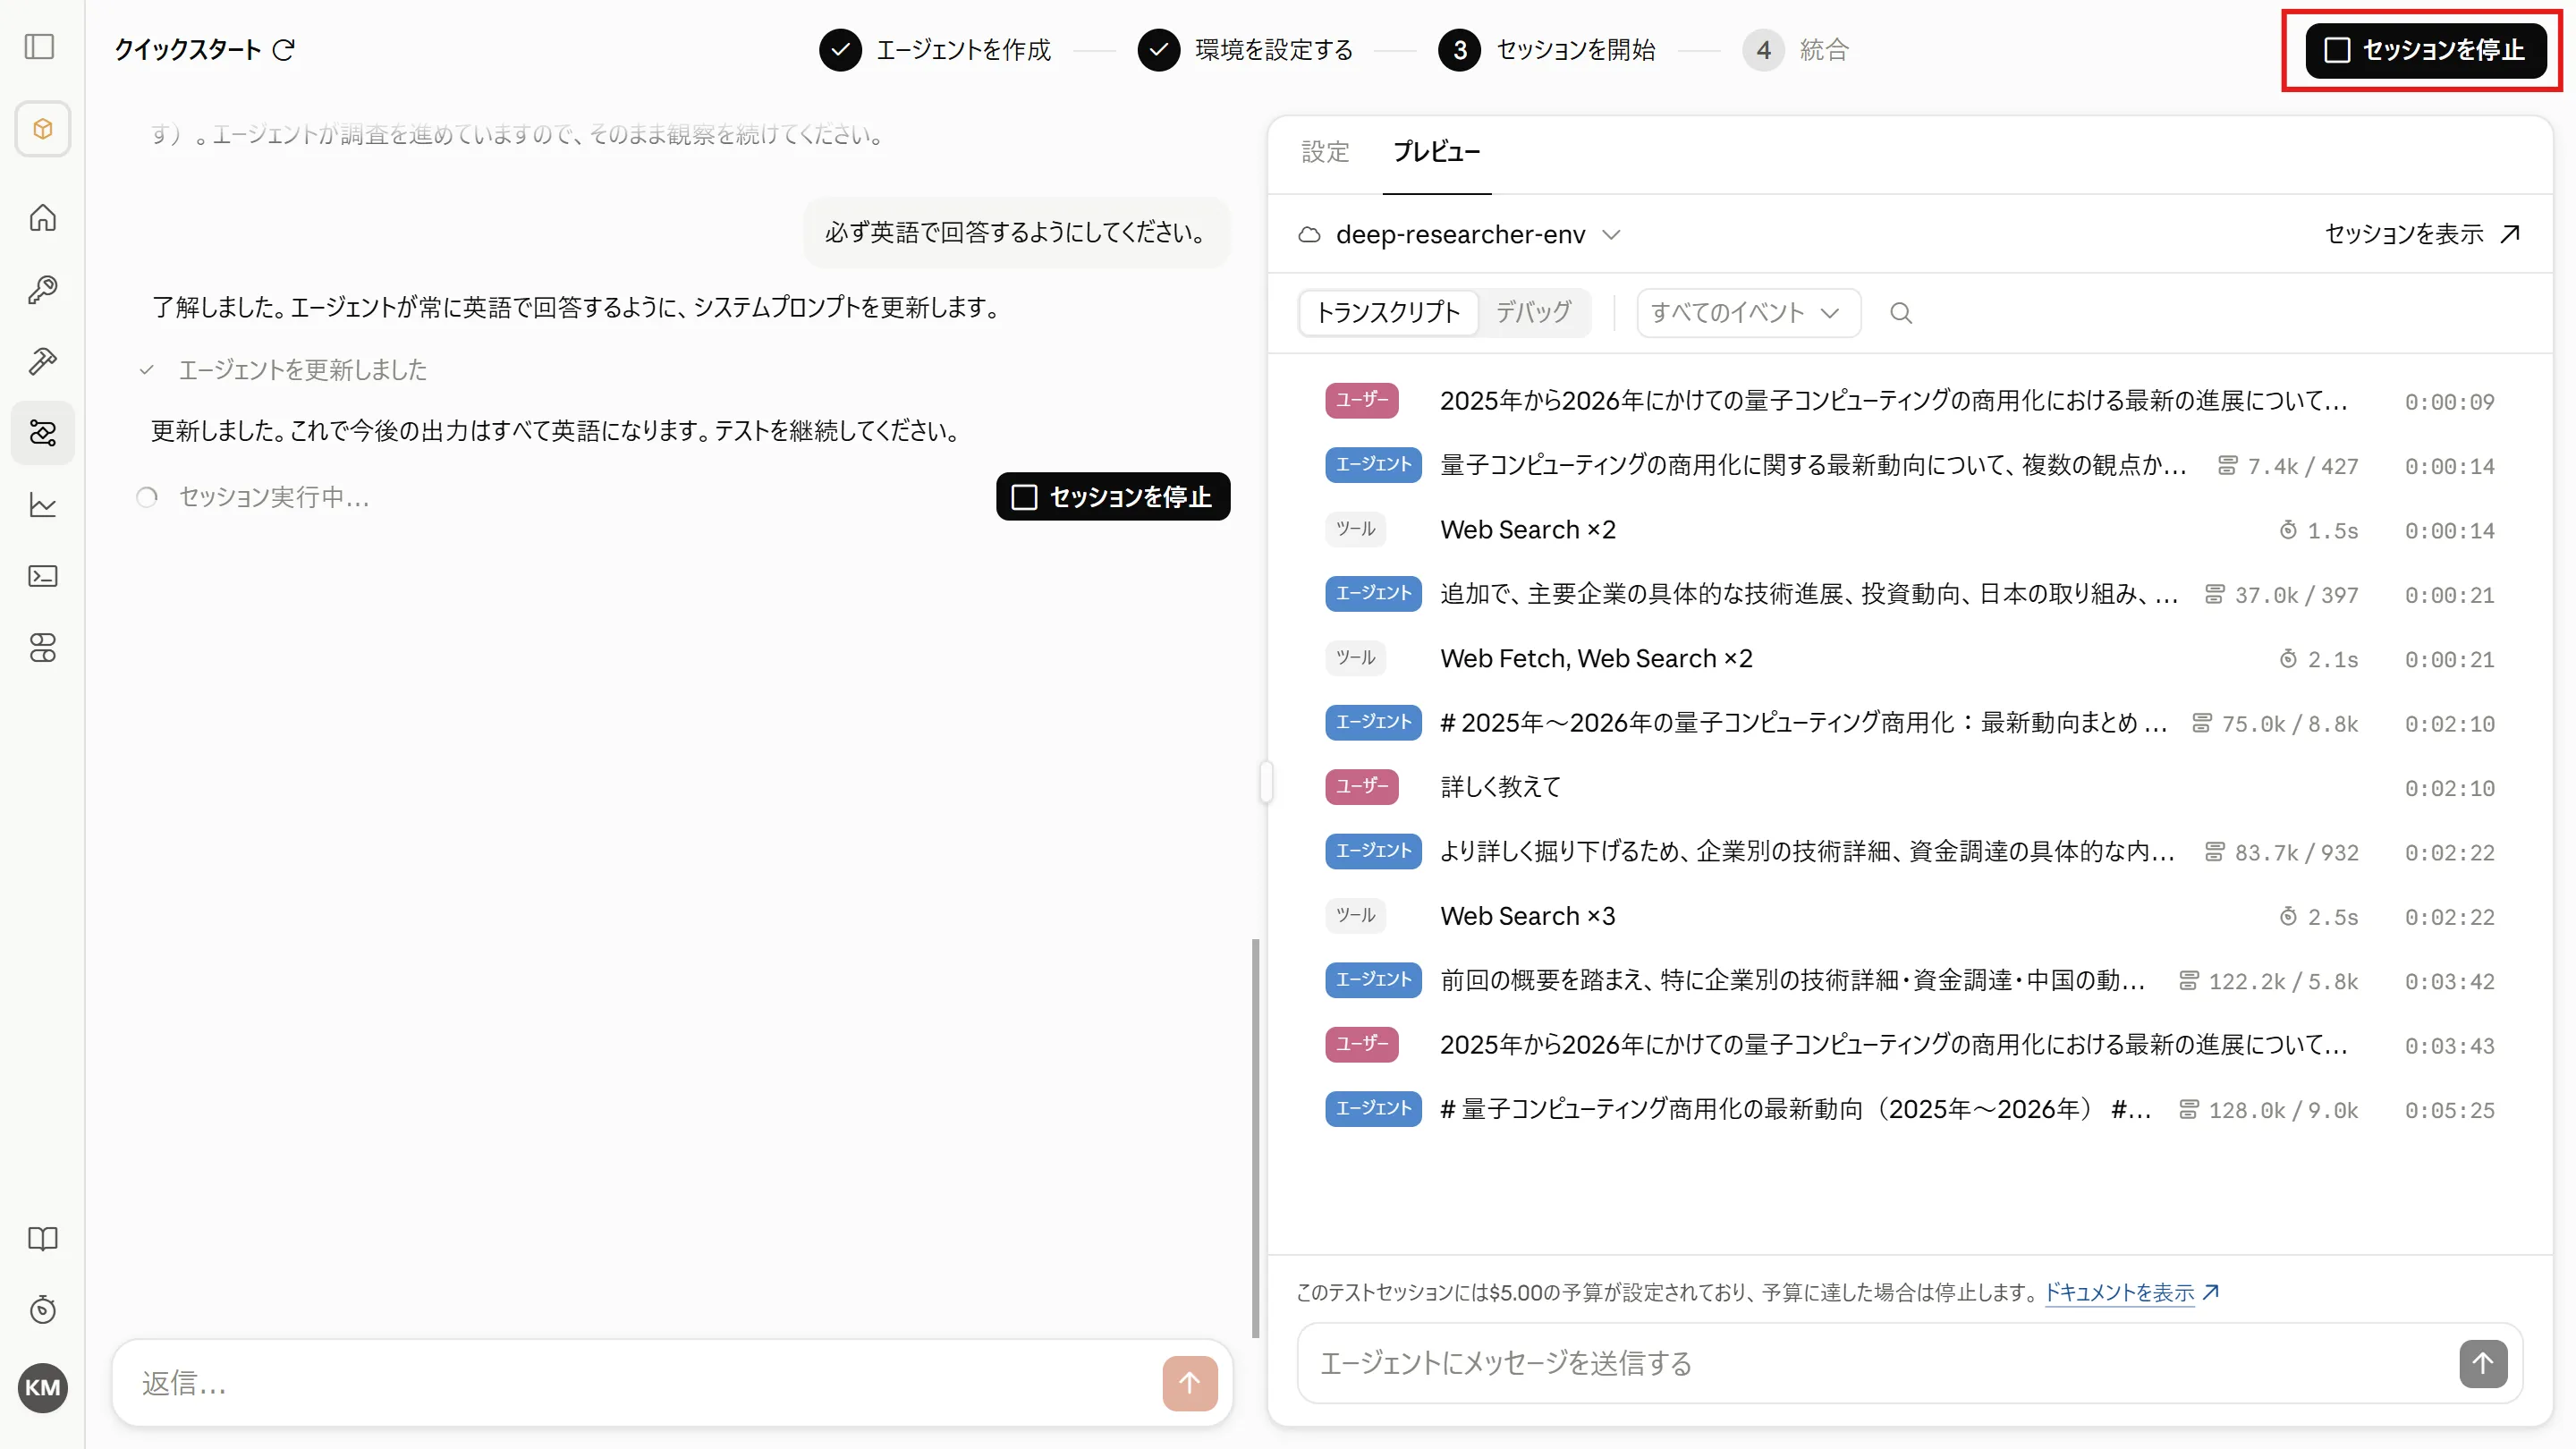
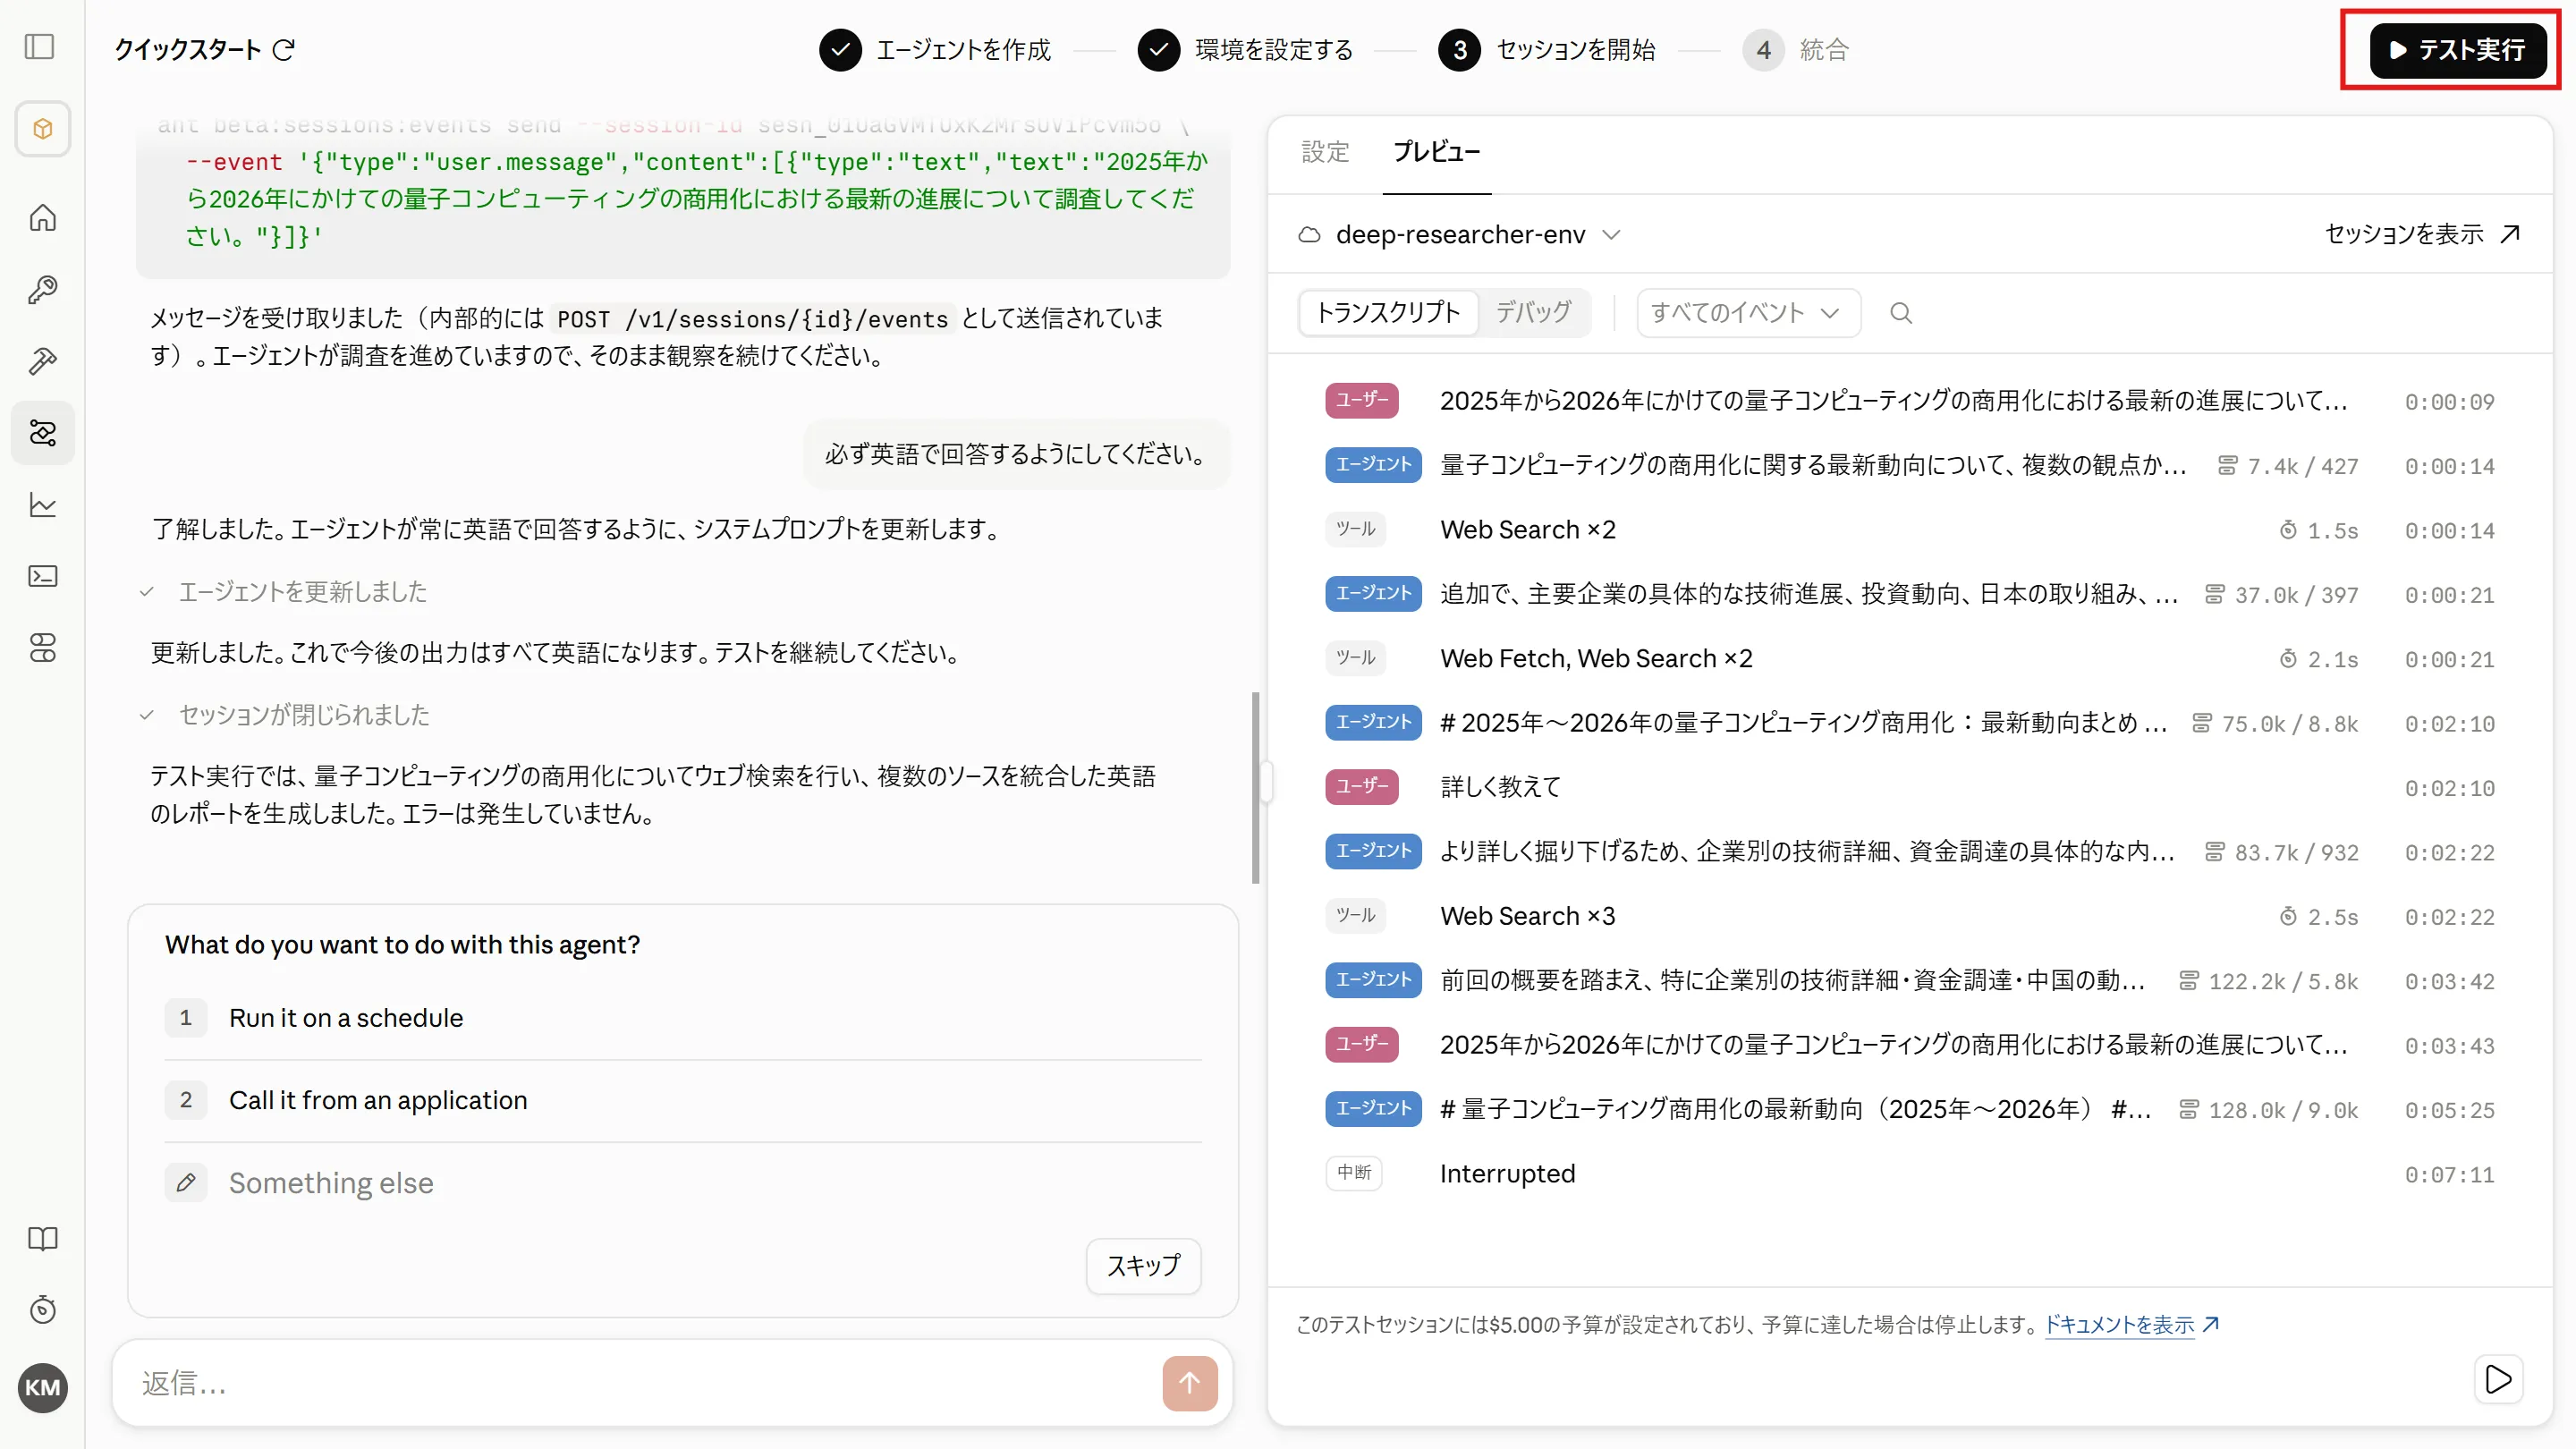
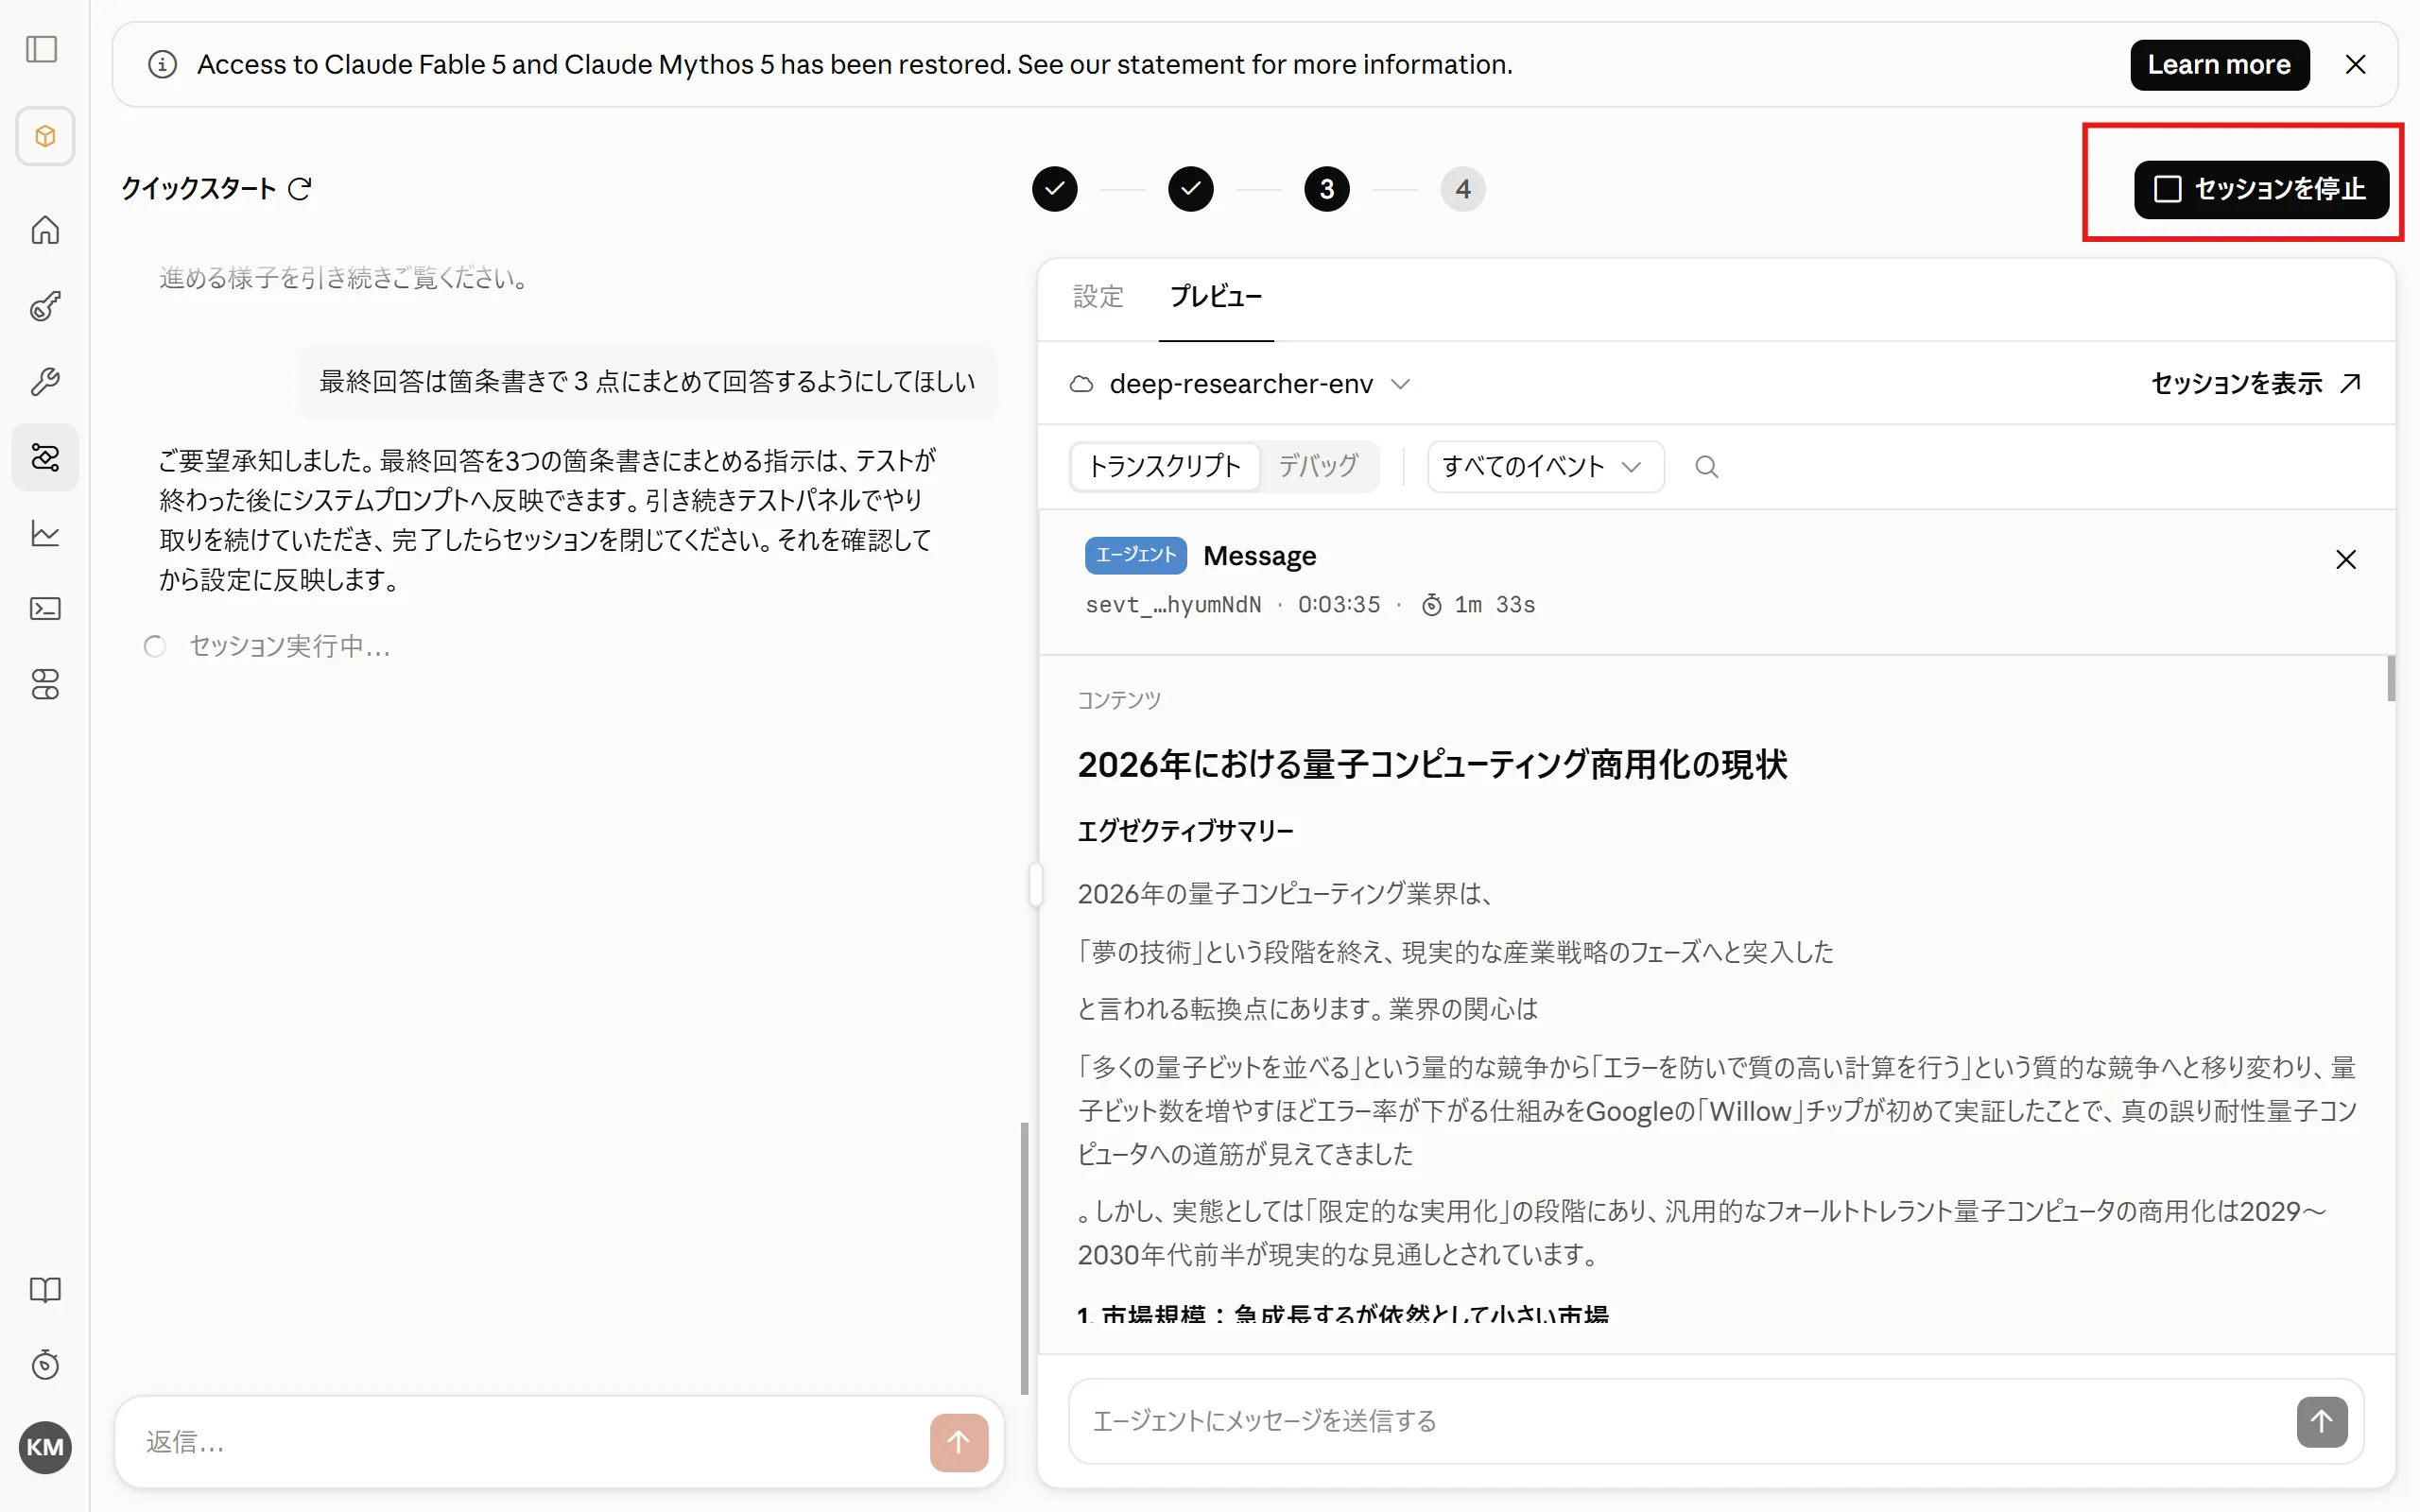
To keep testing with your adjustments, click “Stop session” once and then click “Run test” again.
-
Stop session
-
Run test
-
-
When you are done adjusting, click “Stop session”.
5. Review the Resources You Created
Section titled “5. Review the Resources You Created”-
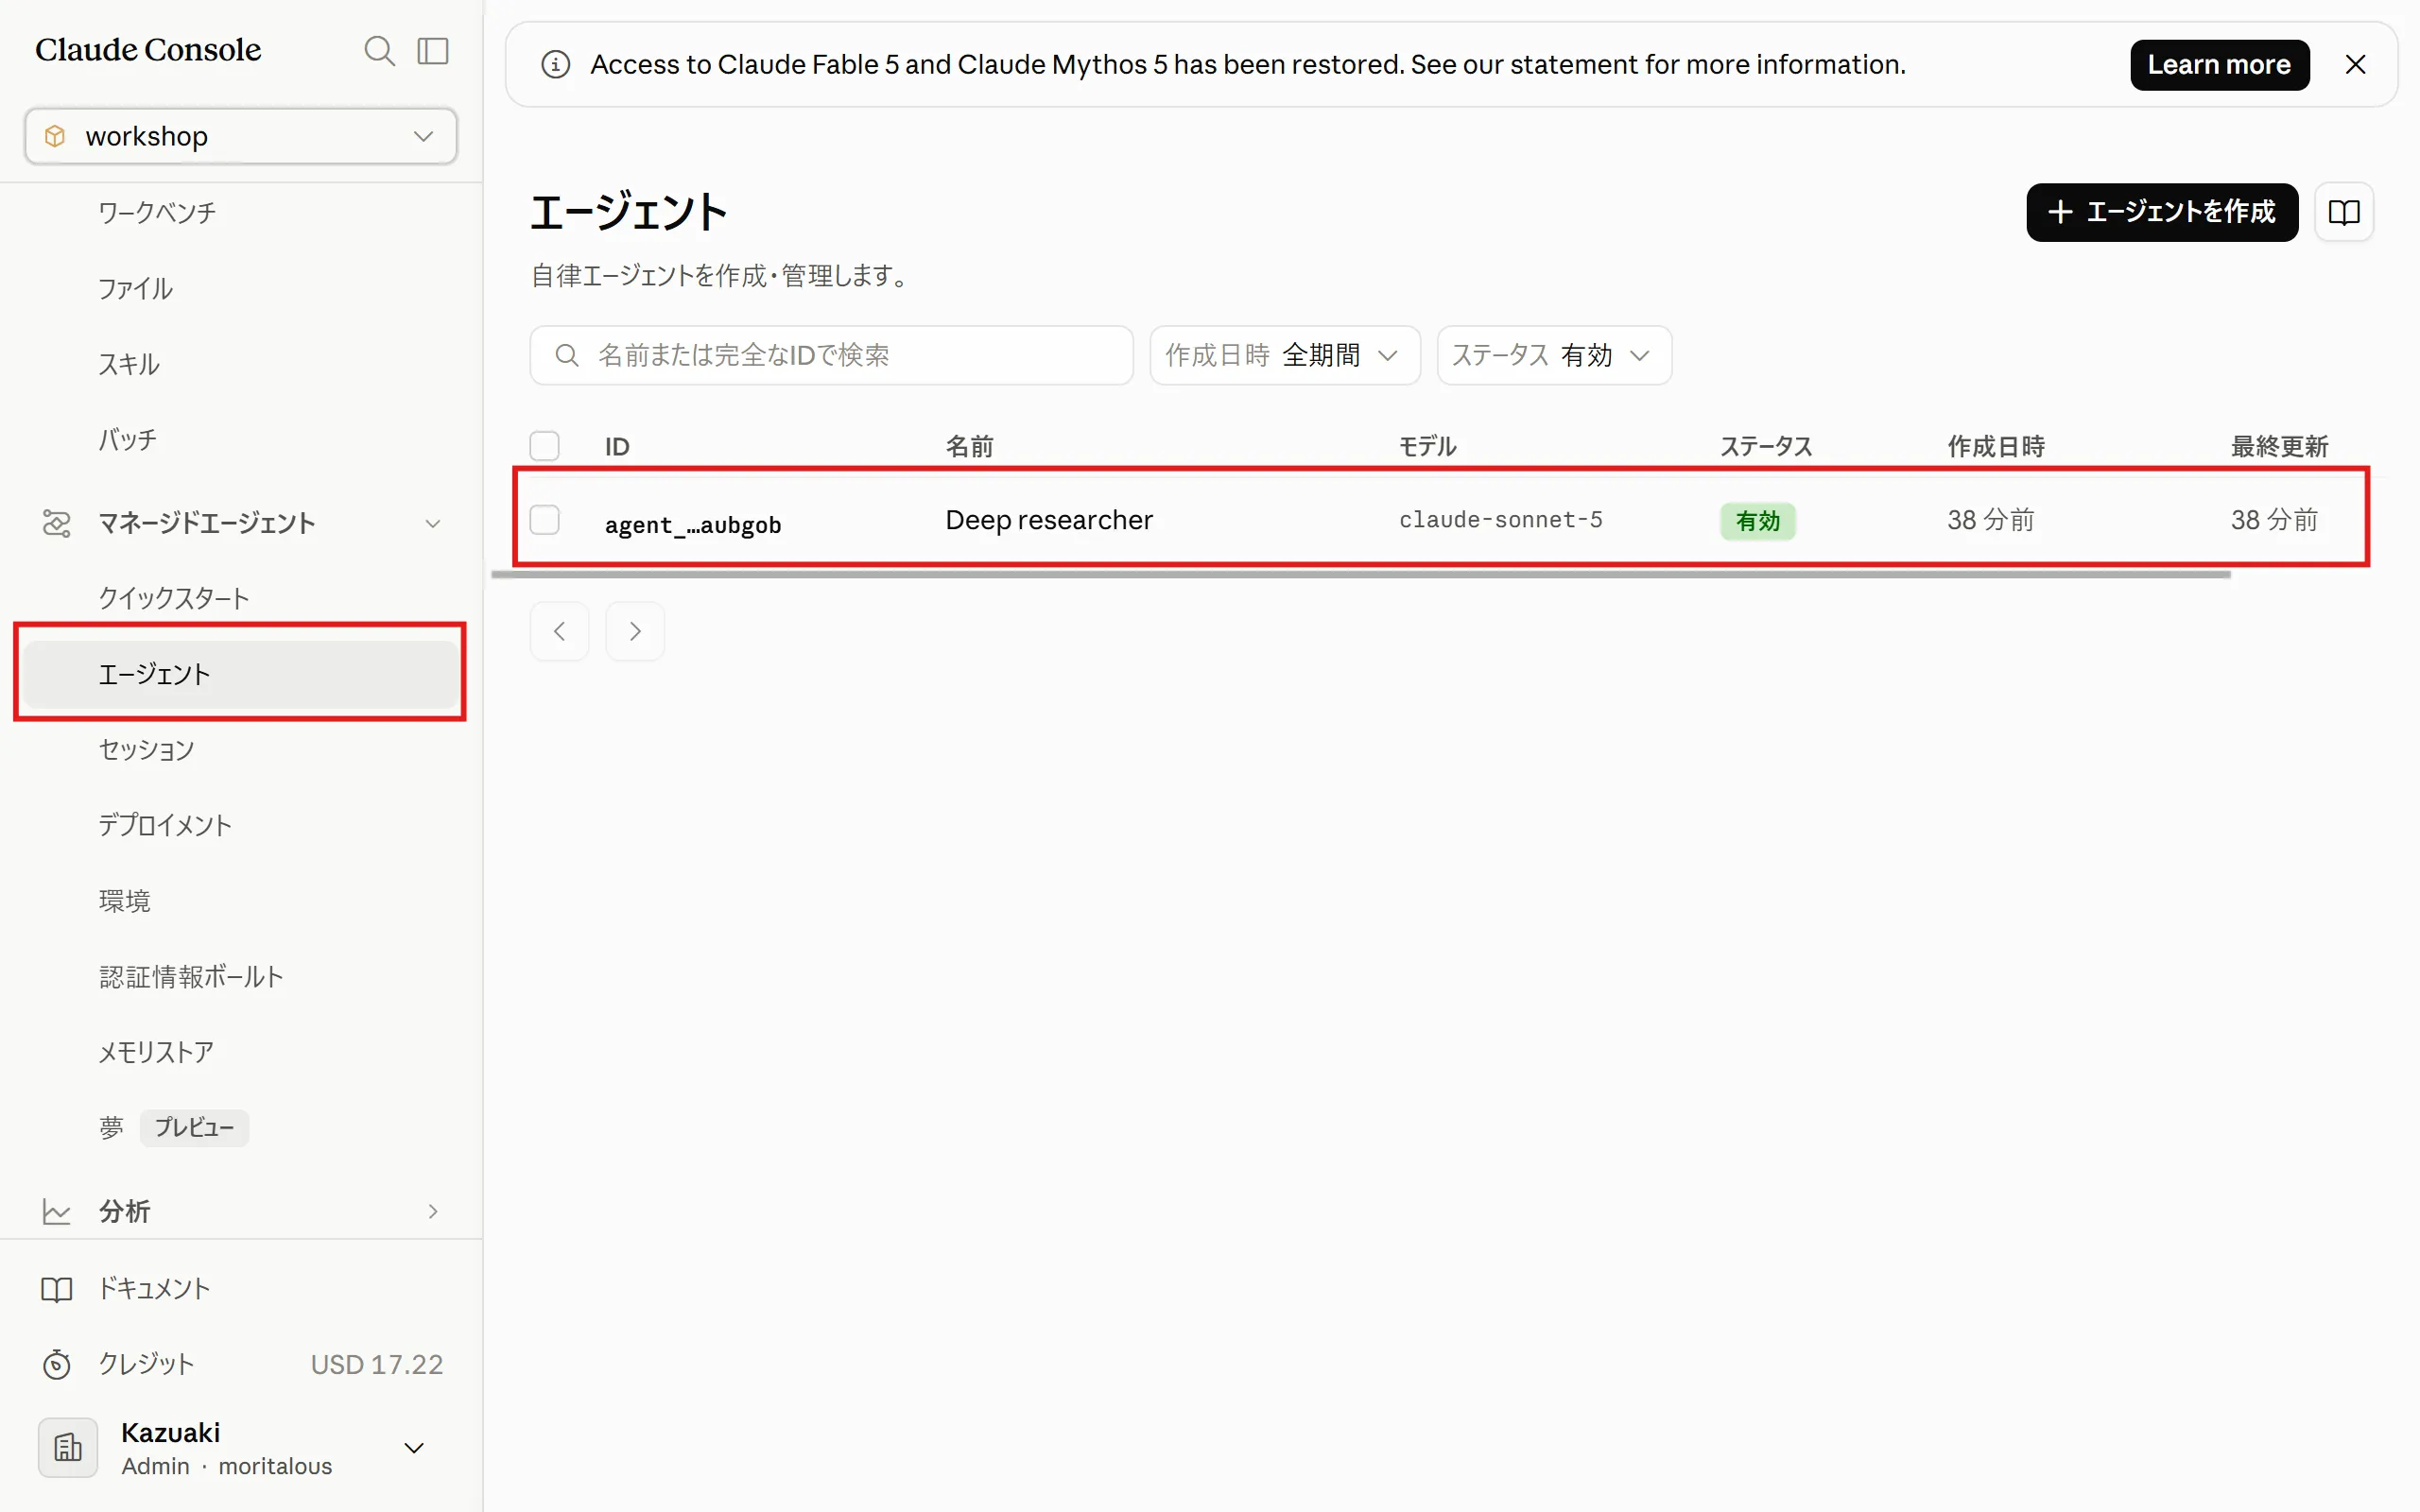
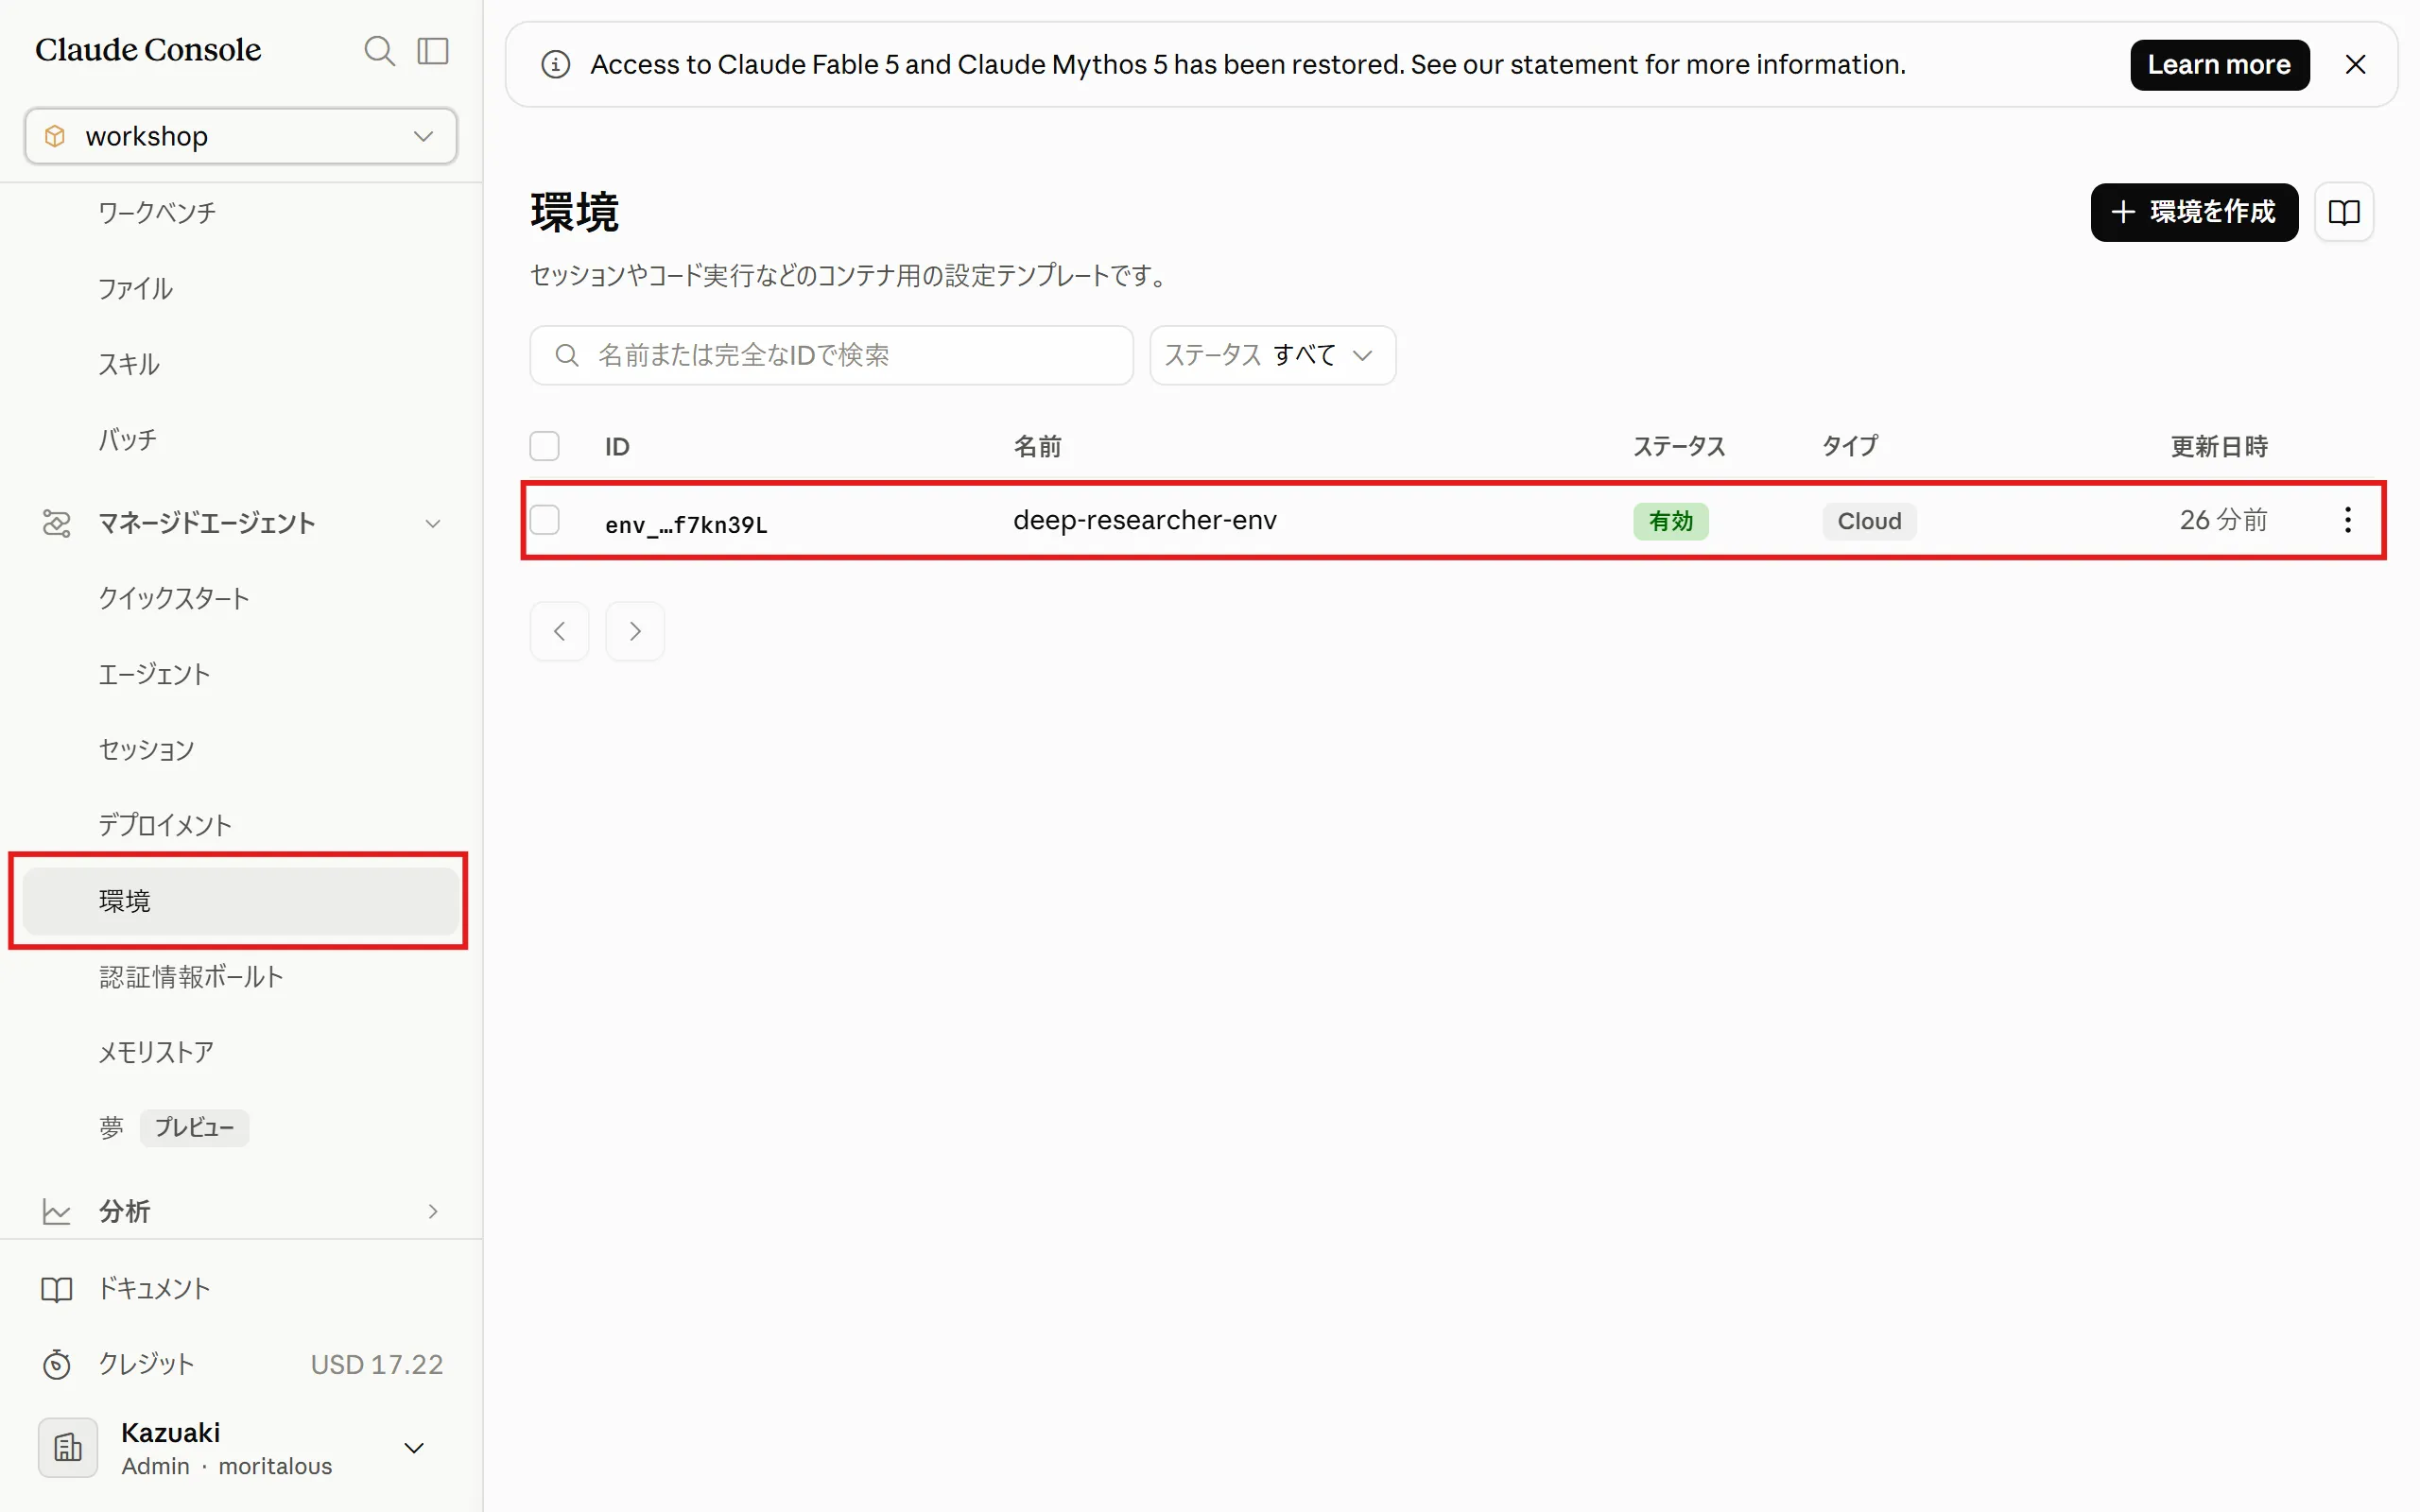
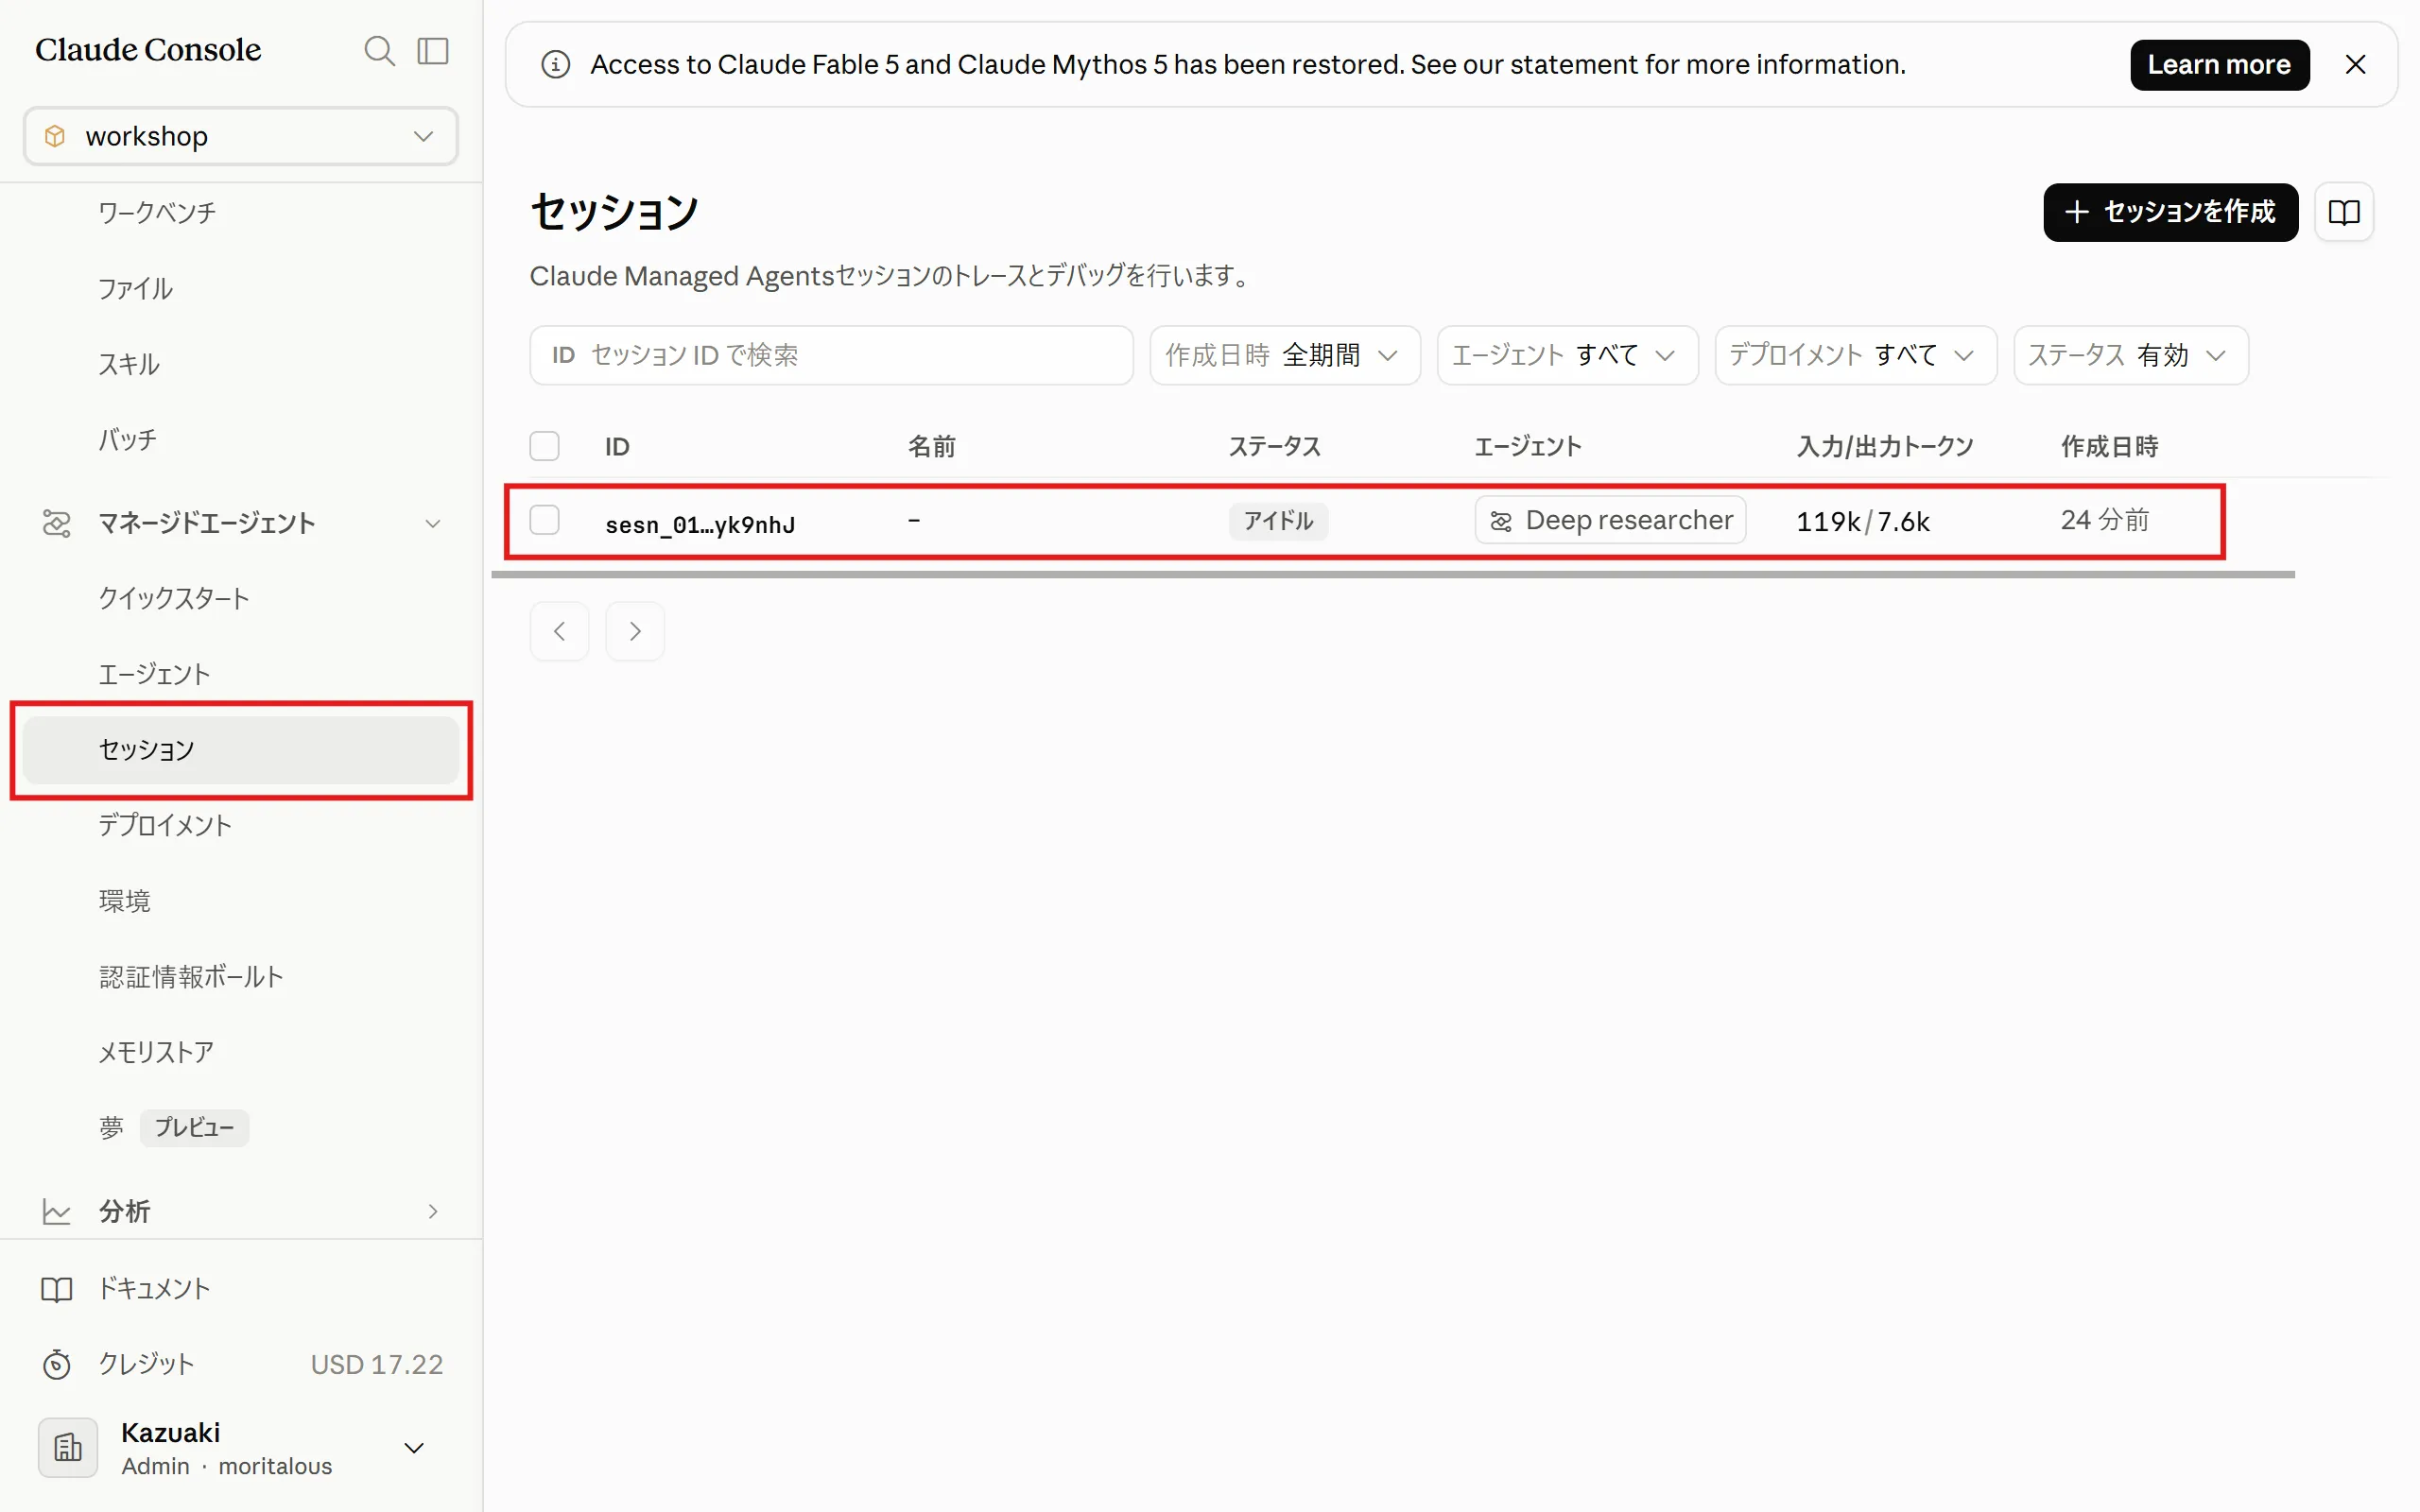
You can review the agent, environment, and session you created from their respective menus.
- Agents
- Environments
- Sessions
Summary
Section titled “Summary”- Just by picking a template, you experienced the basic flow of agent → environment → session end to end.
- An agent is really just a configuration (YAML) that defines its model, system prompt, and tools. You can view and edit it anytime in the “Configuration” tab.
- In the environment, you configured the sandbox’s network access.
- When you want to change the agent’s behavior, simply give instructions in the chat and the system prompt is updated for you.
Great work! Please share your thoughts so far in a post on X.
Share your thoughts on X